Quick answer: To remove an LED disk light safely, turn power off at the breaker, confirm the fixture is cool, then identify how it is mounted. Some disk lights twist off a mounting plate, some use screws, some pull down on spring clips, and some are hardwired to a junction box. Do not yank the fixture down; support it while you look for clips, screws, a plug connector, or wire nuts.
Identify The Disk Light Type
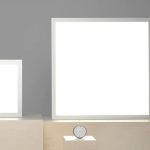
“LED disk light” can mean a surface-mount fixture, a low-profile recessed wafer, a retrofit disk in a can, or a hardwired ceiling fixture. The removal method depends on the design.
| Disk light type | How it usually releases | What to watch for |
|---|---|---|
| Surface-mount disk on junction box | Twist lens/fixture or remove visible screws | Fixture may be hardwired behind the base |
| Flush disk with mounting plate | Rotate fixture body to unlock from plate | Paint can glue the edge to the ceiling |
| Wafer/recessed disk | Pull down gently, then squeeze spring clips | Spring clips can snap back against fingers or drywall |
| Retrofit disk in recessed can | Pull trim down, release springs or friction clips | May have a screw-in adapter or plug connector |
| Integrated bathroom/garage disk | Remove cover/lens first, then mounting screws | Gasket, moisture, or corrosion may hold it in place |
Tools And Safety
If removal exposes wiring, treat it as electrical work. Switches can be wired in ways that leave parts of the box energized, so the safer habit is to turn the breaker off before removing the fixture body.
| Tool | Why it helps | Avoid |
|---|---|---|
| Stable ladder | Keeps both hands available | Standing on furniture |
| Non-contact voltage tester | Quick check before touching wiring | Assuming the wall switch made it safe |
| Small screwdriver | Loosens screws, tabs, or adapter plates | Prying against drywall |
| Painter’s tape | Marks orientation before twisting off | Permanent marks on ceiling or trim |
| Gloves or microfiber cloth | Better grip and fewer fingerprints | Pulling hard on glass/plastic lens |
Safe Removal Steps
- Turn off power at the breaker and let the light cool.
- Set a stable ladder so you are not directly under the fixture.
- Look around the rim for screws, slots, tabs, arrows, or a twist-lock notch.
- Support the disk with one hand before loosening anything.
- If it is a twist-lock type, rotate gently while supporting the body.
- If it is spring-clip style, pull down only a small amount, then squeeze the spring arms before lowering.
- If wiring is exposed, verify power is off before disconnecting plugs or wire nuts.
- Cap loose conductors if the fixture will remain removed and a replacement is not installed immediately.
If The Disk Light Is Stuck
Do not pry hard in one spot. Paint, caulk, dust, and heat can make thin disk fixtures stick to the ceiling. Work around the edge gently with a plastic trim tool or score the paint line carefully before twisting or lowering. If the ceiling moves with the light, stop; the mounting plate or electrical box may be loose.
| Problem | Likely cause | Better fix |
|---|---|---|
| Fixture will not twist | Hidden screw, paint, or wrong direction | Inspect rim and try gentle pressure while rotating |
| Fixture drops only one inch | Spring clips or short connector | Support it and release clips before pulling farther |
| Cover comes off but base stays | Separate lens and mounting base design | Look for screws inside the base |
| Wire connector will not release | Locking plug or wire nut | Identify connector type; do not pull on wires |
| Rust, moisture, or brittle insulation | Bathroom/outdoor/garage environment damage | Stop and replace/repair with qualified help if needed |
Replacing Or Reinstalling
When reinstalling, match the replacement disk light to the electrical box, ceiling opening, damp/wet rating, insulation contact rating if applicable, dimmer compatibility, and color temperature. Do not bury a junction box or driver where it cannot be accessed later. If the old disk failed early, check for heat, moisture, dimmer mismatch, or poor connections before installing the same style again.
When To Call An Electrician
- The fixture is hardwired and you are not comfortable identifying line, neutral, ground, and switched conductors.
- The box is loose, damaged, or not rated to support the fixture.
- You see brittle insulation, burn marks, buzzing, sparks, corrosion, or water intrusion.
- The breaker or GFCI trips when the light is used.
- You are replacing a bathroom, exterior, garage, or damp-location fixture and are unsure about ratings.
Related GarageSanctum Guides
- How to remove LED light covers
- Why an LED light stopped working
- How long LED lights last
- LED flickering troubleshooting
- LED light colors explained
Source Notes
- Home Depot fixture use/care guide example includes the standard warning to shut off electricity at the fuse or breaker before fixture work.
- HALO recessed and surface lighting documentation is a useful manufacturer reference point for low-profile LED fixture families that use mounting plates, connectors, and spring retention depending on product line.
- NFPA home electrical safety guidance supports stopping work for warning signs such as burning smells, sparks, and recurring breaker issues.