Quick answer: A multimeter can help test simple low-voltage LEDs, LED strip polarity, continuity, supply voltage, and driver output, but it cannot reliably prove every household LED bulb or integrated fixture is good. For mains-powered fixtures, keep testing power-off unless you are qualified to work around live voltage.

What A Multimeter Can Actually Test
| LED item | Useful multimeter test | Limitation |
|---|---|---|
| Bare LED diode | Diode mode may light it faintly | Color/forward voltage can exceed meter output |
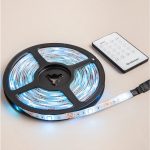
| 12V LED strip | Polarity and supply voltage | Does not prove every segment under load |
| LED driver | Output voltage/current range | Live testing may be hazardous |
| Household LED bulb | Very limited | Internal driver hides the LED array |
| Ceiling fixture | Power path and driver output | Hardwired testing needs electrical skill |
Safe Test Workflow
| Step | Meter setting | Use it for |
|---|---|---|
| 1. Visual inspection | No meter | Burn marks, broken solder, loose connector |
| 2. Confirm power is off | AC voltage | Before touching fixture wiring |
| 3. Check low-voltage supply | DC voltage | 12V/24V strips and adapters |
| 4. Check polarity | DC voltage or continuity | Plus/minus strip wiring |
| 5. Diode test | Diode mode | Loose LEDs or simple modules |
| 6. Re-test under load | Voltage while connected | Finding weak adapters or voltage drop |

Common Readings
| Reading | Possible meaning | Next step |
|---|---|---|
| 0V at strip input | No supply, bad switch, bad adapter, open wire | Trace power source |
| Correct voltage but strip dark | Wrong polarity, failed strip, bad connector | Check polarity and connector |
| Voltage drops when connected | Weak driver/adapter or overload | Compare load to supply rating |
| Diode mode shows open both ways | LED may be open or meter cannot drive it | Do not rely on one test only |
| Continuity beep across supply rails | Possible short | Stop before powering |
Safety Boundaries
- Do not use resistance or continuity mode on a live circuit.
- Move meter leads to the correct jack before measuring current.
- Do not bridge mains voltage with meter probes in a cramped fixture box.
- If a breaker trips, wiring is damaged, or you are unsure what is live, stop and use an electrician.
Related GarageSanctum Guides
- Testing LED tube lights with a multimeter
- LED light stopped working
- Connect an LED light to a battery and switch
Source Notes
- Fluke multimeter guidance explains common multimeter functions and safe measurement practices.
- OSHA electrical safety guidance summarizes electrical hazard precautions.