StepbyStep Guide: Installing LED Light Strips Under Your Car

If you’re looking to add some personality to your car, installing LED light strips under the vehicle is a great way to do it. Not only do they look cool, but they also provide extra visibility and safety when driving at night. With a little bit of patience and some basic tools, installing LED light strips can be a fun and rewarding project that will make your car stand out from the crowd. Before diving into the installation process, it’s important to first consider the laws and regulations in your area regarding lighting modifications to vehicles. Some states and cities have specific rules regarding the placement and color of lights on cars, so be sure to do your research beforehand to avoid any legal issues. Once you’ve confirmed that LED light strips are allowed in your area, you can begin gathering the necessary materials and preparing for the installation process.
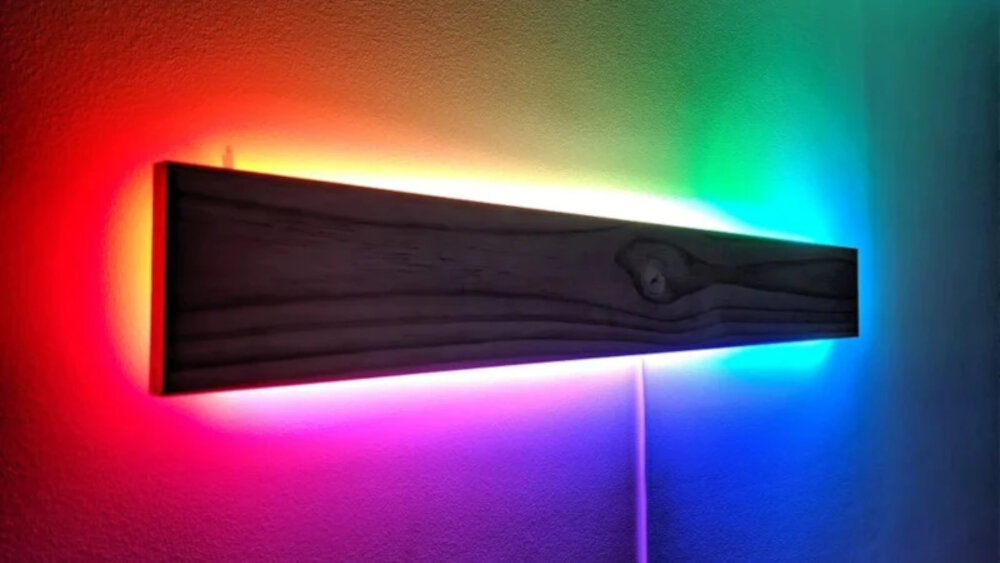
LED light strips are a versatile lighting option that has gained immense popularity over the years. They come in various colors and sizes, perfect for decorating cars, homes, and commercial spaces. LED light strips have a long lifespan, consume less power, and emit less heat compared to traditional lighting systems. Besides, they are easy to install, flexible, and can be cut to fit any length, making them ideal for custom installations. LED light strips can also be controlled remotely, allowing you to adjust the brightness and color of your lights with ease. With their energy efficiency, durability, and convenience, LED light strips provide an excellent lighting solution for anyone looking to add a touch of style and elegance to their car or home.
Proper installation of LED light strips under your car is crucial to ensure optimal performance and longevity of the product. A poorly installed LED light strip can lead to electrical short circuits, potential fire hazards, and could even damage your car’s electrical system. Furthermore, an improperly installed LED light strip can create an unsightly appearance, which defeats the purpose of installing the product in the first place. By following a step-by-step guide and taking the necessary precautions during installation, you can ensure that your LED light strips look great, function properly, and last for years to come. So, take the time to properly install your LED light strips and enjoy the many benefits they provide.
Gather Materials
Before beginning the installation of LED light strips under your car, it is essential to gather all the necessary materials. First and foremost, you will need LED light strips, which are available in a variety of colors and lengths. You will also need a power supply, which can be either a battery or a converter. Additionally, you will require a soldering iron, a wire stripper, electrical tape, and heat shrink tubing. It is vital to ensure that you have all the materials before starting the installation process to avoid any unnecessary delays or interruptions. Apart from the basic materials, you may also require some additional tools depending on the complexity of the installation process. If you need to remove any parts of the car to access the installation area, you may require a wrench or a screwdriver. You may also need clips or brackets to attach the LED light strips to the car’s underside. Additionally, you may require a remote control to operate the lights. Gathering all the necessary materials beforehand will help you work efficiently and reduce the chances of making mistakes during the installation process.
Before installing LED light strips under your car, it’s important to gather all the necessary materials to ensure a successful installation. You will need LED light strips, a power source, a remote control, wire connectors, a wire stripper, electrical tape, and mounting clips. It’s crucial to choose LED light strips that are waterproof and have adhesive backing for easy installation. The power source should be compatible with the voltage requirements of the LED light strips. Wire connectors should be used to connect the LED light strips to the power source, and a wire stripper should be used to remove the insulation from the wires. Electrical tape can be used to secure the wire connectors and prevent any electrical shorts. Mounting clips can be used to secure the LED light strips in place under the car. Gathering all the necessary materials beforehand will make the installation process smoother and ensure a professional-looking result.
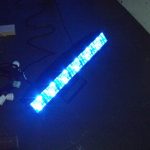
Selecting the right LED light strips for your car is crucial to ensure that they provide the desired look and functionality. Firstly, consider the length and size of the strip to ensure it fits your car perfectly. Secondly, choose the color and brightness that suits your preferences and the laws in your area. Additionally, check the adhesive quality of the strip to make sure it sticks well to your car’s surface. Lastly, assess the quality of the LED lights, ensuring they are durable and can withstand the car’s vibrations and weather conditions. Taking these factors into consideration will guarantee that you select the right LED light strips for your car, providing you with a stunning and functional upgrade.
Prepare Your Car
Preparing your car is an essential step before installing LED light strips. The first thing you should do is clean the underside of your car thoroughly. It is important to remove any dirt, dust, or debris that may have accumulated over time as this can interfere with the adhesive that will be used to attach the LED light strips. You can use a pressure washer or a hose to do this, but be sure to let your car dry completely before proceeding. Next, you should inspect the underside of your car for any loose or damaged parts. This is particularly important if you have a low clearance vehicle as you will be working close to the ground. Check that all bolts and screws are tight, and that there are no leaks or cracks in the exhaust system. If you find any issues, it is best to address them before proceeding with the installation. This will ensure that your car is in good condition and that the LED light strips will be securely attached.
When selecting the right location for your LED light strips, there are a few tips to keep in mind. Firstly, consider the purpose of the lights and where you want them to be visible from. For example, if you want your lights to be visible from the side of the car, consider installing them on the underside of the side skirts. Secondly, think about the overall look you want to achieve and how the lights will enhance it. A popular choice is to install them under the front and rear bumpers to create a sleek and futuristic appearance. Finally, make sure to choose a location where the lights will be protected from debris and won’t be easily damaged while driving. With these tips in mind, you can select the perfect location for your LED light strips and achieve the desired effect.
Before starting the installation of LED light strips under your car, it is crucial to clean the area thoroughly. First, remove any dirt, mud, or debris that may have accumulated under the vehicle. You can use a high-pressure hose or a bucket of water and a sponge to do this. Next, use a degreaser or all-purpose cleaner to remove any grease or oil stains that may be present. Be sure to rinse the area thoroughly with water once you’ve finished cleaning it. Finally, use a dry cloth or towel to remove any excess water or moisture before proceeding with the installation. A clean surface will ensure that the adhesive on the LED light strips adheres properly, preventing them from falling off or becoming loose while you’re driving.
Install the LED Light Strips
Installing LED light strips under your car can add a unique and impressive touch to your vehicle. To begin the process, you will need to gather the necessary tools and equipment. This includes LED light strips, a power source, wire cutters, a soldering iron, and electrical tape. Once you have everything you need, you can begin the installation process by deciding on the placement of the LED strips. Most car enthusiasts prefer to install the light strips on the undercarriage of the vehicle. However, you can also choose to install them on the sides or interior of the car depending on your preference. The first step in installing the LED light strips is to prepare the surface where they will be installed. Make sure the surface is clean and dry before attaching the strips. Then, use wire cutters to cut the strips to the desired length. Next, use a soldering iron to connect the wires to the power source. Finally, use electrical tape to secure the wires and ensure they do not come loose. Once you have completed these steps, you can turn on the power source and enjoy the custom lighting effects of your LED light strips.
Installing LED light strips under your car is a great way to add a touch of personal style while also increasing visibility and safety. To get started, first gather all necessary tools and equipment including the LED light strips themselves, wire cutters, a soldering iron, electrical tape, and a power source. Next, select the location where you want to install the lights and clean the area thoroughly to ensure a strong adhesive bond. Then, measure and cut the light strips to fit the length of your car and connect the wires using the soldering iron. Finally, use electrical tape to secure the wires and connect them to a power source, testing the lights to ensure they are functioning properly. With these step-by-step instructions, you’ll be able to install LED light strips under your car with ease and enjoy a unique and eye-catching look.
Proper placement and alignment are crucial in installing LED light strips under your car. Before starting the installation process, ensure that the surface where you will be mounting the strips is clean and dry. Use a degreaser or rubbing alcohol to remove any dirt, oil or wax that may interfere with the adhesive. Once the surface is clean, position the strips carefully and ensure that they are evenly spaced. Use a tape measure or ruler if necessary to ensure that the alignment is accurate. If you want to achieve a professional finish, it is also important to use mounting clips or brackets. These accessories will hold the strips in place and prevent them from falling off over time. Finally, test the lights to ensure that they are working correctly and that the alignment is perfect.
Wiring and Power
The wiring and power aspect of installing LED light strips under your car is a crucial step that requires careful attention to detail. Before beginning the installation process, it is essential to gather all the necessary tools and equipment required for the job, including wire cutters, crimpers, and electrical tape. It is also important to ensure that the wires are of the appropriate gauge and that the power source is adequate to power the LED light strips. In addition, it is recommended to use a fuse or circuit breaker in the wiring to prevent damage to the light strips or the car’s electrical system in case of a short circuit or overload. It is important to note that the wiring and power aspect of the installation process may vary depending on the type of LED light strips used and the car’s make and model. Therefore, it is crucial to consult the manufacturer’s instructions or seek professional assistance if unsure about the installation process. Overall, the wiring and power aspect of the installation process requires careful planning and execution to ensure a safe and successful installation of LED light strips under your car.
Wiring LED light strips properly is crucial for ensuring their longevity and optimal performance. First, determine the voltage and current requirements of your LED light strips and select a power supply that can meet those needs. Then, connect the positive and negative wires of the power supply to the corresponding wires on the LED light strips, ensuring that the connections are secure and well-insulated. It is also recommended to use a fuse or circuit breaker in-line with the power supply to protect against any electrical faults. Finally, test the LED light strips to ensure that they are working properly before mounting them under your car. With proper wiring, your LED light strips will provide a stunning and long-lasting addition to your vehicle’s aesthetic.
When it comes to powering LED light strips under your car, there are a few tips to keep in mind. Firstly, it’s important to choose the right voltage and current for your LED strips, as this will ensure they function properly and don’t get damaged. It’s also a good idea to use a power supply with a higher wattage than you need, as this will prevent overheating and prolong the lifespan of your LED strips. Additionally, consider using a fuse or circuit breaker to protect against any electrical surges or short circuits. And finally, make sure to connect your LED strips to a switch or remote control, so you can easily turn them on and off as needed. By following these tips, you can ensure a safe and effective installation of LED light strips under your car.
Proper installation is crucial when it comes to installing LED light strips under your car. Not only does it ensure the longevity of your LED lights, but it also guarantees that they are functioning safely and efficiently. Incorrect installation can cause damage to the lights or even create a fire hazard. Furthermore, a poorly installed LED light strip can impact the overall appearance of your car, making it look tacky and unprofessional. Taking the time to ensure proper installation not only ensures the functionality and safety of your lights but also enhances the overall aesthetic of your car. So, it’s essential to follow the step-by-step guide when installing LED lights to enjoy the full benefits of your LED light strips.
Before wrapping up your installation, there are a few final tips and considerations to keep in mind. Firstly, make sure all your connections are secure and the wiring is tucked away neatly to prevent any damage or accidents while driving. It’s also a good idea to test the lights before hitting the road to ensure everything is working properly. Additionally, be mindful of local laws and regulations regarding undercar lighting and adjust the brightness accordingly. Lastly, consider adding a switch to turn the lights on and off as needed, which can save battery life and prevent any unwanted attention. By following these tips and remaining cautious throughout the installation process, you can enjoy the stylish and functional addition of LED light strips to your vehicle.
Installing LED light strips under your car is a fantastic way to enhance its look and make it stand out. It not only adds a touch of style but also improves visibility when driving at night, ensuring safety on the road. LED light strips come in a variety of colors and patterns, allowing you to customize your car to your liking. They are easy to install and maintain, making them a great addition to any vehicle. So, take advantage of this opportunity to enjoy the new LED light strips under your car and turn heads wherever you go!
Conclusion

In conclusion, installing LED light strips under your car is a great way to give it a unique and eye-catching look. With the step-by-step guide provided, you can easily install the LED light strips yourself and customize the lighting to your preference. Not only does it enhance the appearance of your car, but it also increases visibility and safety on the road. It is important to remember to follow safety precautions and check local laws and regulations before installing the LED light strips. Overall, adding LED light strips under your car can be a fun and exciting DIY project that will make your car stand out from the crowd.