StepbyStep Guide: Installing LED Light Strips Under Dash Easily
Installing LED light strips under the dash of your car can be a great way to add a unique and personalized touch to your vehicle’s interior. Not only do these light strips look great, but they can also provide functional benefits such as improved visibility and easier navigation while driving at night. However, many people are intimidated by the thought of installing these light strips themselves, assuming that it requires advanced electrical knowledge and specialized tools. In reality, installing LED light strips under the dash is a relatively simple process that can be completed with just a few basic tools and a little bit of patience. In this step-by-step guide, we will walk you through the process of installing LED light strips under the dash of your car, from choosing the right materials and tools to connecting the wiring and mounting the strips in place. Whether you’re a seasoned DIY enthusiast or a beginner who has never attempted a project like this before, this guide will provide all the information you need to get started and ensure that your LED light strips are installed safely and effectively. So, let’s dive in and explore the world of DIY car customization with LED light strips!
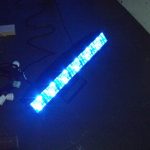
LED light strips are a popular lighting solution that can be easily installed in a variety of settings, including under dashboards in vehicles. These strips use light-emitting diodes (LEDs) to produce bright, energy-efficient light that can be customized to suit any mood or occasion. One of the main advantages of LED light strips is their flexibility, allowing them to be easily bent or cut to fit any space. They also come in a wide range of colors and styles, and can be dimmed or brightened to create the perfect ambiance. Additionally, LED light strips are long-lasting and require very little maintenance, making them a cost-effective and convenient choice for anyone looking to add some extra light to their vehicle’s interior.
To successfully install LED light strips under your car’s dashboard, you will need a few essential tools and materials. These include a set of LED light strips, a power supply, a fuse tap or inline fuse holder, wire cutters, wire strippers, electrical tape, zip ties, and a soldering iron. It is also recommended to have a multimeter handy to test the electrical connections. Additionally, you may want to have a drill and drill bits on hand to create holes for mounting the strips. With these tools and materials, you will be well-equipped to complete the installation process with ease and achieve a stunning visual effect in your car’s interior.
Step 1: Preparing for Installation
Installing LED light strips under dash can be an easy task if you have the right tools and follow the right steps. The first and most crucial step is preparing for installation. Before you start, make sure you have all the necessary tools required for the installation process. You will need a screwdriver, wire strippers, electrical tape, and of course, the LED light strips. It’s also essential to read the manufacturer’s instructions that come with the LED light strips to ensure you have all the necessary parts and to understand how to install them correctly. Another important step in preparing for installation is to clean the area where the LED light strips will be installed. The surface should be free of any dirt, dust, or debris that could interfere with the adhesive backing of the LED light strips. You can use a damp cloth or a cleaning solution to clean the area thoroughly. It’s also crucial to ensure that the area is dry before proceeding with the installation process. Preparing for installation is a critical step that should not be overlooked. It sets the foundation for the installation process and ensures that the LED light strips are installed correctly, resulting in a seamless and stunning finish.
Before installing LED light strips under the dash, it is crucial to clean the surface thoroughly where you will install them. A dirty or greasy surface can cause the adhesive to fail, making the light strips fall off. To clean the surface, use a clean cloth and a mild cleaning agent to remove any dust, dirt, or oil residues. Make sure the surface is completely dry before applying the light strips. It is also recommended to use rubbing alcohol to wipe the surface to ensure a clean and grease-free surface. A clean surface will ensure a secure and long-lasting installation of the LED light strips, providing a stunning visual effect to the interior of your vehicle.
After selecting the right LED light strips for your car, the next step is to measure and cut them to fit the dash area. This process requires a high level of precision to avoid wastage of the strips. The first step is to measure the length of the dash area where the light strips will be installed. Use a measuring tape to get an accurate measurement. After getting the measurement, cut the light strip to the exact length using a sharp pair of scissors or a cutting tool. Ensure that you cut the strip at the marked cutting point to avoid damaging the circuit. Additionally, be careful not to cut the strip too short as it may not fit the dash area properly.
Before starting the installation of LED light strips under the dash, it’s essential to plan the wiring route for the lights and connect them to the power source appropriately. First, decide on the placement of the LED strips and identify the best route for the wiring to reach the power source. It’s crucial to ensure that wires are not visible and do not create a safety hazard. Once the route is planned, the wires should be connected to the power source using appropriate connectors and wire gauge to prevent overheating and power loss. Proper planning and execution of the wiring route will ensure a safe and efficient LED light strip installation under the dash.
Step 2: Installing the Light Strips

Installing LED light strips under the dash of your car is an easy way to give your vehicle a personalized touch. One of the critical steps in this process is installing the light strips. To begin, you will need to decide where you want to place the LED light strips. Once you have determined the location, you can begin installing the strips. First, clean the surface where you will be attaching the LED light strips. Dust and debris can interfere with the adhesive, so it is essential to ensure that the surface is clean and dry. Next, peel the backing off the adhesive tape and place the LED light strip onto the surface. Firmly press the strip onto the surface to ensure a secure bond. Repeat this process for all the LED light strips you plan to install. When installing the LED light strips, it is essential to ensure that the wires are concealed and out of the way. You can use zip ties or adhesive clips to secure the wires and keep them organized. Additionally, it is crucial to connect the LED light strips to the power source correctly. Most LED light strips come with a controller that connects to the power source, allowing you to turn the lights on and off and change the color or pattern. However, it is essential to read the instructions carefully to ensure that you are connecting the LED light strips correctly. Once you have installed and connected the LED light strips, you can turn them on and enjoy the ambiance they create in your car.
Attaching the LED light strips to the dash is a crucial step in the installation process. To ensure a secure and long-lasting placement, it’s recommended to use adhesive tape. The tape should be strong enough to hold the weight of the light strips but also gentle enough not to damage the dash’s surface. It’s important to clean the area thoroughly before attaching the tape to remove any dirt or debris that may interfere with the adhesion. Once the tape is in place, carefully apply pressure to ensure a strong bond between the tape and the dash. With the light strips securely attached, the dash will be illuminated with a stunning glow, adding a touch of style and ambiance to the vehicle’s interior.
After positioning the LED light strips under the dashboard of your car, the next step is to secure them with zip ties or clips. This step is crucial as it ensures that the light strips remain in place and do not fall off while driving. Using zip ties or clips also prevents any potential damage to the strips, keeping them in pristine condition. When attaching the zip ties or clips, it’s important to ensure that they are not too tight, as this could cause the strips to bend or break. Additionally, make sure the zip ties or clips are evenly spaced to avoid any uneven lighting. With these simple steps, you can easily secure your LED light strips under the dashboard of your car and add a stylish touch to your ride.
Before completing the installation of LED light strips under your car’s dashboard, it is crucial to test the lights to ensure they function correctly. Turn on the car ignition and inspect each strip’s connection to the power source. Check the color and brightness of the lights to ensure they match your desired outcome. If any light strip fails to light up or displays a different color, troubleshoot the issue immediately. Making sure your lights are working correctly will prevent the need to dismantle your entire installation and make any necessary adjustments, saving you time and hassle.
Step 3: Hiding the Wires

Once you have mounted your LED light strips under your dashboard, the next step is to hide the wires. Hiding the wires will give your installation a cleaner and more professional look. There are several ways to hide the wires. You can use cable ties or zip ties to bundle the wires together and attach them to the existing wiring in your car. Alternatively, you can use electrical tape to secure the wires to the underside of the dashboard. Another option is to use wire loom or conduit to cover the wires and protect them from damage. Whatever method you choose, make sure that your wires are securely fastened and not loose. Before hiding the wires, it is important to test your LED light strips to ensure that they are working properly. Turn on your car and check that all the lights are working as expected. Once you have confirmed that everything is working correctly, you can proceed to hide the wires. Take your time and be patient, as this step can be time-consuming. However, the end result will be worth it. A clean and professional installation will not only look great, but it will also ensure that your LED light strips are secure and safe.
One of the most important steps in installing LED light strips under dash is to conceal the wires. This is where wire loom and cable ties come in handy. Wire loom is a protective tube that covers the wires and keeps them organized while cable ties are used to bundle the wires together. Using these tools will not only make the installation look neater, but it will also protect the wires from damage and make them easier to manage. When using wire loom, make sure to choose the appropriate size for the wires you are covering and use cable ties to secure the loom in place. With these simple steps, you can easily conceal the wires and achieve a professional-looking installation of your LED light strips.
When installing LED light strips under your car’s dash, one important consideration is routing the wires. You may choose to use existing channels or create new ones. Using existing channels can save time and effort, but it’s important to ensure that the wires won’t get tangled or damaged. Creating new channels may provide more flexibility in terms of wire placement, but it can be a more involved process. Whichever option you choose, it’s important to plan the wire routing carefully to avoid any potential hazards or interference with other components in your car. By taking the time to route your wires properly, you can ensure a safe and effective installation of your LED light strips.
Step 4: Final Touches

After completing the previous steps, it is time to add the final touches to your LED light strip installation. This step is crucial as it will help you ensure that the lights are working correctly, and you can enjoy the full effect of your new lighting system. The first thing you need to do is connect the power source to the LED light strips. You can use a power adapter or a car battery to power your LEDs. Make sure to double-check your connections before turning on the power to avoid any unwanted accidents. Once you have connected the power, turn on the lights to see if they are working correctly. If everything is working correctly, you can proceed to the final step. The last step in the installation process is to secure the LED light strips under the dashboard. You can use zip ties or adhesive tape to secure the lights in place. Make sure to secure them in a way that they are not visible from the outside. You can also use a wire cutter to trim any excess wires that may be sticking out. Once you have secured the LED light strips, turn off the power and enjoy your new lighting system. With just a few easy steps, you have transformed your car’s interior into a stunning, illuminated space that will impress your passengers and make driving at night more enjoyable.
After installing LED light strips under your car’s dashboard, you may want to adjust the brightness and color of the lights to suit your preferences. You can do this by using the controller that comes with the LED light kit. The controller allows you to choose from a variety of colors and adjust the brightness level according to your mood or environment. Some LED light kits also come with a remote control that makes it even easier to adjust the brightness and color of the lights. By adjusting the brightness and color of your LED lights, you can create a unique and personalized atmosphere in your car that reflects your style and personality.
If you’re looking to take your LED light strip installation to the next level, adding some additional features such as a remote control or music synchronization can really enhance the experience. With a remote control, you can easily adjust the brightness and color of your lights without having to physically access them. This is especially useful if you have your lights installed in hard-to-reach areas. Music synchronization allows your lights to pulse and change colors in time with your favorite tunes, creating a fun and dynamic atmosphere in your car. Both of these features are relatively easy to install and can really take your LED light strip installation to the next level.
The installation process for LED light strips under the dash is a relatively simple and straightforward procedure. Firstly, ensure that you have all the necessary tools and supplies for the job, including the LED light strips, a power source, adhesive tape, and wire cutters. Secondly, measure and cut the LED strips according to the length of your car’s dashboard. Thirdly, clean the surface of the dash with an alcohol pad and stick the adhesive tape to the back of the LED strips. Fourthly, connect the LED strips to a power source and test them to ensure they are working correctly. Finally, secure the LED strips to the bottom of the dashboard using adhesive tape, and you are done. By following these easy steps, you can transform the ambiance of your car interior with colorful LED light strips.
Customizing LED light strips can be a fun way to add a personal touch to your car’s interior. One suggestion is to choose a color scheme that matches your personality or mood, such as calming blues or energetic reds. You can also experiment with different lighting effects, such as a pulsing rhythm or a gradual fade. Consider adding a dimmer switch to adjust the brightness to your liking. Another idea is to strategically place the strips to highlight specific areas of the car, such as the footwells or dashboard. With a little creativity, LED light strips can transform your car into a personalized and stylish space.
In conclusion, having LED lights installed under your car’s dashboard offers numerous benefits that enhance your driving experience. Apart from creating a beautiful and eye-catching ambiance, LED lights also provide additional illumination, making it easier to locate items stashed away in the dark corners of your vehicle. The versatility of LED lights allows them to be used in various ways, such as to signal turns, indicate braking, and even as a warning sign. Moreover, LED lights are energy-efficient, long-lasting, and easy to install, making them a practical and economical choice for car owners. Overall, installing LED lights under your car’s dashboard is an excellent way to add some personality to your vehicle while also improving its functionality.
Conclusion
In conclusion, installing LED light strips under the dash of your vehicle is a simple and straightforward process that can add a touch of style and sophistication to your ride. By following the step-by-step guide provided, you can easily achieve the desired look and ambiance inside your car. LED light strips are a cost-effective way to enhance the overall appearance of your vehicle while also providing practical benefits such as improved visibility and safety. So, whether you’re a car enthusiast looking to upgrade your ride or simply want to add some flair to your daily commute, installing LED light strips under the dash is definitely worth considering. With a little creativity and patience, you can transform your car’s interior into a personalized and captivating space that reflects your unique style and personality.