StepbyStep Guide: Installing LED Panel Lights in Your Ceiling
Installing LED panel lights in your ceiling is an excellent way to bring modern and energy-efficient lighting to your home or office. LED panel lights offer a sleek and low-profile design, making them an ideal choice for spaces with limited ceiling height. They also provide a bright and even light that is perfect for task lighting or creating a warm and inviting atmosphere. If you are looking to upgrade your lighting, installing LED panel lights is a great option, and with the right tools and a little bit of know-how, it’s a job you can do yourself. In this step-by-step guide, we will walk you through the process of installing LED panel lights in your ceiling. We will cover everything from the tools and materials you will need to the preparation and installation steps. Whether you are an experienced DIYer or a beginner, this guide will provide you with all the information you need to successfully install LED panel lights in your home or office. So, let’s get started and bring some modern and energy-efficient lighting to your space!
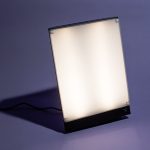
LED panel lights are a modern and efficient lighting solution that offers numerous benefits over traditional lighting options. These lights are ultra-thin, lightweight, and easy to install, making them an ideal choice for both residential and commercial spaces. LED panel lights also provide uniform and bright illumination, making them perfect for use in areas where you need a lot of light, such as in offices or kitchens. Additionally, LED panel lights are energy-efficient, which means they use less electricity and help reduce your carbon footprint. They also have a longer lifespan than traditional lighting options, which means you won’t have to replace them as often. Overall, LED panel lights offer a practical and cost-effective lighting solution that can help you save money on your energy bills while providing superior illumination.
Proper installation of LED panel lights is crucial for both safety and efficiency purposes. Firstly, incorrect installation can result in electrical hazards such as short circuits and fires. It is important to follow the manufacturer’s instructions and use the appropriate tools and equipment. Secondly, proper installation ensures that the LED panel lights function optimally and provide the desired lighting effect. Incorrect installation can lead to uneven lighting and reduced energy efficiency. Additionally, proper installation can extend the lifespan of the LED panel lights, reducing the need for frequent replacements and maintenance. Overall, taking the time and effort to install LED panel lights properly can save you money, time, and potential safety hazards.
Tools and Materials Needed
Installing LED panel lights in your ceiling requires specific tools and materials to ensure a safe and successful installation. The first item you’ll need is a drill with a hole saw attachment. This tool will be used to create the openings in your ceiling for the mounting brackets and wiring. A stud finder is also essential to locate ceiling joists that will support the weight of the panel lights. Additionally, you’ll need a screwdriver to attach the brackets to the ceiling, and a wire stripper to prepare the wires for connection. A voltage tester is also necessary to ensure that the power is turned off before starting the installation process. In terms of materials, you’ll need LED panel lights, which come in a variety of sizes and shapes to fit your specific needs. You’ll also need mounting brackets to secure the panel lights to the ceiling, and electrical wire to connect the lights to the power source. To protect the wires and ensure a neat appearance, you’ll need wire nuts and cable ties. Finally, you may need a drywall saw to make any necessary adjustments to the ceiling opening. Having all of these tools and materials on hand before starting the installation process will ensure a smooth and efficient installation of your LED panel lights.
Before beginning the installation process of LED panel lights in your ceiling, it is important to have a list of necessary tools and materials. The tools required for this project include a stud finder, drill, measuring tape, wire strippers, wire connectors, and a screwdriver. Additionally, materials that will be necessary for installation include the LED panel lights, mounting brackets, electrical wire, and cable ties. It is important to ensure that all materials and tools are readily available before beginning the installation process to ensure a smooth and efficient process. Following the necessary steps and having the required materials and tools will result in a well-installed LED panel light system that will provide bright and energy-efficient lighting for your space.
Before embarking on the installation of LED panel lights in your ceiling, it is crucial to keep in mind some essential safety precautions. Firstly, ensure that the power supply to the area is turned off to prevent electrocution. Secondly, use appropriate tools and wear protective gear such as gloves and goggles to avoid injury. Thirdly, make sure to follow the manufacturer’s instructions carefully and double-check all connections before turning the power back on. Lastly, it is advisable to have a partner to assist in the installation process and to avoid working alone. By taking these precautions, you can ensure a safe and successful installation of LED panel lights in your ceiling.
Preparing Your Ceiling
Preparing your ceiling is a crucial step in installing LED panel lights. The first thing you need to do is to turn off the power source. You don’t want to risk any electrical hazards while working on your ceiling. Then, remove any existing fixtures or lighting that are attached to the ceiling. Make sure to keep the screws and brackets, as you might need them later. Once you have removed everything, assess the condition of your ceiling. If there are any cracks or damages, fix them before installing the LED panel lights. You can use a putty knife and joint compound to cover any imperfections. Sand the ceiling once the compound is dry to ensure a smooth surface. Remember to wear a mask while sanding to avoid inhaling any dust particles. After preparing your ceiling, you need to measure the size of the LED panel lights you want to install. Use a tape measure to determine the length and width of the panel. Mark the dimensions on the ceiling with a pencil. Make sure you choose a location that is centered in the room and away from any vents or obstructions. Next, drill holes in the corners of the marked area. These holes will serve as an entry point for the jigsaw blade. Use the jigsaw to cut along the marked lines until you have a hole that fits the LED panel light. Test fit the panel light to ensure it fits securely in the hole. If necessary, adjust the hole until the panel light fits perfectly.
Before installing LED panel lights in your ceiling, it is crucial to measure and mark the area where the lights will be installed. Start by turning off the power supply to the area and using a measuring tape to determine the length and width of the installation area. Next, use a pencil or marker to mark the corners of the installation area on the ceiling. You can also use a chalk line or laser level to ensure straight lines and accurate measurements. Marking the area will help you determine the number of LED panel lights required for the space and ensure that they are installed evenly and symmetrically. Taking the time to measure and mark the area before installation will help you avoid mistakes and ensure a professional-looking finish.
Cutting the hole in the ceiling is a crucial step when installing LED panel lights. To begin, it is important to locate the exact position of the light panel and then mark it on the ceiling. Next, use a stud finder to ensure that there are no obstacles like wires or pipes that could be damaged by the cutting process. Once the area is clear, use a saw or a drywall knife to carefully cut the hole according to the marked area. It is important to ensure that the hole is the same size as the light panel to ensure a proper fit. After the hole is cut, smooth the edges with sandpaper to avoid any roughness or jagged edges. Cutting the hole in the ceiling may seem daunting, but with proper planning and execution, it can be accomplished with ease.
Wiring the LED panel lights is a crucial step in the installation process, and it requires careful attention to detail. First, turn off the power supply to the room where you are installing the lights. Then, connect the wires from the LED driver to the mains supply, making sure to follow the manufacturer’s instructions carefully. Next, connect the LED panel lights to the driver, ensuring that the polarity is correct. Make sure to test the lights before closing up the ceiling to ensure that everything is working correctly. Finally, neatly organize and secure all wires and connections to prevent any potential hazards. With proper wiring, your LED panel lights will provide long-lasting, energy-efficient illumination for your space.
Installing the LED Panel Lights
Installing LED panel lights is a great way to upgrade your old and outdated lighting system. LED panel lights are energy-efficient, long-lasting, and offer a brighter and more uniform light distribution compared to traditional lighting systems. In this step-by-step guide, we will walk you through the process of installing LED panel lights in your ceiling. Firstly, you need to prepare the necessary tools and materials before starting the installation process. These tools include a drill, screws, wire stripper, pliers, and a voltage tester. You also need to purchase the LED panel lights, which come in different sizes and shapes. Once you have all the tools and materials ready, you can start by turning off the power supply to the ceiling lights. Next, remove the old ceiling lights and check the wiring to ensure that it is safe to proceed. Then, follow the manufacturer’s instructions to connect the wires to the LED panel lights. Once the wiring is connected, attach the LED panel lights to the ceiling using screws, and turn on the power supply to test the lights. With these simple steps, you can easily install LED panel lights in your ceiling and enjoy the benefits of energy-efficient and high-quality lighting.
Connecting the LED panel lights to the ceiling is a crucial step in the installation process. Firstly, ensure that you have all the necessary tools and equipment, including a ladder, drill, screws, and the LED panel lights. Begin by marking the position of the lights on the ceiling and drilling holes accordingly. Next, connect the wiring of the panel lights to the power source, ensuring that the wiring is secure and correctly placed. Finally, attach the LED panel lights to the ceiling using screws, and test them to ensure that they are functioning correctly. Overall, connecting the LED panel lights to the ceiling requires precision and attention to detail to ensure that they are installed safely and effectively.
Securing the panel lights in place is a crucial step in the installation process of LED panel lights in your ceiling. To ensure that the panel lights stay in position, it is important to use the appropriate hardware and follow the manufacturer’s instructions carefully. The most common method is to use clips or brackets that are screwed into the ceiling. These clips or brackets should be placed at regular intervals to evenly distribute the weight of the panel lights. Additionally, it is important to make sure that the clips or brackets are securely fastened to the ceiling to prevent any movement or vibration that may cause damage to the panel lights or compromise their performance. Once the panel lights are securely in place, you can connect them to a power source and enjoy the many benefits of having energy-efficient and stylish lighting in your home or office.
After installing the LED panel lights in your ceiling, it is crucial to test the lights to ensure they are functioning correctly. Testing the lights involves turning on the switch and examining each light panel to see if they light up evenly. Additionally, you can check the brightness level of each panel and compare it to the manufacturer’s specification. If you notice any flickering or uneven lighting, it may indicate a wiring issue or a defective light panel. In this case, you should turn off the switch and consult with a qualified electrician to resolve the issue before using the lights. Overall, testing the lights is an essential step to ensure they provide optimal lighting and a comfortable environment in your home or workspace.
Final Touches
Final touches are an important part of any DIY project and installing LED panel lights in your ceiling is no different. Once you have successfully installed your LED panel lights, it is time to add the final touches to make your project look professional and polished. The first step in these final touches is to check that all of your connections are secure and that your LED panel lights are functioning correctly. This is crucial as it will ensure that your lights work correctly and do not pose a safety hazard. Once you have checked that everything is working correctly, you can begin to add the finishing touches to your project. One of the most important final touches is to make sure that your LED panel lights are level and flush with your ceiling. This will ensure that your lights look professional and that they do not cause any issues when it comes to lighting your space. You can use a spirit level to check that your lights are level and adjust them if necessary. Once your lights are level, you can finish your project by adding any additional features that you desire, such as a dimmer switch or a remote control. These final touches will ensure that your LED panel lights are not only functional but also stylish and add value to your space.
One of the crucial steps of installing LED panel lights in your ceiling is covering the hole left after removing the old fixtures. To do this, you’ll need to measure the size of the hole and cut a piece of drywall that fits perfectly. Then, place the drywall over the hole and secure it in place using drywall screws. Apply a coat of joint compound over the screws and the seams between the drywall and the ceiling. Smooth out the compound and let it dry completely before sanding it down and painting it to match the color of the ceiling. This step is essential to ensure a seamless and professional-looking finish to your LED panel light installation.
Cleaning up the work area is an essential step in any DIY project, and installing LED panel lights in your ceiling is no exception. After completing the installation, you may have leftover packaging, screws, and other debris scattered around the room. Taking the time to tidy up not only ensures that your space looks neat and organized, but it also helps you avoid any potential hazards. By removing all excess materials and tools from the area, you can prevent trips and falls, and ensure that your new LED panel lights are installed in a safe and secure manner. This final step of cleaning up the work area may seem small, but it can make a big difference in the overall success of your project.
LED panel lights are a great addition to any home or office, providing energy-efficient and bright lighting. However, to ensure that they continue to function optimally, proper maintenance is essential. One way to maintain the LEDs is to clean them regularly with a microfiber cloth to prevent dust buildup. It is also important to avoid using harsh chemicals that can damage the surface of the panels. Additionally, LED panel lights should be used within their recommended voltage range to avoid burning out the diodes. By following these tips, you can keep your LED panel lights working efficiently and brightly for years to come.
After gathering all the necessary tools and materials, the installation process for LED panel lights can begin. First, the existing fixture must be removed and the electrical wiring should be inspected for any damage. Next, the LED panel light should be assembled according to the manufacturer’s instructions, including attaching the mounting brackets. Once assembled, the panel can be inserted into the ceiling cutout and secured in place with screws. Finally, the electrical connections can be made and the light switch can be tested to ensure proper functionality. With careful attention to detail and proper installation techniques, LED panel lights can provide a stylish and energy-efficient lighting solution for any room.
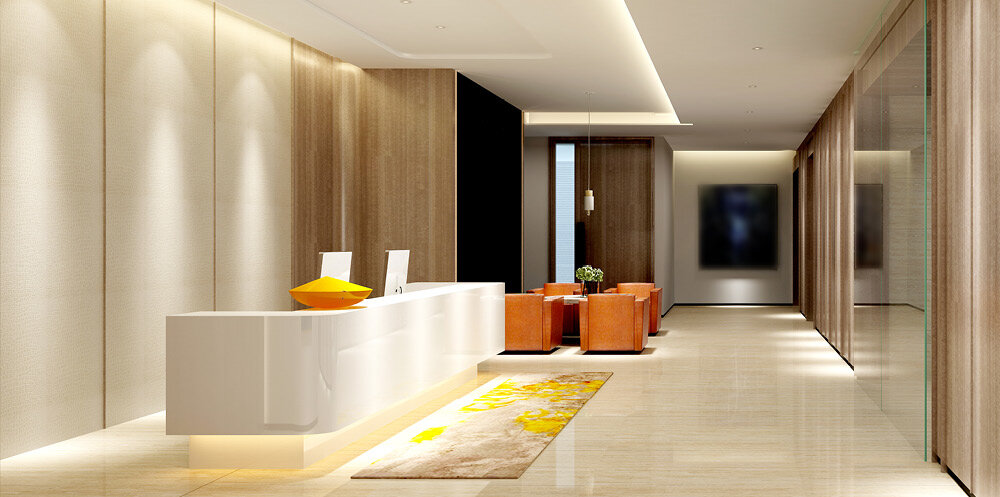
In conclusion, LED panel lights are an excellent choice for those looking to upgrade their lighting system. They offer a plethora of benefits, including energy efficiency, a long lifespan, and a sleek, modern look. Additionally, they emit a bright, even light that is perfect for illuminating large spaces. Installing LED panel lights in your ceiling may seem daunting at first, but with the right tools and instructions, it can be a straightforward process. By following the step-by-step guide outlined above, you can easily transform your space and enjoy the many benefits of LED panel lighting.
Conclusion
In conclusion, installing LED panel lights in your ceiling can be a great way to enhance the ambiance of your home or office space while also saving on energy costs. By following the step-by-step guide outlined in this article, you can easily and safely install these lights yourself. Remember to choose the right size and color temperature for your space, and to take all necessary precautions when working with electrical wiring. With a little bit of effort and attention to detail, you can enjoy the benefits of beautiful, energy-efficient lighting for years to come.