Easy Steps to Replace LED Panel Light in Your Ceiling: A Beginner’s Guide

If you’re looking for a way to upgrade your home lighting system, replacing your old ceiling panel lights with LED panel lights is an excellent choice. Not only do they provide brighter and more energy-efficient illumination, but they also offer a sleek and modern design that can elevate the look of any room. However, if you’re new to DIY projects, the thought of replacing your old lighting fixtures can be daunting. The good news is that with the right tools and a bit of know-how, it’s a simple task that you can do yourself. In this beginner’s guide, we’ll take you through the easy steps to replace LED panel lights in your ceiling. We’ll cover everything from the tools you’ll need to the actual installation process, so you can confidently tackle this project and enjoy the benefits of your new LED lighting system. So, whether you’re looking to save money on your energy bills or simply update your home’s look, read on to learn how to replace your old ceiling panel lights with LED panel lights.
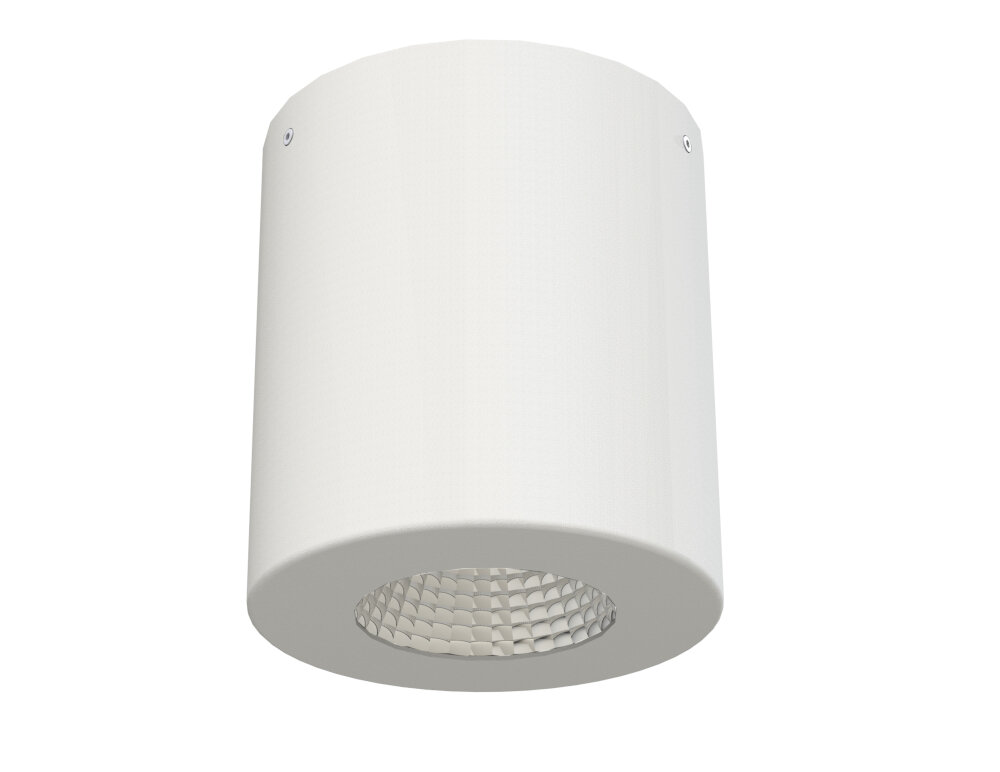
LED panel lights are a modern and energy-efficient lighting solution that is becoming increasingly popular in commercial and residential spaces. These lights are composed of a flat panel that emits bright, evenly-distributed light, making them an ideal choice for ceiling fixtures. The panels are made up of a series of LED chips that are mounted on a thin, lightweight frame. Their slim design allows them to be easily installed in drop ceilings or suspended from the ceiling. LED panel lights are long-lasting and consume less power than traditional fluorescent fixtures, making them a cost-effective and eco-friendly lighting option. They also come in a range of color temperatures and can be dimmed to create the perfect ambiance for any setting. Overall, LED panel lights are an excellent choice for those looking to upgrade their lighting system.
Replacing faulty LED panel lights is crucial for several reasons. Firstly, faulty LED lights can be a safety hazard, especially in homes or workplaces where lighting is essential for visibility. Secondly, malfunctioning LED lights can lead to higher energy consumption, increasing electricity bills and negatively impacting the environment. Additionally, faulty LED panels can affect the overall aesthetic of the room and decrease the value of the property. Finally, replacing faulty LED panel lights is a simple and affordable way to upgrade the lighting system and improve the functionality and appearance of the space. By following the easy steps outlined in this beginner’s guide, anyone can replace faulty LED panel lights and enjoy the benefits of a well-lit and efficient space.
Gather the Required Tools
When it comes to replacing an LED panel light in your ceiling, the first step is to gather all the required tools. You will need a few basic tools such as a ladder, screwdriver, and wire stripper. A ladder is necessary to reach the ceiling and remove the old panel light. Make sure you choose the right size ladder that can support your weight and is tall enough to reach the fixture. A screwdriver is essential to remove the screws that hold the old panel light in place. Choose a screwdriver that matches the type of screws in your fixture to avoid damaging them. A wire stripper is also required to strip the wires and prepare them for connecting the new panel light. It is important to choose the right wire stripper that is compatible with the wire gauge of your fixture. Apart from the basic tools, you may also need a voltage tester to check if the power is off before you start working on the fixture. This is a safety measure to prevent electrocution. You may also need a drill and a saw if you need to make new holes or adjust the size of the fixture. Finally, you will need the new LED panel light that you want to install. Make sure you choose a high-quality panel light that matches the size and specifications of your old fixture. Gather all the required tools and materials before you start working on the fixture to avoid any delays or interruptions.
Before starting the process of replacing an LED panel light in your ceiling, it is crucial to have a few necessary tools. Firstly, a screwdriver is required to loosen the screws holding the panel in place. Additionally, a voltage tester is essential to ensure that the power is turned off before beginning the replacement. A pair of pliers or wire strippers can come in handy to detach any wires connected to the old LED panel. Moreover, it is advisable to have a new LED panel light of the same size and wattage as the old one. Lastly, a ladder or step stool is needed to reach the panel in the ceiling. By having these tools at hand, replacing an LED panel light can be a simple and straightforward process.
LED panel lights are an essential part of modern ceiling lighting systems, providing efficient and durable illumination for a variety of settings. The main function of LED panel lights is to provide bright and even lighting to a room, creating a welcoming and comfortable environment. In addition to their primary function, LED panel lights are also energy-efficient, cost-effective, and long-lasting, making them an ideal choice for both commercial and residential applications. Replacing an LED panel light in your ceiling may seem like a daunting task, but with the right tools and steps, it can be done easily and quickly.
Turn Off the Power Supply

When it comes to replacing an LED panel light in your ceiling, safety should be your number one priority. Before starting the replacement process, make sure to turn off the power supply to avoid any electrical accidents. This step may seem obvious, but it is crucial to ensure that no current is running through the wires while you work on the light fixture. To turn off the power, locate the circuit breaker panel in your home and shut off the switch that controls the power supply to the room where the light is located. You can also use a voltage tester to confirm that the power is off before starting any work. Turning off the power supply also protects the LED panel light from damage. Electricity can cause severe damage to electronic devices, and LED panel lights are no exception. If you attempt to replace a light while the power is on, you risk damaging the new LED panel light, which can be costly to replace. Additionally, working on a light while the power is on can be dangerous and can result in injury. Therefore, it is essential to take the time to turn off the power supply before starting any work on your LED panel light.
Turning off the power supply is an essential step when it comes to replacing LED panel lights in your ceiling. This step is crucial for two main reasons: firstly, it ensures your safety while working with electrical equipment, as it eliminates the risk of electric shock. Secondly, turning off the power supply prevents any damage to the LED panel light or any other electrical components in your ceiling. Not only does this protect your investment, but it also ensures that your new LED panel light functions correctly, without any issues. Therefore, it is imperative to take this step seriously and turn off the power supply before beginning any work.
Before starting to replace your LED panel light, it is important to turn off the power supply. To do this, you must first locate the circuit breaker panel in your home. Once you have found it, open the panel and look for the breaker labeled “lights” or “ceiling lights.” Flip the switch to the “off” position to cut off the power supply to the LED panel light. It is important to take this safety precaution to prevent electrical shock or injury while replacing the light. After replacing the LED panel light, remember to turn the power supply back on by flipping the breaker switch to the “on” position.
Remove the Old LED Panel Light
The first step in replacing an LED panel light in your ceiling is to remove the old panel light. This can be accomplished in a few easy steps. The first thing you will need to do is turn off the power to the light fixture. This can typically be done by switching off the circuit breaker or by removing the fuse that controls the circuit. Once the power is off, you can remove the old LED panel light by gently pressing on the edges of the panel to release it from its mounting clips. Be careful not to apply too much pressure or force, as this can damage the panel or the surrounding ceiling. Once the panel is removed, you should take the time to inspect the wiring and mounting hardware. Check for any signs of damage or wear, and replace any parts that are in poor condition. You should also take the opportunity to clean the mounting surface and surrounding area of any debris or dust that may have accumulated over time. This will ensure that the new LED panel light is securely mounted and functioning properly. With the old panel removed and the area cleaned, you are now ready to install the new LED panel light and enjoy the benefits of bright, energy-efficient lighting in your home or office.
Removing an old LED panel light can be a straightforward process if you follow a few simple steps. Firstly, switch off the power supply to the light at the circuit breaker. Next, use a ladder to access the ceiling panel and locate the screws holding the panel in place. Using a screwdriver, remove the screws and gently lower the panel down. Disconnect the wiring connector before completely removing the panel. If the panel is attached with clips, release them gently, and then disconnect the wiring. Be sure to handle the panel with care and store it in a safe place if it is still functional. With the old panel removed, you can now proceed with installing the new LED panel light.
Removing an old LED panel light can be a tricky task, especially for beginners. However, following some simple tips can make the process easy and safe. Firstly, ensure that the power supply to the light is turned off to prevent any electrical hazards. Next, carefully detach the cover of the panel light and remove the screws holding it in place. Gently pull the light down from the ceiling and disconnect the wires from the power source. It is important to handle the light with care to avoid any breakage or damage. Finally, dispose of the old light safely and responsibly to protect the environment. By following these tips, you can easily remove the old LED panel light and prepare for the installation of a new one.
Install the New LED Panel Light
Installing a new LED panel light is an easy and straightforward process that can be done by anyone, even if you have no experience with electrical work. The first step is to turn off the power to the ceiling light by flipping the circuit breaker or removing the fuse. Once the power is off, remove the old fixture by unscrewing the screws that hold it in place. Carefully disconnect the wires and remove the fixture from the ceiling. Next, install the new LED panel light by connecting the wires to the corresponding wires in the ceiling. Make sure to match the colors of the wires – black to black, white to white, and green to green or bare copper. Once the wires are connected, attach the new fixture to the ceiling by screwing it into place. Finally, turn the power back on and test the new LED panel light to ensure that it is working properly. With these easy steps, you can replace your old ceiling light with a new LED panel light and enjoy the benefits of energy-efficient lighting in your home. In addition to being energy-efficient, LED panel lights also provide a sleek and modern look to any room. They are available in a variety of sizes and shapes, making it easy to find one that fits your ceiling and decor. LED panel lights are also long-lasting, with an average lifespan of up to 50,000 hours, which means you won’t have to replace them as often as traditional light bulbs. With their many benefits, installing a new LED panel light is a great way to upgrade your home lighting and save money on your electricity bill.
Installing a new LED panel light in your ceiling is a simple process that can be accomplished without the help of a professional. Firstly, gather the necessary tools, including a ladder, screwdriver, and wire stripper. Next, turn off the power supply to the light fixture by switching off the circuit breaker. Then, remove the old light fixture by unscrewing it from the ceiling and disconnecting the wires. After that, carefully attach the LED panel light to the ceiling using the provided screws, ensuring that the wires are neatly tucked away. Finally, connect the wires to the corresponding terminals, taking care to match the colors correctly. Once the connections are secure, turn on the circuit breaker to supply power to the new LED panel light. Enjoy the bright, energy-efficient lighting that your new fixture provides.
Installing a new LED panel light can seem daunting, but with the right tools and precautions, it can be done safely and efficiently. First, be sure to turn off the power to the room where the panel will be installed. Use a voltage tester to ensure that the power is indeed off. Next, carefully remove the old light fixture and prepare the ceiling for the new panel. It’s important to follow the manufacturer’s instructions for installation and to use the appropriate tools, such as a level and a drill. Be sure to handle the LED panel with care, as it is fragile and can be easily damaged. Finally, turn the power back on and test the new light to ensure that it is working properly. With these tips in mind, installing a new LED panel light can be a simple and safe process for beginners.
Replacing LED panel lights is a crucial aspect of maintaining the overall lighting system in your home or office. Over time, LED panel lights can become dim or malfunction, leading to inconsistent lighting that can negatively impact productivity and overall ambiance. Additionally, outdated LED panel lights can consume more energy than newer, more efficient models, leading to higher energy bills and increased carbon emissions. As such, replacing LED panel lights is an easy and effective way to improve the quality and efficiency of your lighting system. With the simple steps outlined in this beginner’s guide, anyone can replace their LED panel lights and enjoy the benefits of a well-lit and energy-efficient space.
Replacing LED panel lights might sound like a daunting task, but it can be done quickly and easily with just a few simple steps. First, turn off the power to the light fixture at the circuit breaker to ensure your safety. Next, remove the old LED panel light from the ceiling by unscrewing the screws or clips holding it in place. Then, disconnect the wires from the old panel light and attach them to the new LED panel light in the same configuration. Finally, secure the new panel light in place using the screws or clips provided and turn the power back on. With these easy steps, you can replace your LED panel light in no time and enjoy the benefits of energy-efficient lighting.
In conclusion, replacing an LED panel light in your ceiling may seem like a daunting task at first, but with the right tools and knowledge, it can be done easily and efficiently. Remember to always turn off the power and handle the light with care to avoid any accidents. Additionally, it’s important to choose the right size and type of LED panel light for your space. If you’re unsure about what to purchase or how to install the light, don’t hesitate to seek help from a professional electrician. By following these easy steps and taking the necessary precautions, you can update your ceiling lighting and create a brighter, more energy-efficient space.
Conclusion
In conclusion, replacing an LED panel light in your ceiling may seem like a daunting task for a beginner, but it is actually a relatively simple process that can be accomplished with just a few easy steps. By following the guidelines outlined in this beginner’s guide, you can successfully replace your LED panel light and enjoy the benefits of energy-efficient lighting in your home or office. Remember to turn off power sources and follow safety precautions, and don’t be afraid to ask for help if you need it. With a little bit of patience and know-how, you’ll be able to upgrade your lighting in no time.