Quick Guide: Removing LED Panel Light from Ceiling StepbyStep Instructions
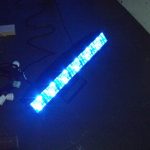
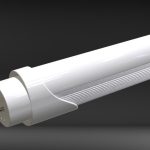
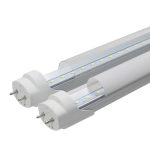
LED panel lights are a popular lighting option in modern homes and commercial buildings due to their efficiency and sleek design. However, there may come a time when you need to remove them from the ceiling, whether it’s for maintenance or replacement purposes. While it may seem like a daunting task, removing an LED panel light from the ceiling is actually quite simple and can be done with just a few tools and some basic knowledge. In this quick guide, we will provide you with step-by-step instructions on how to remove an LED panel light from the ceiling. We will cover everything from preparing the tools and materials you need, to safely and correctly removing the fixture from the ceiling. Whether you’re a DIY enthusiast or a professional electrician, this guide will help you complete the task quickly and easily, without causing any damage to your ceiling or the fixture itself. So, let’s get started!
Tools Needed

When it comes to removing an LED panel light from the ceiling, having the right tools is crucial to ensure a successful and safe removal process. The tools required for this task are not extensive, but they are essential. First and foremost, you will need a ladder so that you can safely reach the ceiling. The ladder should be tall enough to allow you to reach the panel light without having to stretch or overextend your arms. Additionally, make sure that the ladder is sturdy and placed on a level surface to avoid any accidents. In addition to the ladder, you will need a screwdriver to remove the screws holding the panel light in place. The type of screwdriver you need will depend on the type of screws used to secure the panel light. Most LED panel lights are held in place by screws, but some may have clips or other mounting mechanisms. Therefore, it is essential to check the manufacturer’s instructions or consult a professional if you are unsure about the type of screws or mounting mechanism used. Having the right tools will make the removal process much easier and safer, and will also help prevent any damage to the panel light or ceiling.
StepbyStep Instructions
Step-by-step instructions are an essential component of any DIY project, and they are especially vital when it comes to removing LED panel lights from a ceiling. These instructions guide DIY enthusiasts through the process, ensuring that they complete the task safely and efficiently. The instructions break down the process into manageable steps, making it easy for even novice DIYers to follow along. By providing clear and concise guidance, step-by-step instructions help users avoid mistakes and achieve the desired outcome. In the context of removing LED panel lights from a ceiling, step-by-step instructions outline each stage of the process. They typically begin with an overview of the task, followed by a list of the tools and materials needed. The instructions then guide the user through the process of turning off the power supply to the light, removing the diffuser, and accessing the LED panel. By providing clear guidance, step-by-step instructions ensure that users can complete the task safely and efficiently, without causing any damage to the ceiling or the light fixture.
The use of an
- or ordered list is an effective way to present step-by-step instructions in a clear and organized manner. In the context of removing an LED panel light from a ceiling, an
- can be used to detail each step involved in the process, from turning off the power supply to carefully removing the panel from the ceiling. By utilizing an
- , the instructions become more accessible to the reader and can help prevent confusion or mistakes. The use of concise and specific language in each step of the
- is important to ensure that the reader understands the task at hand and can successfully complete it.
Before starting the process of removing an LED panel light from the ceiling, it is essential to turn off the power to the fixture. This step is crucial to ensure your safety while working on the light. You can do this by switching off the circuit breaker that controls the power supply of the light. Alternatively, you can remove the fuse or turn off the switch that controls the light. Remember to double-check that the power is off before proceeding with the removal process. Neglecting to turn off the power could result in electrical shock or injury, so it is vital to take this precaution seriously.
Removing the cover or diffuser of an LED panel light is a crucial step in the process of replacing or maintaining the bulb. The diffuser is usually made of durable plastic and is attached to the frame of the panel light by a series of clips or screws. To remove it, you will need to use a screwdriver or simply apply pressure to the clips to release them. Once the diffuser is removed, you will be able to access the LED panel light and carry out any necessary maintenance or replacement. It is important to handle the diffuser with care to avoid damage and ensure that it can be re-attached securely.
Unscrewing the LED panel light is the first step towards removing it from the ceiling. It’s important to ensure that the power supply is turned off before starting the process. The LED panel light is held in place by screws, which can be located either on the sides or corners of the fixture. A screwdriver is required to remove these screws, and it’s essential to be careful not to damage the fixture or the ceiling during the process. Once the screws are removed, the panel can be gently lowered down from the ceiling. Proper care should be taken while removing the panel to avoid any damage to the wires or other components of the fixture.
Before attempting to remove the LED panel light from the ceiling, it’s essential to disconnect the wires to ensure safety. First, switch off the power supply to the ceiling light circuit from the main electrical panel. Next, use a voltage tester to double-check that no live wires are present. Once you’re sure that the electrical supply is off, disconnect the wires attached to the LED light panel. Depending on the wiring configuration, there may be two or three wires to disconnect. Carefully remove any wire connectors or screws holding the wires in place. It’s crucial to handle the wires gently to avoid damaging them or causing an electrical short circuit. By disconnecting the wires correctly, you’ll be able to remove the LED panel light safely and efficiently.
Removing the mounting bracket of an LED panel light is a crucial step in the process of taking it down from the ceiling. The mounting bracket is what secures the light fixture onto the ceiling, and removing it requires careful attention and precision. To start, turn off the power supply to the light at the circuit breaker. Then, unscrew the screws or bolts that hold the bracket in place using a screwdriver or wrench. Make sure to hold the fixture securely with one hand while removing the bracket with the other to prevent it from falling. With the bracket removed, the LED panel light can be safely taken down from the ceiling, making it ready for cleaning, repair, or replacement.
When it comes to removing an LED panel light from your ceiling, it is essential to ensure that you fill in any holes or gaps that might be left behind. This is particularly important if you plan on replacing the light fixture with a different one. Leaving holes or gaps can not only look unsightly but can also cause issues with insulation and ventilation. Fortunately, filling in these gaps is a relatively straightforward process. You can use a variety of materials, such as spackle or caulking, to fill in any gaps or holes. Once you’ve filled them in, be sure to let the material dry completely before sanding it down and painting over it. This will help ensure that the area looks seamless and matches the rest of your ceiling.
The LED panel light is a popular lighting solution that provides a modern and elegant touch to any interior space. However, it may become necessary to remove the LED panel light for maintenance or replacement purposes. This quick guide provides step-by-step instructions on how to remove an LED panel light from the ceiling. The process involves turning off the power source, removing the screws that secure the panel to the ceiling, and gently pulling the panel down. It is important to handle the panel with care to avoid damaging it. By following these instructions, one can safely and easily remove an LED panel light from the ceiling.
Tips and Precautions
When removing an LED panel light from a ceiling, it is important to take certain precautions to ensure safety and prevent damage to the light and the ceiling. One of the most important tips is to turn off the power supply to the light before attempting to remove it. This can be done by switching off the circuit breaker or removing the fuse that powers the light. This will prevent any electrical shocks and ensure that the light is not accidentally turned on while it is being removed. It is also important to wear gloves and safety goggles to protect your hands and eyes from any debris that may fall during the removal process. Another important precaution to take when removing an LED panel light from a ceiling is to make sure that the ceiling is strong enough to support the weight of the light. LED panel lights can be heavy, and if the ceiling is not strong enough, it may collapse under the weight of the light. Before attempting to remove the light, it is recommended to check the ceiling for any signs of damage or weakness, such as cracks or sagging. If the ceiling is not strong enough to support the light, it may be necessary to reinforce it before attempting to remove the light. By taking these precautions, you can ensure that the removal process is safe and successful.
Conclusion
In conclusion, removing an LED panel light from the ceiling may seem like a daunting task, but with these step-by-step instructions, it can be done easily and safely. It is important to ensure that the power supply is turned off before starting the removal process to prevent any accidents. By following the instructions carefully, one can remove the LED panel light without damaging the ceiling or the light fixture. It is essential to take proper safety precautions and to use the correct tools and techniques for a successful removal. With patience and attention to detail, anyone can remove an LED panel light from the ceiling and replace it with a new one.