Quick Guide: Changing Integrated LED Light Fixture in Few Simple Steps
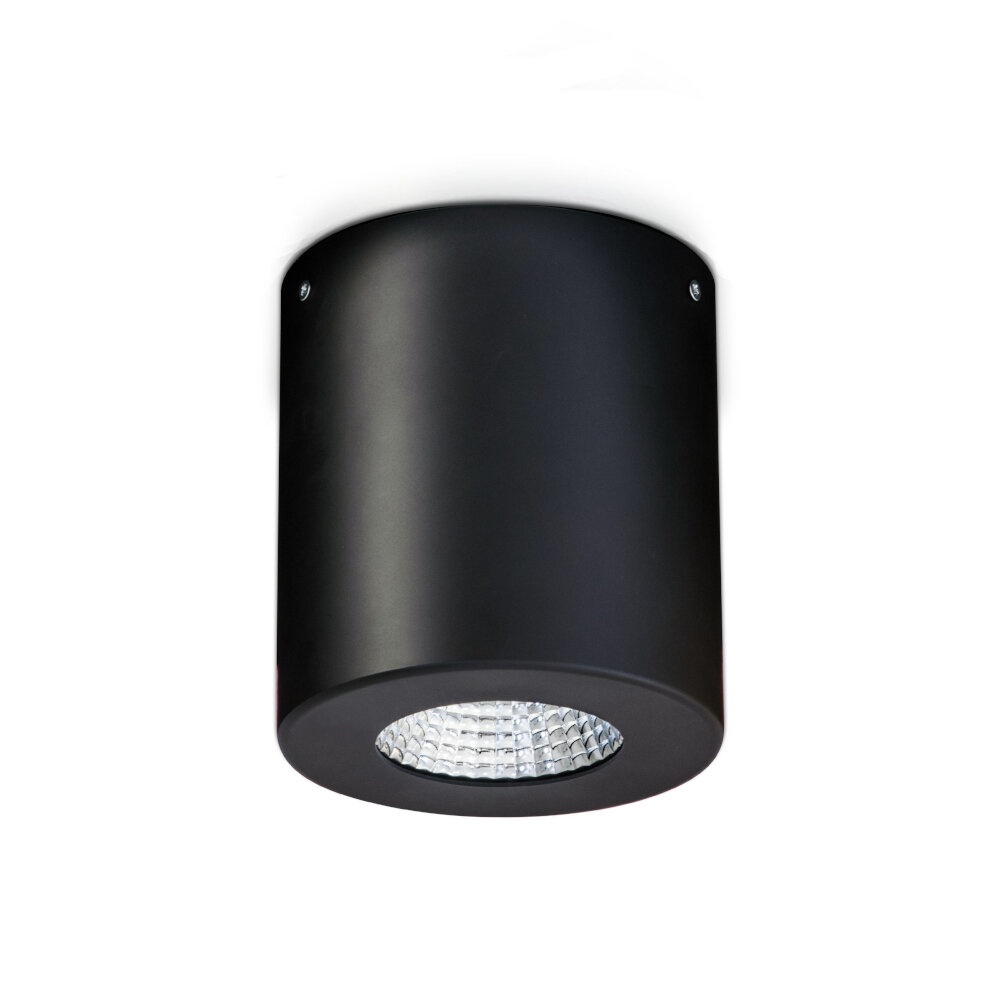
Integrating LED light fixtures have become a popular choice among homeowners and businesses alike. These fixtures offer a sleek and modern look while being energy-efficient and long-lasting. However, like any other lighting fixture, they may eventually need to be replaced due to wear and tear or a desire for a new look. Fortunately, changing an integrated LED light fixture is a relatively simple task that can be completed in just a few steps. In this quick guide, we will provide step-by-step instructions on how to change an integrated LED light fixture. Whether you are a seasoned DIYer or a beginner, this guide will help you successfully replace your old fixture with a new one. With just a few tools and some basic knowledge, you can have a brand new LED light fixture installed in no time. So, let’s get started!
Integrated LED light fixtures are lighting fixtures that have the LED light source built into the fixture itself, as opposed to traditional fixtures that require a separate bulb or lamp. These fixtures have become increasingly popular due to their energy efficiency, long lifespan, and low maintenance requirements. They also provide a sleek and modern look, with options for dimming and color temperature control. Integrated LED light fixtures are easy to install and replace, as they do not require any special wiring or tools. Additionally, they are environmentally friendly, as they do not contain harmful materials such as mercury. Overall, integrated LED light fixtures offer a cost-effective and high-quality lighting solution for any space.
Safety Precautions
When it comes to changing an integrated LED light fixture, safety precautions are of the utmost importance. While it may seem like a simple task, one wrong move could lead to serious injury. First and foremost, always turn off the power supply to the light fixture before attempting to change it. This can typically be done by turning off the circuit breaker that controls the fixture. If you’re unsure which breaker controls the fixture, turn off the main breaker to be safe. Never attempt to change the fixture while the power is still on, as this can lead to electric shock. Another important safety precaution is to use proper tools and equipment. Make sure you have a sturdy step ladder or stool to stand on while changing the fixture. Never attempt to change the fixture while standing on an unstable surface or using makeshift equipment. Additionally, use a non-contact voltage tester to ensure there is no residual electricity flowing to the fixture before you start working on it. This will help protect you from electric shock and ensure a safe working environment. By taking these safety precautions, you can change your integrated LED light fixture with confidence and peace of mind.
Before starting the process of changing an integrated LED light fixture, it is crucial to turn off the power source to avoid any electrical hazards. This step is essential because working on live electrical components can result in fatal accidents that could be avoided by cutting off the power. To turn off the power, locate the circuit breaker box and switch off the corresponding breaker that powers the light fixture. If you’re not sure which breaker to turn off, switch off the main breaker to cut off power to the entire house. Once the power is off, you can proceed with the next steps of safely replacing your integrated LED light fixture.
When it comes to changing an integrated LED light fixture, safety should be the top priority. Wear safety gloves and goggles to protect your hands and eyes from any potential hazards. Safety gloves can prevent cuts, bruises, and burns while handling the fixture and tools, while goggles can shield your eyes from flying debris, dust, and chemicals. It is essential to make sure that the gloves and goggles fit properly and are comfortable to wear throughout the process. By taking the necessary precautions, you can ensure a safe and successful installation of your new integrated LED light fixture.
When changing an integrated LED light fixture, it is crucial to use a stable ladder or step stool to ensure your safety. A wobbly or unstable ladder can cause accidents and injuries, especially when dealing with electrical wiring or fixtures. It is recommended to use a ladder or step stool with rubberized feet or a non-slip base to prevent slipping and sliding. Additionally, make sure the ladder or step stool is at the appropriate height and angle for the task at hand. Taking these precautions can significantly reduce the risk of accidents and allow you to work with confidence and ease.
Remove the Old Fixture
When it comes to changing an integrated LED light fixture, the first step is to remove the old fixture. This is a crucial step as it will determine the success of the installation of the new fixture. Before starting the removal process, make sure to turn off the power supply at the breaker box to avoid any electrical hazards. Next, remove the old fixture cover, which is usually held in place by screws or clips. Once the cover is removed, disconnect the wiring from the old fixture. It is essential to take note of the wiring connections to ensure proper connections when installing the new fixture. Carefully remove the old fixture from the mounting bracket and set it aside. It is also recommended to clean the mounting bracket before installing the new fixture to ensure a secure and stable installation. Removing the old fixture may seem like a daunting task, but it is relatively simple with the right tools and knowledge. It is crucial to take your time and follow the manufacturer’s instructions to avoid any damage to the new fixture or electrical hazards. Additionally, it is recommended to have another person assist you, especially when dealing with heavy and bulky fixtures. With the old fixture out of the way, you can now move on to the next step of installing the new fixture and enjoy the benefits of a brighter and more energy-efficient lighting system.
Removing the cover or lens of an integrated LED light fixture is the first step in changing the light. It is an essential process that requires careful attention and precision to ensure a successful transition. To remove the cover or lens, you must first identify the type of fixture you are working with, as some may have screws or clips holding the cover in place, while others may have a twist-and-lock mechanism. Once identified, use the appropriate tool to remove the screws or clips or twist and unlock the cover. Be sure to handle the cover with care to avoid damaging it or injuring yourself. With the cover removed, you can now proceed to replace the old LED light with a new one, completing the process of changing the integrated LED light fixture.
To begin the process of changing an integrated LED light fixture, the first step is to unscrew the fixture from the ceiling. This may require the use of a ladder or step stool to reach the fixture. It is important to make sure that the power to the fixture is turned off before attempting to unscrew it. Once the fixture is loose, gently lower it down from the ceiling and disconnect any wiring or connectors that may be attached. This step is crucial in order to safely and effectively replace the old fixture with a new one. Remember to take caution when handling electrical components and always prioritize safety when working with electricity.
Before changing the integrated LED light fixture, it is essential to disconnect the wires to avoid any electrical mishap. This step can be achieved by turning off the power supply to the fixture from the main circuit breaker. Once the power is turned off, the next step is to unscrew the fixture from the ceiling or wall and carefully remove the cover. After that, disconnect the wires from the fixture by unscrewing the wire nuts and separating the wires. It is crucial to label the wires as per the colors to ensure a smooth reinstallation process. By disconnecting the wires, one can safely proceed with changing the integrated LED light fixture without risking any electrical harm.
Install the New Fixture
Once you have successfully removed your old integrated LED light fixture, it’s time to install the new one. The first step is to carefully read the manufacturer’s instructions that come with the new fixture to ensure you properly install it. Make sure to turn off the electricity to the area where you will be installing the new fixture. You can do this by turning off the power at the circuit breaker or fuse box. Double-check that the power is off with a voltage tester before proceeding with the installation. Next, follow the manufacturer’s instructions to connect the wires from the new fixture to the wires in the electrical box. Make sure to connect the wires of the same color together, such as black to black, white to white, and green or bare copper to the ground wire. Use wire nuts to secure the connections and wrap them with electrical tape for added safety. Once the wires are connected, carefully tuck them into the electrical box and attach the new fixture to the box using the screws provided. Finally, turn the power back on at the circuit breaker or fuse box and test the new fixture to ensure it’s working properly.
After removing the old fixture, it’s time to connect the wires to the new one. Make sure to turn off the electricity to the room before beginning this step. First, match the wires from the new fixture to those from the ceiling – typically black to black, white to white, and green or copper to the grounding wire. Twist the ends of the wires together, and then secure them with wire nuts. Gently push the wires back into the ceiling box, and then attach the fixture base to the box using screws or bolts. Finally, attach the shade or cover to the fixture base according to the manufacturer’s instructions. Once completed, restore power to the room and test the new fixture to ensure it is working properly.
When changing an integrated LED light fixture, it is essential to know how to properly attach the fixture to the ceiling. One of the most crucial steps is to screw the fixture into the ceiling. To accomplish this, align the fixture’s mounting bracket with the screws in the ceiling junction box, and then secure the fixture to the bracket with screws. Make sure that the fixture is flush against the ceiling and that it is securely attached to the bracket. Failure to screw the fixture into the ceiling correctly can result in it becoming loose or falling, creating a safety hazard.
Attaching the cover or lens is the final step in changing an integrated LED light fixture. This crucial step not only protects the LED lights but also determines the overall look of the fixture. Before attaching the cover, ensure that the LED lights are functioning correctly and securely in place. Once confirmed, place the cover over the fixture and fasten it with screws or clips, depending on the type of cover. It is essential to handle the cover with care to avoid damaging it or leaving any fingerprints or smudges. Once attached, switch on the power supply to test the fixture and admire the newly installed integrated LED light.
Turn on the Power and Test
After replacing the integrated LED light fixture, it’s time to turn on the power and test it. Before doing so, make sure that the circuit breaker is turned off to prevent any electrical accidents. Once you’re sure that the power is off, connect the new fixture’s wires to the corresponding wires in the electrical box. Usually, the wiring is color-coded, but if not, refer to the manufacturer’s instructions. Once you’ve made sure that the connections are secure, carefully tuck the wires back into the electrical box and secure the fixture to the ceiling or wall. After that, turn on the power and test the light. If it doesn’t turn on, turn off the power again and check the connections to ensure they’re secure. If the connections are fine, there might be a problem with the bulb, and you should replace it. Once you’ve turned on the power and tested the light, make sure that it’s functioning correctly. Check if the light is bright enough, and if it’s not, you might need to replace the bulb with a higher wattage. Also, check if there are any flickering or dimming issues. If you notice any problems, turn off the power and check the connections and wiring. If everything seems fine, the issue might be with the electrical circuit or the power supply, and you should call a professional electrician to diagnose and fix the problem. Remember, safety should always come first when dealing with electrical fixtures, so make sure that you follow the manufacturer’s instructions and take all necessary precautions.
Before starting any work on the integrated LED light fixture, it is essential to ensure that the power supply is turned off. Safety precautions should be taken seriously to avoid electrocution or electrical hazards. To turn off the power, locate the circuit breaker box and switch off the breaker corresponding to the room where the light fixture is located. It is also advisable to use a voltage tester to double-check that there is no electricity flowing to the fixture. Turning off the power is a critical step that should not be overlooked, as it ensures that the fixture is safe for handling and that the installation process can be carried out without any potential risk.
Once the new integrated LED light fixture has been installed, it is crucial to test it to ensure that it is working correctly. Start by turning on the power to the circuit that the fixture is connected to. Then, switch on the light and observe its performance. Check if the light is bright enough, if the color temperature is suitable for the room, and if there are any flickering or buzzing sounds. If everything looks and sounds right, turn off the light and power, and continue to enjoy your newly installed integrated LED light fixture. However, if there are any issues, troubleshoot the problem and fix it before using the light fixture.
In summary, changing an integrated LED light fixture can be accomplished in just a few simple steps. First, turn off the power supply to the fixture by flipping the circuit breaker or removing the fuse. Next, remove the old fixture by unscrewing or unclipping it from the ceiling. Once the old fixture is removed, disconnect the wiring and remove any mounting hardware. Finally, install the new fixture by connecting the wiring and securing it to the ceiling with the mounting hardware. Turn the power back on and test the new fixture to ensure it is functioning properly. With these easy steps, you can update the look of your space and improve its lighting in no time!
It is crucial to remember that safety should always be the top priority when handling any electrical work. Before starting any project, ensure that you have turned off the power supply. Make sure to wear personal protective equipment, such as gloves and goggles, to avoid any injury. Additionally, use insulated tools to prevent electrical shock. It is essential to follow the instructions provided and not take shortcuts, as they can lead to danger. Remember to take your time and work carefully to ensure that the job is done correctly and safely. By following these safety precautions, you can complete your integrated LED light fixture change with confidence and security.
If you’re feeling hesitant about changing an integrated LED light fixture, don’t be! With just a few simple steps, you can easily accomplish this task on your own. Not only will you save money on hiring a professional, but you’ll also gain a sense of satisfaction from completing a DIY project. Plus, with the detailed instructions provided in this quick guide, you’ll have all the information you need to successfully change out your old fixture for a new one. So why not give it a try? You might surprise yourself with how capable you are and end up with a beautifully updated lighting fixture.
Conclusion

In conclusion, changing an integrated LED light fixture is a simple process that can be completed in just a few easy steps. By following the instructions outlined in this quick guide, you can successfully remove the old fixture and install a new one without the need for professional assistance. Whether you are looking to upgrade your lighting or simply replace a faulty fixture, the process is straightforward and can be completed quickly and easily. With the right tools and a little bit of patience, anyone can tackle this project and enjoy the benefits of a new, efficient LED light fixture in their home or workspace.


