Light Up Your Space: A StepbyStep Guide on How to Connect LED Light Strips
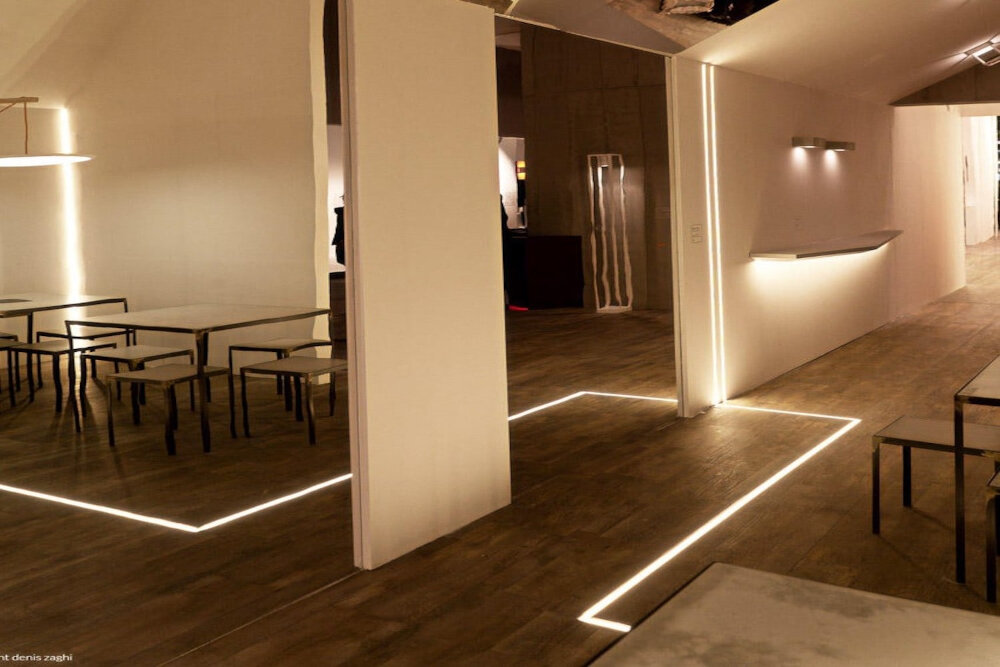
Lighting plays a vital role in setting the ambiance of any space. It’s not only a means of illuminating a room but also a way of expressing one’s creativity and personality. LED light strips have become increasingly popular in recent years due to their versatility and energy-efficient properties. These tiny lights can transform a dull space into a vibrant one and can be easily installed with a few simple steps. Whether you’re looking to enhance your room’s aesthetics or create a cozy atmosphere, this guide on connecting LED light strips will help you achieve your desired lighting effect. If you’re new to LED light strips, don’t worry, as this guide will provide you with a step-by-step process on how to connect them. You don’t need to be an expert in electrical engineering or have any prior experience in lighting installations. All you need is a basic understanding of how to plug in a device and a few materials that you can easily find at your nearest hardware store. So, let’s get started on this exciting journey of lighting up your space with LED light strips!
LED light strips are a versatile lighting solution that can be used in a variety of settings. Made up of small, energy-efficient LED bulbs mounted on a flexible circuit board, these strips can be cut and connected to fit any space. LED light strips are available in a wide range of colors, from warm white to cool white to multicolor, making them perfect for adding ambiance to any room. The benefits of LED light strips include their low energy consumption, long lifespan, and ease of installation. They can be used to highlight architectural features, create a specific mood or atmosphere, or simply add a pop of color to a space. With their flexibility, durability, and energy efficiency, LED light strips are an excellent choice for anyone looking to add some extra light to their home or business.
Proper installation and connection are crucial when it comes to LED light strips. This is because an improper installation or connection can lead to a malfunctioning light strip, which not only defeats the purpose of the strip but can also be a potential hazard. A poorly installed light strip can cause short circuits, fires, and other electrical hazards. In addition, a properly installed LED light strip will ensure that it is functioning at maximum efficiency, providing the intended illumination and ambiance. Therefore, it is essential to follow the step-by-step guide to the letter to ensure that the installation and connection of your LED light strip is done correctly and safely.
Understanding the LED Light Strip
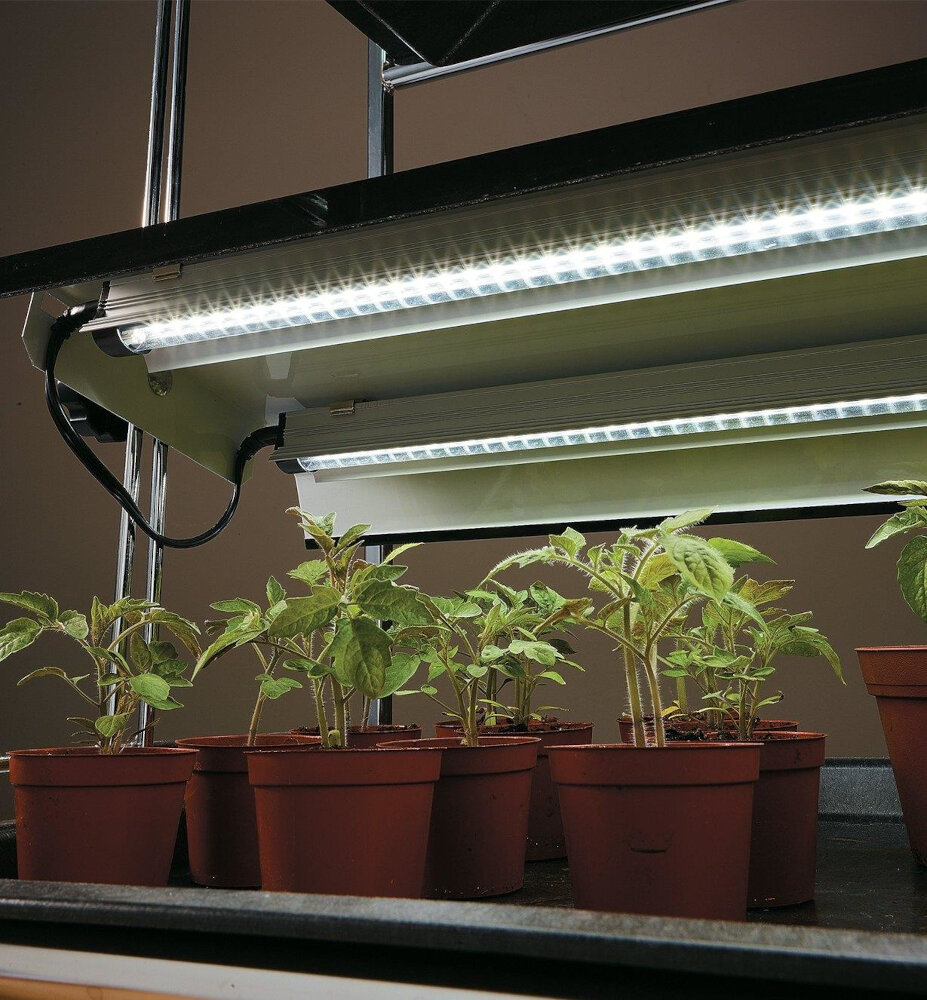
LED light strips have become increasingly popular in recent years due to their versatility and energy efficiency. These strips are a type of thin, flexible circuit board that contains multiple LED lights. They can be cut to any length and come in a variety of colors, making them a great option for adding ambiance and style to any room. LED light strips are also easy to install and can be connected to a power source using a simple connector. Understanding the components of an LED light strip is crucial to successfully installing and using them. The LED lights are the most important part of the strip, and they come in different colors and brightness levels. The circuit board connects the lights and provides power to them, and the adhesive backing allows the strip to be attached to any flat surface. The power source can either be a battery pack or a wall adapter, and the connector is used to connect the strip to the power source. By understanding these components and how they work together, anyone can easily install and enjoy the benefits of LED light strips in their home or office.
LED light strips are composed of several components that work together to create a stunning lighting effect. The most important part of the LED light strip is the LED chip, which emits light when an electric current is passed through it. These chips are mounted onto a flexible circuit board, which allows the strip to be bent and shaped to fit any space. The circuit board is then covered in a protective layer, such as silicone or epoxy resin, to protect the delicate components from damage. Finally, the strip is connected to a power source, either through a battery pack or a power adapter, which supplies the necessary voltage to the LEDs. With these components working together, LED light strips can provide a beautiful and versatile lighting solution for any space.
There are various types of LED light strips available in the market that cater to different lighting needs. The most common types include single color, RGB, and RGBW. Single color LED strips come in a single hue and are suitable for ambient lighting or highlighting specific areas of a room. RGB LED strips allow for color changing and can create a dynamic ambiance, perfect for parties or events. RGBW LED strips are similar to RGB but also include a white LED chip, providing a more natural and brighter white light. They are ideal for task lighting or creating a brighter ambiance. Ultimately, the choice of LED strip will depend on the intended use and personal preference.
When choosing LED light strips, there are several factors to consider to ensure you get the right one for your needs. Firstly, you need to determine the brightness level required for your space. The brightness of LED light strips is measured in lumens, so consider the lumens per foot or meter when selecting the product. Secondly, you need to decide on the color temperature that is appropriate for your space. LED light strips come in a range of color temperatures, from warm white to cool white, and each provides a different ambiance. Thirdly, you need to consider the length of the LED light strip, as this will determine the coverage area. Lastly, look for features such as waterproofing, dimming options, and ease of installation, to ensure your LED light strips are functional and efficient.
Preparation
Preparing for any project is essential, and connecting LED light strips is no exception. Before beginning, there are a few things to consider. First, determine where you want to install the LED light strips. This will help you decide how many strips you need and what lengths they should be. It is also important to measure the area where the strips will be installed to ensure that you purchase the correct length. Once you have determined the length and number of strips needed, it is time to select the appropriate power supply. The power supply should match the voltage and wattage requirements of the LED light strips, and it should be rated for indoor or outdoor use depending on where the strips will be installed. Additionally, it is important to have the necessary tools on hand, such as scissors, wire cutters, and a screwdriver. After gathering all necessary materials, it is time to prepare the area where the LED light strips will be installed. This involves cleaning the surface where the strips will be attached to ensure that they will adhere properly. If the surface is not clean, the strips may not stick or may fall off over time. Once the surface is clean, it may be necessary to use mounting clips or adhesive tape to secure the strips in place. This will help prevent the strips from sagging or falling down over time. It is also important to plan the wiring and routing of the LED light strips before installation. This will help ensure that the wiring is neat and organized, and that there is enough slack in the wiring to connect the strips to the power supply. By taking the time to properly prepare for the installation of LED light strips, you can ensure that your project will be a success and that your space will be beautifully illuminated.
When it comes to connecting LED light strips, having the right tools and materials is crucial. Firstly, you’ll need the LED light strips themselves, which come in various lengths and colors. You’ll also need a power supply, preferably one that matches the voltage and wattage of your LED light strips. A controller is also essential, as it allows you to adjust the brightness, colors, and effects of your LED light strips. Other tools you’ll need include wire cutters, a soldering iron, and electrical tape. Additionally, it’s important to have a clean and dry work area, as well as protective gear, such as gloves and safety glasses, when working with electricity. By having all the necessary tools and materials, you can ensure a safe and successful installation of your LED light strips.
When it comes to connecting LED light strips, safety should always be a top priority. Before starting any electrical work, make sure to turn off the power source and unplug all devices. Wear protective gear like gloves and safety glasses to prevent any injuries. Make sure to follow the manufacturer’s instructions carefully and never exceed the maximum wattage or voltage. Inspect all wires and connections before turning the power back on to ensure everything is secure and in good condition. Lastly, never leave any electrical work unfinished or unattended, and always seek professional help if you’re unsure about any steps. By observing these safety measures, you can ensure a safe and successful LED light strip installation.
Measurement and planning is a crucial aspect when it comes to connecting LED light strips. Before embarking on the installation process, it is important to measure the length of the area where the LED light strips will be installed. This will ensure that you acquire the right length of LED light strips. Proper planning is also important to ensure that you have all the necessary tools and accessories for the installation process. A well-planned installation process will not only save time but also minimize the chances of errors that may occur during the installation process. It is important to also consider the power source and the type of LED strip lights that will be suitable for your space. By taking the time to measure and plan, you can ensure that your LED light strips are properly installed and will light up your space effectively.
Installation and Connection
Installation and connection of LED light strips are crucial steps that require careful attention to detail. The first step is to ensure that you have all the necessary tools and materials required. These may include power supply, LED light strips, connectors, and adhesive tapes. Before starting the installation, it is essential to identify the areas where you want to install the LED light strips. This will help you to determine the length of the LED strips required for each section. Once you have identified the areas to install the LED light strips, the next step is to connect the strips together. This can be done by using connectors, which come in different types, including solderless connectors, corner connectors, and T-shape connectors. It is vital to ensure that the connectors match the type of LED light strips you are using to avoid compatibility issues. After connecting the LED light strips, the next step is to connect them to the power supply. This can be done by using a power adapter or a transformer, depending on the type of LED light strips you are using. Finally, ensure that all the connections are secure and that the LED light strips are properly installed before turning on the power.
If you’re looking to add a bit of flair to your living space, LED light strips can be a great option. The installation process is relatively simple and can be done in just a few steps. First, measure the space where you want to install the lights and purchase the appropriate length of LED strips. Next, clean the surface where you’ll be attaching the strips and ensure it’s dry before sticking the adhesive side of the lights to it. Then, connect the power supply to the LED strip and plug it into an outlet. Finally, turn on the lights and enjoy the new ambiance in your space. With just a bit of effort and a few tools, you can add a unique touch to your home decor.
Connecting LED light strips to the power source is a straightforward process that requires minimal technical expertise. The first step is to ensure that the power source is compatible with the LED light strip’s voltage and amperage specifications. Next, identify the positive and negative terminals on both the LED light strip and the power source. Once identified, connect the positive and negative terminals of the LED light strip to the corresponding terminals on the power source. It is essential to use the proper connectors or solder the wires to ensure a secure and stable connection. After connecting the LED light strip to the power source, turn on the power source and enjoy the vibrant and colorful light display. With these simple steps, anyone can add an exciting and visually appealing touch to their space.
During the installation of LED light strips, it’s common to encounter a few issues that can be easily resolved with some troubleshooting techniques. One of the most common problems is that the LED lights don’t turn on, which could be due to incorrect wiring, a faulty power supply, or a damaged strip. Another issue is that the lights flicker or have a dim output, which can be caused by loose connections or insufficient power supply. Additionally, if the lights don’t stick properly, it might be due to a dirty or uneven surface. To solve these problems, it’s essential to double-check the wiring, ensure that the power supply matches the strip’s requirements, and clean the mounting surface before applying the adhesive. By following these troubleshooting techniques, you can successfully install LED light strips and brighten up your space.
Creative Ideas for Using LED Light Strips
LED light strips are versatile and can be used in various creative ways to enhance the ambiance of a space. One creative idea is to use them to highlight artwork or photographs. By placing the LED light strips behind or around the artwork, it can create a beautiful and dramatic effect that draws attention to the pieces. Additionally, LED light strips can be used to create a unique and modern headboard in a bedroom. By placing the light strips behind the bed, it can create a soft and relaxing glow that adds a touch of luxury to the room. Another creative idea for using LED light strips is to create a unique and functional workspace. By placing the light strips under shelves or cabinets, it can provide additional lighting that is both practical and visually appealing. Additionally, LED light strips can be used to create a beautiful and relaxing atmosphere in a bathroom or spa. By placing the light strips around a mirror or bathtub, it can create a soft and calming glow that enhances the overall ambiance of the space. Overall, the possibilities for using LED light strips are endless, and with a little creativity, they can transform any space into a beautiful and inviting sanctuary.
LED light strips are a versatile and affordable way to add ambiance and style to any space. There are several ways to use them to enhance the overall look and feel of your room. For instance, you can install them under cabinets to create a warm and inviting atmosphere in your kitchen. You can also add LED light strips to your living room to highlight your favorite artwork or create a cozy reading nook. Additionally, you can use these light strips to create a stunning accent wall or to highlight architectural details like crown molding or columns. With endless possibilities, LED light strips are an easy and creative way to add a touch of personality to any room.
Creating unique lighting effects can transform a plain and dull space into a stunning and inviting one. To achieve this, it is important to experiment with different colors, intensities, and placements of the LED light strips. Playing with contrasts, such as pairing warm and cool colors, or using the lights to highlight specific areas, can create a dynamic and visually appealing atmosphere. Another tip is to layer the lights, adding depth and dimension to the space. Additionally, incorporating dimmer switches or smart home technology can allow for greater control and customization of the lighting effects. With these tips, the possibilities for creating a unique and personalized space are endless.
In contrast to traditional lighting options, LED light strips come with a multitude of benefits. Firstly, LED light strips are significantly more energy-efficient than their traditional counterparts, and they can save users up to 75% in energy costs. Additionally, LED light strips have a long lifespan, which means they do not need to be replaced frequently, reducing maintenance costs. They also emit low heat, making them safer and more comfortable to use, and are available in a variety of colors and brightness levels, making them highly customizable to suit various needs and preferences. Lastly, LED light strips are incredibly versatile and can be used for various lighting purposes, including task lighting, mood lighting, and accent lighting, making them an excellent choice for any space.
LED light strips are an excellent choice for illuminating any space due to their numerous benefits. They are energy-efficient, consuming only a fraction of the energy used by traditional incandescent bulbs, and have a longer lifespan of up to 50,000 hours. LED light strips also emit minimal heat, making them a safer option for indoor use. The strips are flexible and can be easily cut to fit any desired length, making them ideal for customization. Additionally, they come in a variety of colors and can be programmed to change colors or brightness levels, creating a dynamic ambiance. Overall, LED light strips are a versatile and practical way to enhance any space’s aesthetic appeal while also providing functional lighting.
Proper installation and connection are crucial when it comes to lighting up your space with LED light strips. A poorly installed LED light strip can not only affect the aesthetic appeal of your space but also pose a safety hazard. It is important to carefully follow the manufacturer’s instructions and ensure that the wiring is correctly connected to avoid any electrical mishaps. Additionally, proper connection and installation ensure that the LED light strips function efficiently and have a longer lifespan. Taking the time to correctly install and connect your LED light strips will not only enhance the ambiance of your space but also ensure its safety and longevity.
If you’re looking to add a unique touch to your living space, LED light strips are a great option to consider. These versatile strips come in a variety of colors and can be affixed to just about any surface, making them perfect for accenting your home’s features. Whether you want to highlight your favorite piece of artwork or create a cozy ambiance in your bedroom, LED light strips can help you achieve your design goals. Plus, they’re energy-efficient and can last for years, so you won’t have to worry about constantly replacing bulbs. So why not give LED light strips a try and see how they can transform your space?
Conclusion
In conclusion, connecting LED light strips is a simple and straightforward process that can transform the ambiance of any space. With the step-by-step guide outlined in this article, anyone can easily install and connect LED light strips without the need for professional assistance. These versatile and energy-efficient lighting options can be used to enhance the aesthetic appeal of any room and create a personalized atmosphere. So why not try connecting LED light strips today and brighten up your space in a unique and creative way?

