LED Light Strip Repair Made Easy: Simple Steps to Fix Your Illumination Woes
LED light strips are a popular form of home lighting that has become increasingly prevalent in recent years due to their energy efficiency and versatility. They are used for a variety of applications, from accent lighting to full-room illumination. However, like any electronic device, LED light strips can experience malfunctions and require repairs. Fortunately, repairing LED light strips is a simple process that can be accomplished by anyone with basic technical skills. In this article, we will guide you through the steps required to fix your LED light strip, from identifying the problem to replacing damaged components. Whether your light strip is not turning on, flickering, or showing uneven brightness, we will show you how to diagnose and fix the issue with ease. With our simple and concise instructions, you will be able to get your LED light strip back to its full functionality in no time. So, let’s get started on repairing your illumination woes!
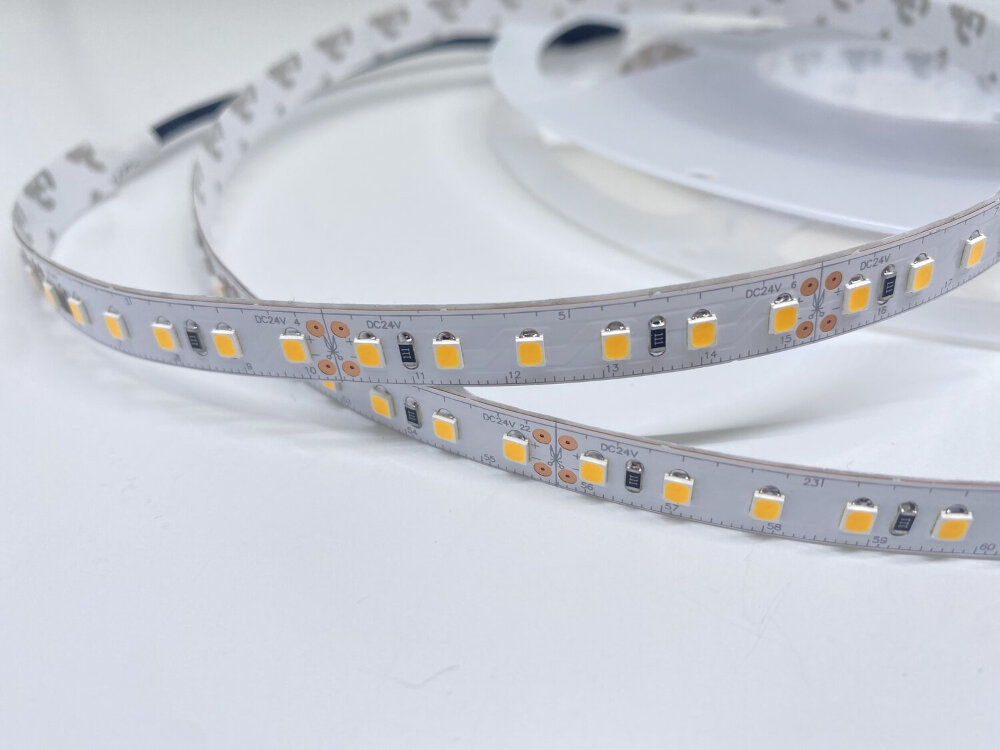
LED light strips are a popular and versatile lighting solution that can be used in a wide range of applications. They consist of a series of small LED lights that are mounted on a flexible strip and can be cut to length to fit any space. LED light strips are energy-efficient, long-lasting, and come in a variety of colors and brightness levels. They are commonly used for accent lighting, under cabinet lighting, and even as a replacement for traditional lighting fixtures. Despite their durability, LED light strips can sometimes malfunction or become damaged. In this article, we will provide simple steps to repair your LED light strips and restore them to their full functionality.
LED light strips are increasingly popular due to their energy efficiency and versatility. However, they are not immune to issues that require repair. Some of the most common problems with LED light strips include flickering, dimming, and complete failure to light up. These issues can occur due to faulty wiring, damaged components, or poor installation. Repair is necessary to ensure that the LED light strips function properly and provide the desired illumination. Leaving these issues unaddressed can lead to further damage and even safety hazards. With the right tools and techniques, LED light strip repair can be a simple and cost-effective solution.
Tools You Will Need

When it comes to fixing an LED light strip, having the right tools on hand can make all the difference. First and foremost, you will need a soldering iron, as this will be essential for reattaching any disconnected wires or repairing broken connections. Additionally, a multimeter can also come in handy for testing the electrical connections and ensuring everything is working properly. A wire stripper may also be needed to remove any insulation from the wires before soldering them together. Finally, some electrical tape or heat shrink tubing can provide an extra layer of protection and help keep the wires in place. Aside from these essential tools, having a clean and well-lit workspace is also important. A magnifying glass or a pair of reading glasses can help you see small details more clearly, while a workbench or table can provide a stable surface for soldering and testing the LED light strip. Additionally, having a set of pliers or tweezers can help you manipulate small parts and wires with precision. By having all of these tools and a dedicated workspace on hand, you can make the LED light strip repair process much smoother and more efficient, allowing you to quickly and effectively fix any illumination woes you may be experiencing.
LED light strips are a great way to add a pop of color to any space, but like any other electronic, they can malfunction over time. Luckily, repairing your LED light strips is a fairly straightforward process with the right tools. To get started, you will need a few essential tools such as a multimeter, wire cutters, and soldering iron. A multimeter is necessary to test the electrical current and voltage of the LED light strip, while wire cutters are required to cut the wires to the appropriate length. A soldering iron is an essential tool for repairing broken wires or connections. Additionally, a heat gun or hairdryer can be used to soften the adhesive on the LED strip and help remove it from its surface. With these tools at hand, you’ll be able to repair your LED light strip and enjoy its vibrant illumination once again.
The LED light strip repair process requires a few essential tools that are readily available. First and foremost, a multimeter is required to check the continuity of the LED light strip’s circuit. A soldering iron is also necessary to resolder any broken connections or replace faulty components. For cutting and stripping wires, wire cutters and strippers are required. Additionally, a heat gun or hairdryer is useful for removing old adhesive and applying new adhesive to secure the repaired strip in place. Finally, a replacement LED strip or individual LED components may be necessary, depending on the severity of the damage. These tools are essential in making the LED light strip repair process easy and straightforward.
Identifying the Problem

The first step in repairing an LED light strip is to identify the problem. There are several common issues that can occur with these lighting fixtures, including loose connections, damaged wires, and burned-out LEDs. To determine the cause of the problem, start by inspecting the light strip for any obvious signs of damage or wear. Check the wiring and connections to make sure they are secure and in good condition. You may also want to test the power supply to ensure that it is functioning properly. Once you have identified the problem, you can begin to troubleshoot and repair the LED light strip. Depending on the issue, you may need to replace a damaged component, re-solder a loose connection, or simply replace a burnt-out LED. It is important to take your time and work carefully when making repairs to ensure that you do not cause any additional damage to the light strip. With a little patience and some basic tools, you can easily fix most LED light strip problems and restore your illumination to its former glory.
If you’re experiencing issues with your LED light strip, there are a few simple steps you can take to identify the problem. First, check the power source and make sure it’s properly connected and working. Next, inspect the wiring and look for any visible damage or loose connections. If everything appears to be in order, try replacing the bulbs or testing the circuit board with a multimeter to determine if there’s a faulty component. By taking these steps, you can quickly and easily troubleshoot your LED light strip and get it back up and running in no time.
LED light strips are an excellent way to add ambiance and style to any room. However, like all technology, these strips can sometimes have problems. One of the most common issues is flickering or dimming of the lights. This can be caused by a loose connection or a faulty power supply. Another issue is when the lights don’t turn on at all, which can be caused by a blown fuse or a damaged LED. Finally, some LED light strips may have a color imbalance, where one section of the strip is a different hue than the others. This can be caused by poor manufacturing or damage to the strip itself. Understanding the common problems and their causes can help you troubleshoot and repair your LED light strip with ease.
Troubleshooting and diagnosing the problem with your LED light strip can be a daunting task, but there are some tips that can help make the process easier. First, check the power source and ensure that it is functioning properly. Next, inspect the light strip for any physical damage or loose connections. If everything seems fine, use a multimeter to test the continuity of the circuit. If there are any breaks in the circuit, you will need to identify the damaged section and replace it. It is also important to check for any software or programming issues that may be causing the problem. By following these steps, you can effectively troubleshoot and diagnose the issue with your LED light strip and get it back to working order in no time.
Repairing the LED Light Strip
LED light strips are a popular choice for illuminating various indoor and outdoor spaces. However, like any other electronic device, these light strips can break down over time. If you find that your LED light strip is not functioning properly, there is no need to panic. Repairing an LED light strip is not as complicated as it may seem. With a few simple steps, you can fix the problem and enjoy bright, vibrant lighting once again. The first step to repairing an LED light strip is to identify the problem. This can be done by examining the entire length of the strip to check for any physical damage or loose connections. If you find any physical damage, you may need to replace the affected part. If the damage is due to a loose connection, you can simply re-solder the connection to fix the problem. Additionally, you should check the power source and ensure that it is providing the correct voltage to the light strip. If the power source is faulty, you may need to replace it with a new one. By following these simple steps, you can repair your LED light strip and enjoy beautiful, bright lighting once again.
If your LED light strip is not working, don’t worry, repairing it is easy. First, check the power source and make sure it’s working correctly. Then, inspect the strip for any visible damage or loose connections. If there is visible damage, cut out the damaged section and splice the ends back together using a soldering iron and electrical tape. If there are loose connections, use a wire stripper to expose the wires and twist them together tightly, then cover with electrical tape. Test the strip to ensure it’s working correctly. With these simple steps, you can quickly repair your LED light strip and enjoy the illumination you desire.
LED light strips are a great way to add some ambience to any space, but they can occasionally experience some common issues. Luckily, there are specific techniques you can use to fix them. If your LED light strip isn’t lighting up at all, start by checking the power source and ensuring that it’s properly connected. If you notice that certain sections of the strip aren’t lighting up, there may be a problem with the soldering or wiring. In this case, you can try re-soldering the connection or replacing the damaged section of the strip. If your LED light strip is flickering, it could be due to a loose connection or a faulty power supply. Check all connections and replace the power supply if necessary. With these specific techniques, you can easily fix common LED light strip issues and enjoy your beautifully illuminated space once again.
Preventing future problems with your LED light strip starts with proper installation and maintenance. Make sure to follow the manufacturer’s instructions carefully and avoid overloading the strip with too many accessories. Regularly check the strip for any signs of wear and tear, such as frayed wires or loose connections, and address them immediately. It’s also important to keep the strip clean and dry, as moisture can damage the components. Finally, invest in a surge protector to protect against power surges and keep your LED light strip functioning properly for years to come. By taking these simple steps, you can avoid future problems and enjoy the full benefits of your LED light strip.
Frequently Asked Questions
Frequently Asked Questions (FAQs) are an essential component of any guide or tutorial, and the LED light strip repair is no different. A well-crafted FAQ section can help readers quickly find the answers to common questions and save time. In this article, we have included a comprehensive FAQ section that covers various aspects of LED light strip repair, from troubleshooting to safety precautions. The section is designed to provide readers with useful information that can help them fix their illumination woes with ease. The FAQ section covers a wide range of topics, including how to identify common LED light strip problems, what tools are needed for repair, and how to prevent future issues. It also provides tips on how to make repairs safely and effectively. The section is written in a clear and concise manner, making it easy for readers to understand and follow. Whether you are a DIY enthusiast or a professional electrician, the FAQ section is a valuable resource that can help you get the most out of your LED light strip repair projects. So, if you want to learn more about LED light strip repair, be sure to check out the FAQs section.
LED light strips have become increasingly popular for their versatility and energy efficiency. However, like any electronic device, they can sometimes break or malfunction. When this happens, it’s important to know how to repair them properly. Some common questions that people have about LED light strip repair include: How do I identify the problem? Can I fix it myself or do I need a professional? What tools and materials do I need? What are some common mistakes to avoid? By following a few simple steps, you can easily repair your LED light strip and get it working like new again.
LED light strips are a popular lighting solution due to their energy efficiency and versatility. However, like all electronic devices, they can sometimes malfunction or stop working altogether. If you’re experiencing illumination woes with your LED light strip, don’t despair! Repairing them can be a simple process if you follow a few basic steps. First, identify the cause of the problem. Is it a loose connection or damaged wire? Once you’ve pinpointed the issue, gather your tools and get to work. Some common fixes include soldering broken connections, replacing damaged wires, or checking the power source. With a little effort and know-how, you can have your LED light strip back up and shining bright in no time.
LED light strips have become increasingly popular for their energy efficiency, versatility, and ease of use. However, like any electronic device, they are prone to damage and malfunction. That’s where LED light strip repair comes in. Repairing your LED light strips can save you money on replacement costs, reduce waste, and ensure that your lighting system is fully functional. Additionally, repairing your LED light strips allows you to customize and modify your lighting system to fit your specific needs. With simple steps and the right tools, LED light strip repair can be made easy and accessible to anyone, making it an essential skill for any DIY enthusiast or homeowner.
If you’re feeling intimidated by the prospect of repairing your LED light strip, don’t be! With a few simple tools and a bit of know-how, anyone can fix their illumination woes. Not only will you save money by doing it yourself, but you’ll also gain a sense of satisfaction from the accomplishment. Don’t let the fear of failure hold you back – take the plunge and give it a try! You might just surprise yourself with how capable you are. And if you do run into any issues, remember that there are plenty of online resources and communities that can offer guidance and support. So go ahead, grab your tools, and get ready to become a DIY repair master!
To ensure a successful LED light strip repair, it is crucial to read the manufacturer’s instructions thoroughly before beginning. Make sure to have all the necessary tools and materials ready, and work in a well-lit and safe environment. When diagnosing the issue, start with the simplest solutions first, such as checking for loose connections or damaged wires. Take your time and be patient when making repairs, as rushing can lead to mistakes and further damage. Once the repair is completed, test the light strip to ensure it is working correctly before reinstalling it. Finally, to prevent future issues, take care of your LED light strip by keeping it clean and avoiding overloading it with too many connections. With these tips and a bit of effort, your LED light strip will be back to shining bright in no time.
Conclusion

In conclusion, repairing LED light strips is not as daunting as it may seem. With a few simple steps and the right tools, you can fix your illumination woes and have your lights shining bright once again. Whether it’s a loose connection or a burnt-out LED, identifying the issue and taking the necessary steps to repair it can save you time and money. Don’t let a malfunctioning LED light strip dim your mood, take on the challenge and bring back the glow to your space.