LED Light Driver Repair: A StepbyStep Guide
LED lights are one of the most popular lighting solutions in homes and workplaces these days. They are energy-efficient, long-lasting, and versatile, making them a go-to option for people looking for cost-effective lighting solutions. However, despite their durability, LED light drivers can sometimes malfunction, causing the lights to flicker or not turn on at all. If you’re facing such issues with your LED lights, don’t worry! This step-by-step guide will help you diagnose and repair the problem with ease. The guide covers everything you need to know about repairing LED light drivers, from identifying the problem to sourcing replacement parts and tools. It includes detailed instructions and diagrams that make the repair process easy to follow, even if you’re a novice. Whether you’re dealing with a single bulb or a complex lighting system, this guide will help you get your LED lights up and running in no time. So, let’s dive in and explore the world of LED light driver repair together!
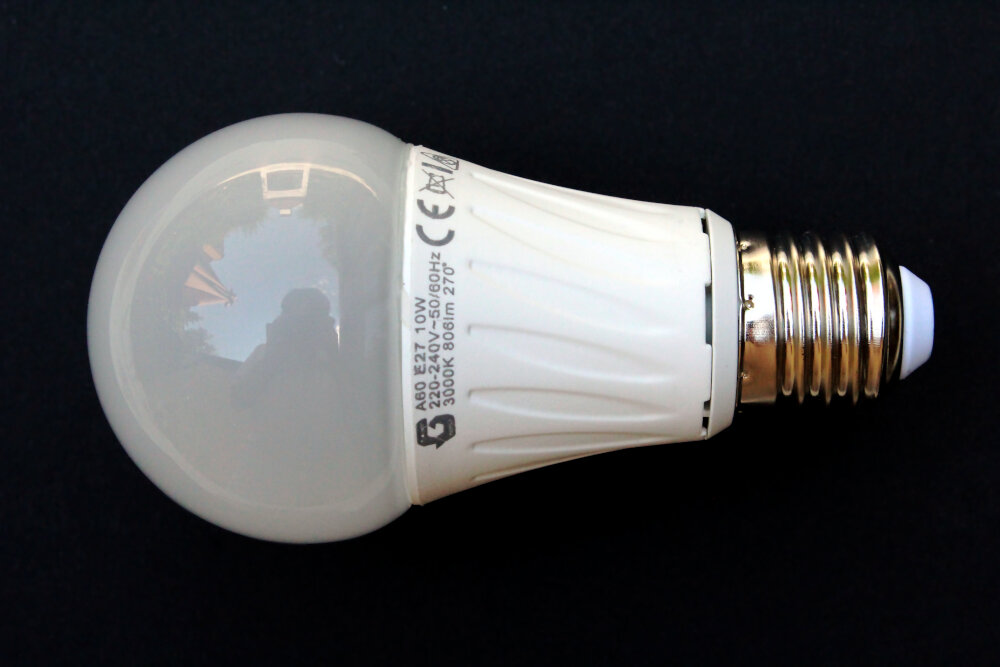
LED light drivers are devices that regulate the power supply to LED lights. They are crucial for the proper functioning and longevity of LED lights. The driver converts the incoming AC voltage to a DC voltage suitable for the LED light and also regulates the current flowing through the light. This helps to prevent damage to the LED by ensuring that it doesn’t receive too much power. LED light drivers also play a role in controlling the brightness and color of the LED light. In short, LED light drivers are an essential component for LED lights to operate efficiently, and their repair or replacement may be necessary to maintain the functionality of the LED light.
LED light drivers are an essential component of any LED lighting system, but they can also be a source of frustration for users when they malfunction. Some of the most common issues with LED light drivers include flickering or flashing lights, dimming or uneven brightness, and outright failure to turn on. These issues can be caused by a variety of factors, including power surges, voltage fluctuations, overheating, or simply wear and tear over time. Repairing a faulty LED light driver may seem like a daunting task, but with the right tools and guidance, it is possible to troubleshoot and fix many of these issues yourself. By following a step-by-step guide, you can identify the root cause of the problem and take the necessary steps to get your LED lighting system back up and running smoothly.
Tools and Materials Needed
When it comes to repairing an LED light driver, having the right tools and materials is crucial. You’ll need a soldering iron, solder wire, a multimeter, and a screwdriver set. The soldering iron and wire are used to remove and replace faulty components on the driver board. The multimeter is used to measure voltage, current, and resistance, which is necessary to diagnose the problem accurately. The screwdriver set is needed to open the driver’s casing and access the internal components. In addition to the tools mentioned above, you’ll also need some materials to replace faulty components. These include capacitors, resistors, diodes, and transistors. You may also need a replacement IC chip if the original one is beyond repair. It’s essential to purchase high-quality components to ensure the longevity of the repair. Using cheap or subpar components may result in the driver failing again in a short amount of time. With the right tools and materials, repairing an LED light driver can be a straightforward process.
Repairing an LED light driver is a skill that requires the right tools for the job. Some of the essential tools needed include a multimeter, soldering iron, desoldering pump, wire cutters, pliers, and screwdrivers. A multimeter is necessary for measuring voltage, current, and resistance. A soldering iron is used to melt solder and join parts together. A desoldering pump is essential in removing excess solder from the circuit board. Wire cutters and pliers are used to cut and bend wires. Lastly, screwdrivers come in handy when opening and closing the LED light driver casing. Having these tools at your disposal will make the repair process easier and ensure that the LED light driver is fixed correctly.
When you are planning to repair an LED light driver, there are certain materials that you will need to have on hand. Firstly, you will need a multimeter to test the voltage and the current flow in the driver. You will also need a soldering iron, soldering wire, and a desoldering pump to remove and replace any electronic components. A screwdriver set will be required to open the driver casing and a heat gun can be used to remove any adhesive materials. Additionally, it is recommended to have a magnifying glass, tweezers, and a cleaning brush to aid in the repair process. It is important to have all the necessary materials before starting the repair to ensure a smooth and successful process.
StepbyStep Guide to Repairing LED Light Drivers

LED light drivers are a vital component of LED lighting systems, used to regulate the voltage and current supplied to the LEDs. When a driver fails, the LEDs may not work at all, flicker or dim. Replacing the driver can be expensive, but with the right tools and knowledge, repairing the driver can be a much more affordable solution. This step-by-step guide will provide you with the necessary instructions to repair your LED light driver safely and effectively. The first step in repairing your LED light driver is to identify the problem. This can be done by testing the voltage and current output of the driver using a multimeter. If the voltage or current output is below the rated level, then the driver may be faulty. The next step is to disassemble the driver and check for any visible damage, such as burnt or swollen components. Once the damaged component has been identified, it can be replaced with a new one using a soldering iron. It is important to ensure that the replacement component is of the same type and rating as the one being replaced. After replacing the component, the driver can be reassembled and tested to ensure that it is working correctly. By following these steps, you can repair your LED light driver and save money on replacement costs.
The first step to repairing an LED light driver is to identify the issue at hand. This involves examining the driver and observing any signs of damage or malfunction. Common issues that may arise include flickering lights, dimming lights, or a complete failure to turn on. It is important to thoroughly inspect the driver and also take note of any changes in behavior or performance over time. By properly identifying the issue, one can proceed with the appropriate repairs and ensure that the LED light is functioning at its optimal level.
Step 2 of the LED Light Driver Repair process is crucial as it involves the disconnection of the power source. This is a critical safety measure that must be taken before proceeding with any repair work. Disconnecting the power source ensures that there is no electricity flowing through the LED light driver, thereby reducing the risk of electrical shock or any other unfortunate incident. It is important to note that some LED light drivers may have built-in capacitors that can store electrical charge even after the power source has been disconnected. Therefore, it is advisable to wait for a few minutes after disconnecting the power source to allow any residual charge to dissipate before commencing with the repair work. Overall, disconnecting the power source is a vital step that must be taken seriously to prevent any accidents or injuries during the LED light driver repair process.
In this crucial step of the LED light driver repair guide, the device is carefully opened to gain access to the inner components. The process of opening the driver requires a certain degree of caution and precision to prevent any damage to the device. The use of appropriate tools and techniques is essential to avoid any potential risks. Once the driver is opened, the electronic circuitry and other components become visible, which makes it easier to identify the faulty parts that require repair or replacement. Therefore, it is imperative to follow this step carefully and skillfully to ensure the success of the repair process.
Step 4 of the LED Light Driver Repair guide involves checking for any loose connections in the circuit board. Loose connections can lead to intermittent or completely failed connections, which can cause the LED light to malfunction or not function at all. It is essential to carefully inspect the circuit board for any loose wires or solder joints using a magnifying glass or microscope. Once identified, the loose connections can be re-soldered or reconnected to ensure a secure and reliable connection. Neglecting to check for loose connections can lead to recurring issues and potentially damage the circuit board beyond repair, making this step critical in the LED light driver repair process.
Step 5 in the LED Light Driver Repair process involves meticulously checking for any burnt components. Burnt components can be the result of overloading, short circuits, or excessive heat, and can cause the driver to malfunction or fail completely. It is important to inspect all components thoroughly, paying close attention to any discoloration, deformities or melting. Burnt components must be replaced, and it is critical to use the appropriate replacement parts to ensure the driver functions correctly. Taking the time to carefully examine the components can save time and money in the long run, preventing further damage or potential hazards.
Step 6 of the LED Light Driver Repair guide involves replacing any faulty components that may be identified during the previous steps. This is a critical step in the process, as faulty components can cause a variety of problems, including flickering lights, dimming, and even complete failure of the driver. It is important to carefully identify and replace any faulty components with high-quality replacements to ensure the long-term reliability and performance of the LED light. This step requires knowledge of electronics and the ability to safely handle and replace components, so it is recommended to consult a professional if you are unsure of your abilities. By replacing faulty components, you can effectively extend the lifespan of your LED light and ensure it operates at its full potential.
After the successful repair of the faulty component, it is time to reassemble the LED light driver. This step is crucial as it ensures that all the components are securely in place, and the device is ready to function optimally. Firstly, carefully place the circuit board back into the housing and reattach any screws or clips that were removed during the disassembly process. Next, reconnect any wires or cables that were previously disconnected, ensuring that they are correctly positioned and secure. Finally, reattach the LED light bulb and test the device to make sure that it is working correctly. By following this step-by-step guide, you can successfully repair your LED light driver and enjoy uninterrupted illumination for years to come.
After successfully repairing the LED Light Driver, the next step is to test it to ensure that it is functioning properly. To do this, plug in the repaired LED Light Driver and turn on the power. Observe the driver closely, and check if the LED lights are turning on and off without any flickering or dimming. You can also use a multimeter to measure the voltage, current, and resistance of the driver to ensure that it is operating within the specified range. Testing the repaired LED Light Driver is crucial to ensure that it is safe and reliable to use, and it also gives you the satisfaction of knowing that your repair skills have paid off.
Troubleshooting Tips
When repairing an LED light driver, there are times when it may not work as expected even after following the repair steps. In such cases, troubleshooting tips come in handy. One of the first things to check is the wiring of the driver. Ensure that all wires are correctly connected and that there are no loose connections. Loose connections can cause the driver to fail or not work correctly. Additionally, it is essential to check the voltage output of the driver. You can use a voltmeter to measure the voltage output and ensure that it is within the required range. If the voltage output is too high or too low, it can cause the LED to malfunction or not light up. Another common issue with LED light drivers is the failure of the LED chips. If the LED chips are faulty, the driver may not work correctly. Therefore, it is essential to check the LED chips to ensure they are working correctly. You can use a multimeter to check the continuity of the LED chips. If the LED chips are faulty, you may need to replace them. Additionally, it is essential to check the quality of the LED chips used. Poor-quality LED chips may not work correctly and can cause the driver to fail. By troubleshooting these common issues, you can ensure that your LED light driver is working correctly and that your LED lights are shining bright.
When it comes to identifying issues with LED light drivers, there are a few tips to keep in mind. First, check the power source to ensure it is providing the correct voltage and amperage. If the power source is not the issue, then use a multimeter to test the driver’s output voltage and current. If the voltage and current are not within the driver’s specifications, then the driver may need to be repaired or replaced. Additionally, inspect the driver for any physical damage or signs of overheating, such as discoloration or burn marks. Finally, check the LED bulbs themselves to ensure they are not the cause of the issue. By following these tips, you can effectively identify and address any issues with LED light drivers.
When dealing with LED light drivers, there are a few common issues that may arise. One of these issues is flickering lights, which can be caused by a faulty driver or incorrect installation. To fix this, you can check the wiring connections and replace the driver if necessary. Another issue is dimming, which can be caused by a faulty dimmer switch or driver. To fix this, you can try replacing the dimmer switch or driver, or adjusting the wiring connections. Overheating can also be a problem with LED light drivers, which can be caused by insufficient ventilation or a faulty driver. To fix this, you can ensure proper ventilation and replace the driver if necessary. By troubleshooting these common issues, you can ensure that your LED lights are working properly and efficiently.
Safety Precautions
When it comes to repairing an LED light driver, it is important to take proper safety precautions to avoid any potential hazards. The first step is to ensure that the LED light driver is completely disconnected from any electrical source before starting the repair process. This means unplugging it from the wall outlet, removing any batteries, and making sure that there is no residual current in the device. It is also recommended to wear protective gloves and eyewear to prevent any injury or damage from potential electrical shocks. Another important safety precaution when repairing an LED light driver is to avoid working on the device when it is wet or in a damp environment. Moisture can cause electrical shorts and other hazards that can be dangerous for the person repairing the device. Additionally, it is important to work in a well-ventilated area to avoid inhaling any harmful fumes or gases that may be present during the repair process. By taking these safety precautions, the repair process can be completed safely and efficiently, minimizing the risk of injury or damage to the device.
Safety is of paramount importance when working with electronics, especially when dealing with the repair of LED light drivers. One must always ensure that the power is switched off before beginning any repair work. Additionally, it is crucial to use the right tools and equipment to avoid any electrocution or injury. The use of protective gear such as gloves, safety glasses, and a face shield is also recommended. Furthermore, it is important to be aware of the risks involved and exercise caution when handling any electrical components. By taking the necessary safety measures, one can avoid accidents and ensure a successful repair process.
When it comes to repairing LED light drivers, safety should be the top priority. Always ensure that the power is turned off before starting any repairs. Wear appropriate personal protective equipment, including gloves and safety glasses, to protect yourself from any potential hazards. Make sure to work in a well-ventilated area, as some electronic components can emit harmful gases or fumes. It’s also important to handle electronic components with care, as they are sensitive to static electricity and can easily be damaged by mishandling. By taking these safety precautions, you can ensure that your LED light driver repair job is not only successful, but also safe for you and those around you.
LED light drivers are crucial components in LED lighting systems as they regulate and control the amount of current and voltage supplied to the LED lights. They ensure that the LED lights operate safely, efficiently and with the correct amount of power. LED light drivers also provide various features such as dimming, color control, and protection against overvoltage, overcurrent, and short circuits. Without proper functioning LED light drivers, LED lights may flicker, not light up at all, or even become permanently damaged. Therefore, repairing LED light drivers is essential for the longevity and performance of LED lighting systems.
The step-by-step guide to repairing LED light drivers is a comprehensive and easy-to-follow guide that outlines the process of repairing LED light drivers. The guide begins by explaining the basics of LED light drivers and the different types of drivers available. It then provides a detailed explanation of the tools and equipment required for the repair process. The guide also includes step-by-step instructions for diagnosing and repairing common issues such as blown capacitors and faulty diodes. Additionally, the guide provides helpful tips and suggestions for troubleshooting and preventing future issues. Overall, this guide is an invaluable resource for anyone looking to repair their LED light drivers and save money on costly replacements.
In conclusion, maintaining LED light drivers is crucial to ensure optimal performance and longevity of your LED lights. Regular inspection and cleaning of the drivers, as well as checking for loose connections and damaged components, can prevent potential malfunctions and accidents. Additionally, using high-quality drivers and following the manufacturer’s instructions can also contribute to the longevity of your LED light system. Remember to always turn off the power before handling any electrical components and seek professional assistance if you are unsure about any repairs. With proper care and maintenance, your LED light drivers can provide reliable and efficient performance for years to come.
Conclusion

In conclusion, repairing an LED light driver can seem like a daunting task, but with the right tools and knowledge, it can be easily accomplished. By following the step-by-step guide outlined in this article, you can save money and extend the life of your LED lights. It is important to remember safety precautions when dealing with electrical components, and to always double check your work before plugging the LED light back in. With a little patience and perseverance, anyone can become proficient in repairing LED light drivers. So, don’t throw away your LED lights just yet – give repairing the driver a try!