Effortlessly Connect a 3Wire LED Light to a 2Wire System: A StepbyStep Guide
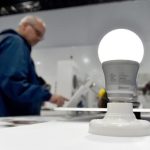
In today’s world, lighting has become an integral part of our daily lives. From our homes to our workplaces, lighting is a crucial factor that can impact our mood, productivity, and even our health. LED lights have gained immense popularity in recent years due to their energy efficiency and longevity. However, connecting a 3-wire LED light to a 2-wire system can be a daunting task for many. But worry not! In this step-by-step guide, we’ll show you how to effortlessly connect a 3-wire LED light to a 2-wire system and brighten up your space without any hassle. The process of connecting a 3-wire LED light to a 2-wire system may seem complicated, but with the right tools and guidance, it can be done with ease. This guide is designed to help you understand the steps involved in the process and provide you with the necessary information to complete it successfully. Whether you’re a DIY enthusiast or a professional electrician, this guide is perfect for anyone looking to connect a 3-wire LED light to a 2-wire system. So, let’s get started and light up your space in no time!
The purpose of the article, \Effortlessly Connect a 3-Wire LED Light to a 2-Wire System A Step-by-Step Guide,\ is to provide readers with a clear and concise step-by-step guide on how to connect a 3-wire LED light to a 2-wire electrical system. The article aims to make this process effortless for readers and guide them through the necessary steps required to ensure that the LED light is properly connected and functioning. By breaking down the process into simple and easy-to-follow steps, the article aims to provide readers with a comprehensive guide that they can use to connect their LED light without any hassle.
Knowing how to connect a 3-wire LED light to a 2-wire system is essential for anyone who wants to upgrade their lighting system. LED lights are energy-efficient, long-lasting, and can save you money in the long run. With that being said, connecting a 3-wire LED light to a 2-wire system may seem daunting, but it is essential to ensure that your lights work correctly and do not pose any safety hazards. A wrong connection can lead to electrical shorts, fires, and many other problems that can be avoided with proper installation. Therefore, it is crucial to follow the step-by-step guide to connect a 3-wire LED light to a 2-wire system to ensure that your lighting system is safe and efficient.
There are several benefits to doing it yourself instead of hiring a professional when it comes to connecting a 3-wire LED light to a 2-wire system. Firstly, you can save a significant amount of money as hiring a professional electrician can be quite expensive. Secondly, you can learn a new skill and gain a sense of accomplishment from completing the task on your own. Additionally, you have the flexibility to work on the project at your own pace and schedule, without having to worry about coordinating with a professional’s availability. Finally, by doing it yourself, you have complete control over the quality of the work and can ensure that everything is done to your satisfaction.
Materials Needed
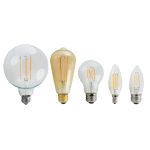
In order to successfully connect a 3-wire LED light to a 2-wire system, there are a few materials that you will need. First and foremost, you will need the LED light itself. This can be found at most hardware stores or online retailers. It is important to choose a light that is compatible with your system and has the appropriate voltage rating. Additionally, you will need a wire stripper and wire connectors. These tools will allow you to strip the insulation off of the wires and connect them to the LED light. It is important to choose connectors that are the appropriate size for your wires and can handle the amount of current that will be flowing through them. Another important material that you will need is a voltage tester. This tool will allow you to determine the voltage in your system and ensure that it is safe to work with. It is also important to have a ladder or other means of reaching the light fixture safely. Finally, you may want to have a helper on hand to assist you with the installation process. This can be particularly helpful if you need someone to hold the light fixture in place while you make the necessary connections. With these materials on hand, you will be well-equipped to connect your 3-wire LED light to your 2-wire system with ease.
Before you begin the process of connecting a 3-wire LED light to a 2-wire system, it is essential to have the necessary materials and tools. Some of the tools you may need for this task include wire strippers, pliers, electrical tape, and a wire cutter. Additionally, you will need to purchase a 3-wire LED light and a junction box. The junction box serves as a connection point between your 2-wire system and the 3-wire light. Ensure that you select a junction box that is compatible with your LED light and that can accommodate the number of wires you need to connect. Always exercise caution when working with electrical systems and be sure to turn off the power before starting the process.
When connecting a 3-wire LED light to a 2-wire system, there are a few items that are necessary to ensure a safe and functional installation. First and foremost, a voltage tester is essential to ensure that there is no live electricity flowing through the wires. This will prevent electrical shock and damage to the LED light. Next, wire connectors are necessary to securely attach the wires together. Wire cutters and strippers will also be needed to prepare the wires prior to connecting them. Finally, a grounding wire may be necessary to ensure proper grounding of the LED light. By having all of these items on hand, the installation process can be completed effortlessly and safely.
StepbyStep Guide

Connecting a 3-wire LED light to a 2-wire system can seem like a daunting task, but with this step-by-step guide, it can be done with ease. The first step is to gather all the necessary tools and materials, including wire strippers, electrical tape, wire connectors, and of course, the LED light and the 2-wire system. Once all the tools and materials are gathered, it’s time to get started. The second step is to turn off the power to the system by flipping the circuit breaker or removing the fuse. This is a crucial safety step that should never be skipped. After the power is turned off, use the wire strippers to remove about ¾ inch of insulation from the ends of the two wires in the 2-wire system. Next, attach the wire connectors to the exposed wires in the system, making sure they are tightly secured. Then, strip the wires on the LED light to expose about ½ inch of insulation and connect them to the wire connectors in the system. Finally, wrap the connections with electrical tape to ensure they are secure and safe. With these simple steps, the 3-wire LED light can now be easily connected to a 2-wire system.
Connecting a 3-wire LED light to a 2-wire system may seem like a daunting task, but it can be done effortlessly by breaking down the process into easy-to-follow steps. Firstly, identify the wires: the black wire is the positive wire, the white wire is the negative wire, and the green wire is the ground wire. Secondly, connect the black wire to the positive wire of the 2-wire system and connect the white wire to the negative wire of the 2-wire system. Finally, connect the green wire to the ground wire of the 2-wire system. Once these steps are completed, the LED light should be fully functional and ready to use. With these steps in mind, you can easily connect a 3-wire LED light to a 2-wire system without any hassle.
When connecting a 3-wire LED light to a 2-wire system, it’s important to provide clear instructions for each step to ensure a successful installation. Start by identifying the positive and negative wires on both the LED light and the 2-wire system. Then, connect the positive wire from the LED light to the positive wire on the 2-wire system, and the negative wire from the LED light to the negative wire on the 2-wire system. Finally, connect the remaining wire from the LED light to the ground wire on the 2-wire system. By following these steps and providing clear instructions, you can easily connect a 3-wire LED light to a 2-wire system without any hassle.
One effective way to enhance the comprehension of a technical process is to include images or diagrams that visually depict the steps involved. In the case of connecting a 3-wire LED light to a 2-wire system, images can help to clarify the wiring process, which may be otherwise difficult to understand through a written description alone. Diagrams that indicate the electrical connections required for the installation can be particularly useful, as they provide a clear visual representation of the process. With the aid of images or diagrams, readers can more easily follow the step-by-step guide and successfully connect their LED light to their 2-wire system.
Testing the Connection
Testing the connection is the crucial final step of connecting a 3-wire LED light to a 2-wire system. Before turning on the power supply, it is essential to ensure that all connections have been made correctly. Start by checking the wiring connections of the LED light to the power supply. Make sure that the positive and negative wires are correctly connected to the corresponding terminals. Additionally, check that the ground wire is attached to the grounding screw. Once the wiring connections are verified, turn on the power supply. Observe the LED light to ensure it illuminates as expected. If the light does not turn on, turn off the power supply immediately and recheck the wiring connections. If the wiring connections are correct, check the power supply voltage and ensure it matches the LED light’s specifications. If everything checks out, the LED light may be faulty, and you may need to replace it. Testing the connection is vital to ensure that the LED light is connected correctly and safely.
It is crucial to test the connection when connecting a 3-wire LED light to a 2-wire system. Testing ensures that the wiring is correct and that the light functions as intended. Without testing, there is a risk of electrical faults, which can result in damage to the LED light or even a fire hazard. Testing the connection also allows for troubleshooting any issues that may arise during the installation process. By taking the time to test the connection, you can ensure a safe and successful installation, as well as peace of mind knowing that your LED light is operating correctly.
Troubleshooting
When connecting a 3-wire LED light to a 2-wire system, troubleshooting may be necessary to ensure everything is functioning correctly. One common issue is a flickering or unstable light, which can be caused by improper wiring or a faulty LED driver. To fix this issue, double-check the wiring connections and ensure they are secure and properly connected. If the wiring is correct, it may be necessary to replace the LED driver. Another issue could be a dimmer switch not working correctly with the LED light. In this case, a compatible LED dimmer switch may need to be installed to resolve the issue. Another potential problem when connecting a 3-wire LED light to a 2-wire system is a lack of power or a completely non-functional light. This can be caused by a variety of factors, including a faulty LED driver, improper wiring, or a blown fuse or circuit breaker. To troubleshoot this issue, start by checking the wiring connections and ensuring they are secure and properly connected. If the wiring seems to be correct, check the fuse or circuit breaker and replace it if necessary. If the LED driver is faulty, it will need to be replaced. If none of these solutions work, it may be necessary to seek the help of a professional electrician to diagnose and resolve the issue.
During the process of connecting a 3-wire LED light to a 2-wire system, several issues may arise. One of the most common issues is a misconnection of wires, which can lead to damaging the LED light or even cause an electrical hazard. Another issue that may occur is a mismatch in voltage, as LED lights require a specific voltage to function properly. Additionally, the polarity of the wires must be correctly identified to ensure that the LED light functions as intended. Finally, factors such as the quality of the LED light and the overall condition of the wiring system may also impact the success of the installation process.
When it comes to connecting a 3-wire LED light to a 2-wire system, there are a few possible solutions to consider, depending on the specific situation. One option is to use a junction box to connect the wires, ensuring that the ground wire is securely connected to the metal box. Another solution is to use a wire nut or connector to join the two wires and the ground wire from the LED light, ensuring that the connection is tight and secure. In some cases, it may also be possible to use a dimmer switch or other control device to regulate the power flow to the LED light, allowing it to function properly even with the mismatched wiring. Whatever the approach, it is important to follow proper safety procedures and consult with an experienced electrician if necessary to ensure that the connection is safe, reliable, and effective.
The article titled \Effortlessly Connect a 3-Wire LED Light to a 2-Wire System A Step-by-Step Guide\ provides an easy-to-follow guide for individuals looking to connect a 3-wire LED light to a 2-wire system. The author emphasizes the importance of safety precautions and notes that the process may require some electrical knowledge. The steps provided include identifying the wires, splicing the wires together using wire nuts, and testing the connection with a multimeter. The article concludes by reminding readers to turn off the power before attempting any electrical work and to seek professional help if necessary. Overall, this guide is a valuable resource for those seeking to connect LED lights to their electrical system.
When it comes to electrical work, safety should always come first. Following safety precautions and instructions carefully is crucial to avoid accidents, injuries or even death. Electrical work can be dangerous if not handled properly, and it’s important to take the necessary precautions to protect yourself and others around you. Some of these precautions include wearing protective gear, turning off power sources before beginning work, and using tools and equipment designed for electrical work. By taking the time to follow instructions carefully and prioritize safety, you can ensure that your electrical work is done correctly and without incident.
In conclusion, connecting a 3-wire LED light to a 2-wire system may seem daunting, but with the right tools and a clear understanding of the process, it can be achieved with ease. Remember to always turn off the power source before beginning any electrical work and to double-check all connections before turning the power back on. Additionally, if you are unsure about any step in the process or feel uncomfortable with electrical work, do not hesitate to seek the assistance of a professional. By following these tips, you can successfully complete the task and enjoy your new LED light.
Conclusion

In conclusion, connecting a 3-wire LED light to a 2-wire system may seem like a daunting task, but with the right knowledge and tools, it can be done effortlessly. By following the step-by-step guide provided, one can successfully connect the LED light to the system without compromising safety or functionality. It is important to note that electrical work should only be attempted by those with proper training and experience. With that said, this guide serves as a helpful resource for those looking to upgrade their lighting system and enhance their living space. By taking the time to learn and understand the process, homeowners can enjoy the benefits of a well-lit and aesthetically pleasing environment.
Related posts:
 Connect LED Light Strips Like a Pro: A StepbyStep Guide
 Effortlessly Check LED Light Bulbs with Multimeter: A StepbyStep Guide
 DIY Guide: How to Easily Connect LED Light Strips Together for a Brighter and Vibrant Home Décor
 DIY Illumination: Connect LED Light Strips Without Connectors in 5 Easy Steps