Easy Steps to Change Your LED Ceiling Light: A Quick Guide
LED ceiling lights are a great way to brighten up your living space while also being energy-efficient. However, over time, these lights may need to be replaced due to wear and tear or simply to upgrade to a newer model. Replacing your LED ceiling light may seem like a daunting task, but it is actually a quick and easy process that can be done in just a few simple steps. In this quick guide, we will take you through the easy steps to change your LED ceiling light. Whether you are a DIY enthusiast or a beginner, this guide is designed to help you complete the task with ease. From gathering the necessary tools to safely removing and installing the new LED light, this guide will provide you with all the information you need to get the job done quickly and efficiently. So, let’s get started!
There are a variety of reasons why you might want to change your LED ceiling lights. Perhaps the current lights are outdated, or they emit insufficient light for the space they occupy. Alternatively, you may wish to upgrade to a more energy-efficient model, reducing your electricity bill and your carbon footprint simultaneously. Another reason to switch out your LED ceiling lights could be to improve the aesthetic of the room, choosing a design that complements your décor and enhances the overall ambiance. No matter your motivation, changing your LED ceiling lights is a relatively simple and cost-effective way to improve your home.
Gather Tools and Materials

Gathering the tools and materials required for changing an LED ceiling light is an essential step in the process. To begin with, you will need a ladder that is tall enough to reach the ceiling. You will also require a screwdriver set that includes both Phillips and flathead screwdrivers. Moreover, you will need pliers, wire cutters, and a voltage tester to ensure that there is no electrical current flowing through the light fixture. Additionally, you may require a wire stripper to strip the wires if you are replacing the entire light fixture. It is important to ensure that you have all the necessary tools and materials before proceeding with the replacement. In addition to the tools, you will require the necessary materials for the replacement. You can purchase LED ceiling lights from a hardware store or an online retailer. Before purchasing, ensure that the dimensions of the fixture match the size of your ceiling. Also, ensure that the light fixture is compatible with the voltage in your home. If you are replacing the entire fixture, you will need electrical wire, wire nuts, and a junction box. It is important to ensure that the materials you are using meet safety standards and are compatible with your home’s electrical system. By gathering the tools and materials beforehand, you can ensure that the replacement process goes smoothly and without any hiccups.
Before starting the process of changing your LED ceiling light, it’s important to gather all the necessary tools and materials. First and foremost, you will need a new LED light fixture that suits your needs and preferences. You will also need a ladder or step stool to reach the ceiling where the light is installed. Additionally, a screwdriver will be required to remove the existing light fixture and install the new one. It’s important to have a voltage tester handy to ensure that the electrical circuit is turned off before beginning the process. Wire connectors are also necessary to connect the wires of the new fixture to the existing electrical circuit. Lastly, a wire stripper and electrical tape will be needed to properly prepare and secure the wires. By having all of these tools and materials ready before starting, you can ensure a smooth and safe process of changing your LED ceiling light.
When it comes to purchasing materials for your LED ceiling light replacement, there are a few tips to keep in mind. Firstly, consider shopping online as you can easily compare prices and options from different retailers all in one place. Websites such as Amazon, Home Depot, and Lowe’s are great places to start. Additionally, check out local hardware stores and lighting shops as they may have a wider selection and knowledgeable staff to assist you. Don’t forget to take note of the dimensions and specifications of your current light fixture to ensure you purchase the correct replacement parts. Lastly, always read reviews from other customers before making a purchase to ensure the quality and reliability of the materials.
Turn off the Power
One crucial step that is often overlooked when changing an LED ceiling light is turning off the power. This step is essential for safety reasons, and failure to do so could result in electrocution. Before performing any maintenance or installation procedures, make sure to shut off the power supply to the light fixture at the circuit breaker or fuse box. If you’re unsure which breaker or fuse controls the light, switch off the main power supply to be safe. Turning off the power supply will not only protect you from potential electrical hazards but also prevent any damage to the light fixture. It’s also essential to take precautions when handling the light fixture, even after turning off the power supply. Make sure to wear gloves and eye protection, especially when dealing with broken or damaged parts. If you’re replacing an LED bulb, make sure that the new bulb matches the wattage and voltage rating of the old one. Reinstall the fixture carefully, making sure that all connections are secure and that the wires are properly connected. Turning the power supply back on after installation should be done with caution, and it’s advisable to have a partner to assist you in testing the light. By following these easy steps, you can change your LED ceiling light without any hassle and ensure your safety in the process.
It is crucial to turn off the power when changing your LED ceiling light to ensure your safety and avoid any potential electric shock. Electricity is a powerful force, and even a small amount of current can be lethal. Turning off the power supply, either at the circuit breaker or the wall switch, is a simple yet effective way to prevent any accidents from happening. Additionally, it can also prevent damage to the LED light or any other electrical appliances connected to the circuit. Taking this simple precautionary step can save you from a lot of trouble and ensure a smooth and hassle-free installation process.
Turning off the power is an essential step when it comes to changing your LED ceiling light. To do so safely, start by locating the circuit breaker that controls the power supply to the room where the light is installed. Once you have found it, switch it off to cut off the power supply to the room. Alternatively, you can use the main switch that controls the power supply to the entire house. However, if you decide to use this option, make sure that no one is using any electrical appliances or devices that require electricity. Always bear in mind that safety is paramount when handling electrical components and equipment, and taking the necessary precautions can prevent accidents and injuries.
Remove the Old LED Ceiling Light

If you’re looking to update the lighting in your home, installing new LED ceiling lights is a great way to start. Before you can install the new lights, however, you’ll need to remove the old ones. This process can be a bit tricky, but with the right tools and a little bit of know-how, you’ll be able to get the job done quickly and easily. To begin, turn off the power to the old light fixture by flipping the circuit breaker or removing the fuse that controls it. Then, remove the screws or bolts that hold the fixture to the ceiling. Once the fixture is loose, gently pull it down and disconnect the wires that are attached to it. Be sure to make a note of which wire is connected to which terminal so that you can reconnect everything correctly later. Finally, remove any mounting hardware that is still attached to the ceiling, and your old LED ceiling light will be completely removed. With these steps completed, you’re now ready to move on to installing your new LED ceiling light.
Changing an LED ceiling light is a simple task that requires a few basic tools and some precautionary measures. Firstly, turn off the power supply to the light fixture by flipping the circuit breaker or removing the fuse. Next, take a ladder and climb up to the ceiling to remove the screws or bolts holding the fixture in place. Gently pull the fixture down to expose the wires and disconnect them by unscrewing the wire nuts. Finally, remove the mounting bracket and ceiling box to complete the removal process. It is important to handle the old fixture with care, avoiding any damage to the wires or the mounting hardware. With these steps completed, you are now ready to install your new LED ceiling light.
When handling an old light, it’s important to take precautions to avoid injury or damage to the fixture. Firstly, turn off the power supply at the circuit breaker or fuse box to prevent electrocution. Use a ladder or step stool to safely reach the light fixture and wear gloves to protect your hands from broken glass or sharp edges. If the light fixture uses incandescent bulbs, allow them to cool down before attempting to remove them. For fluorescent or LED lights, follow the manufacturer’s instructions for proper disposal. Once the old light is removed, inspect the wiring and mounting hardware for any damage or wear before installing the new LED ceiling light.
Install the New LED Ceiling Light
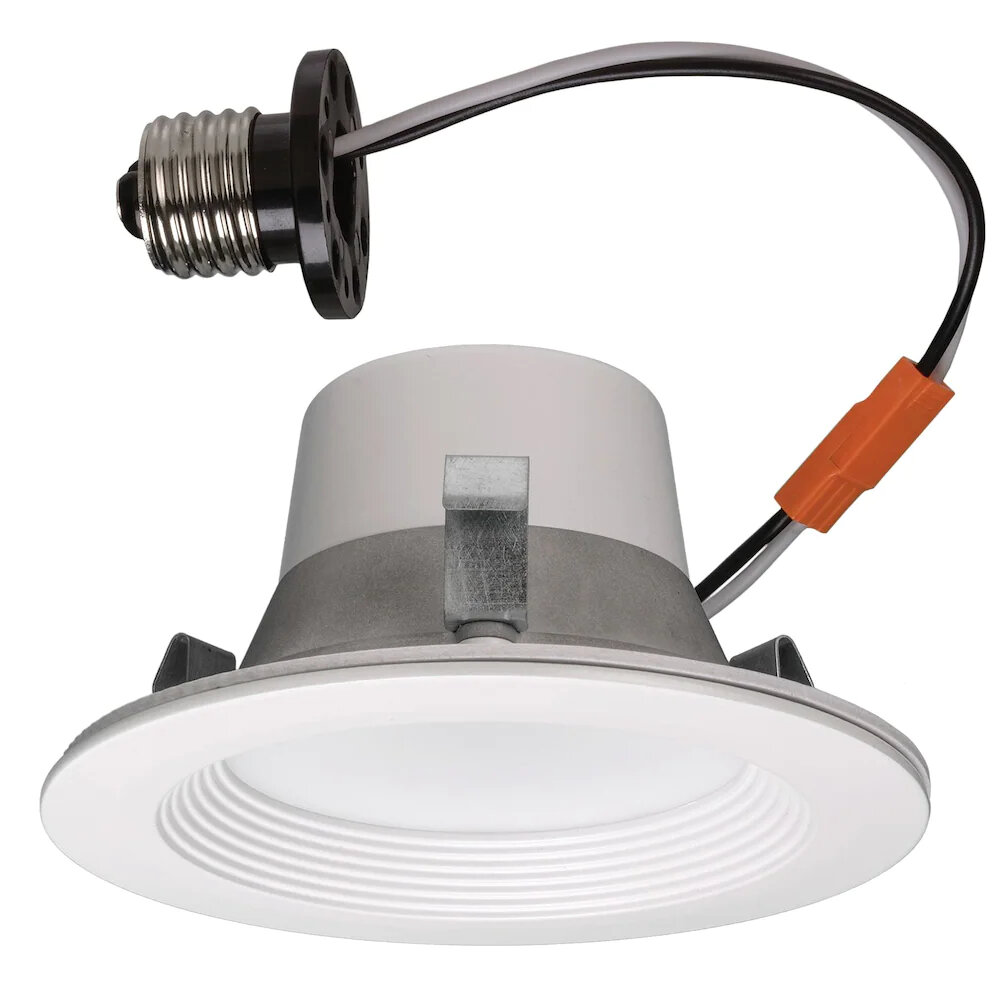
Installing a new LED ceiling light can be an easy and cost-effective way to update the look of your home. Not only do LED lights offer energy efficiency and long-lasting durability, but they also come in a wide variety of styles and designs to fit any decor. Before you begin the installation process, it’s important to turn off the power to the existing light fixture and remove it from the ceiling. Once you’ve done this, you can begin the process of installing your new LED ceiling light. The first step in installing your new LED ceiling light is to attach the mounting bracket to the ceiling. This will typically involve using screws to attach the bracket to the electrical box in the ceiling. Once the bracket is securely in place, you can begin wiring the new light fixture. This will involve connecting the wires in the light fixture to the corresponding wires in the ceiling. Make sure to follow the manufacturer’s instructions carefully and use wire nuts to securely connect the wires. Once the wiring is complete, you can attach the light fixture to the mounting bracket and turn the power back on to enjoy your new LED ceiling light.
Installing a new LED ceiling light is a simple task that requires a few easy steps. Firstly, you need to turn off the power supply to the existing light fixture. Then, remove the old light fixture by unscrewing the mounting screws and disconnecting the wires. Next, attach the mounting plate of the new LED light to the ceiling junction box and connect the wires according to the manufacturer’s instructions. Finally, attach the LED light fixture to the mounting plate and turn on the power supply to test the new fixture. With these easy steps, you can quickly and easily replace your old ceiling light with a new LED light that will provide brighter and more energy-efficient lighting.
Installing a new LED ceiling light is a relatively simple process that can be done by anyone with basic DIY skills. First, turn off the power supply to the existing light fixture. Then, remove the old light fixture and disconnect the wiring. Next, attach the mounting bracket to the ceiling and connect the wiring to the new LED light fixture. Make sure to follow the manufacturer’s instructions for wiring and securing the fixture. Finally, attach the cover or shade and turn on the power to test the new light. Always use caution and follow safety guidelines when working with electricity. With these easy steps, you can enjoy a new and energy-efficient LED ceiling light in your home.
Changing an LED ceiling light is not as complicated as it may seem. First, turn off the power supply to the light switch and make sure that the light is cool to avoid any burns. Next, remove the old LED bulb by twisting it counterclockwise and gently pulling it out. Then, insert the new LED bulb by aligning the pins and twisting it clockwise until it clicks into place. Finally, turn on the power supply and test the new LED light to ensure that it is working properly. With these simple steps, you can replace your LED ceiling light in no time and enjoy bright, efficient lighting in your home.
In conclusion, changing your LED ceiling light is a simple process that can be accomplished with just a few easy steps. Remember to turn off the power, remove the old light fixture, connect the wires of the new fixture to the existing wires, and attach the new fixture to the ceiling. It’s important to choose the right size and type of LED bulb for your fixture and to follow all safety precautions. If you’re not comfortable with electrical work, it’s always best to hire a professional. With these tips in mind, you can easily update your home’s lighting and enjoy the benefits of energy-efficient, long-lasting LED bulbs.
Conclusion
In conclusion, changing a LED ceiling light may seem like a daunting task, but with these easy steps, it can be a quick and simple process. It is important to ensure safety measures are taken before attempting to change the light, such as turning off the power supply. Additionally, selecting the correct replacement bulb and following the manufacturer’s instructions will ensure proper installation and optimal performance. With a little bit of patience and attention to detail, anyone can successfully change their LED ceiling light and brighten up their living space.