DIY Guide: Build Your Own LED Aquarium Light in 5 Simple Steps
Are you tired of the high costs of buying an LED aquarium light? Why not try building your own? Not only will it save you money, but it will also give you a sense of satisfaction knowing that you created something useful from scratch. In this DIY guide, we’ll walk you through the process of building your own LED aquarium light in just five simple steps. LED aquarium lights are becoming increasingly popular among hobbyists due to their energy efficiency and the fact that they provide a healthier environment for your aquatic plants and animals. However, they can be quite expensive, especially if you have a large aquarium. Building your own LED aquarium light is a cost-effective solution that doesn’t require any special skills or tools. With just a few basic materials and our step-by-step guide, you’ll have a custom-made LED aquarium light that will make your aquarium look stunning. So, let’s get started!
Aquarium lighting is a crucial element for the health and growth of aquatic plants and animals. Proper lighting ensures that plants receive the necessary amount of light for photosynthesis, which is essential for their survival. It also helps to maintain the natural circadian rhythm of the fish, which is important for their overall well-being. In addition, lighting plays a significant role in enhancing the aesthetic appeal of the aquarium, creating a visually stunning environment for both the fish and the observer. By building your own LED aquarium light, you can customize the lighting to suit the specific needs of your aquatic ecosystem, while also saving money in the long run.
Building your own LED aquarium light can be a rewarding and fulfilling experience for any aquarium enthusiast. Not only does it allow you to customize the light to fit the specific needs of your aquarium, but it also provides numerous benefits. Firstly, it is a cost-effective solution as buying a pre-built LED light can be expensive. Secondly, you have complete control over the spectrum and intensity of the light, which can be adjusted to mimic natural lighting conditions for your aquatic pets. Thirdly, DIY LED lights are more energy-efficient, reducing your electricity bill and providing a more eco-friendly solution. Lastly, building your own LED light allows you to experiment with different configurations, giving you the opportunity to learn and explore the world of aquarium lighting.
Materials Needed

When embarking on the journey of building your own LED aquarium light, it is important to gather all the necessary materials to ensure a smooth and successful process. Firstly, you will need LED strips, preferably with waterproof coating, as they will be exposed to water and humidity. Additionally, you will require a power supply, either an AC adapter or a DC power supply, depending on the voltage and wattage requirements of your LED strips. It is advised to get a power supply with a higher wattage than necessary to allow for potential future upgrades or additions to the light. Other essential items include a soldering iron, solder, wire cutters, and heat shrink tubing to secure the connections and prevent any electrical mishaps. In addition to the basic materials, you will also need a few optional components to enhance the efficiency and aesthetic of your LED aquarium light. A dimmer switch or a timer can be added to control the brightness and duration of the light, replicating a natural day-night cycle for your aquatic pets. Reflective material can be used to increase the light output and direct the light towards the aquarium. Lastly, a sturdy and waterproof housing such as an aluminum channel or a PVC pipe can be used to protect the LED strips and power supply from water damage and ensure a longer lifespan for your DIY LED aquarium light.
To build a DIY LED aquarium light, you will need several materials that can be easily obtained from your local hardware store or online. The list of materials includes LED strips or chips, a power supply, a heatsink, thermal adhesive, a dimmer switch, wires, a soldering iron, a drill, screws, nuts, and bolts. You will also need a waterproof container or housing to protect the electrical components from water damage. It’s important to choose high-quality materials that can withstand the harsh environment of an aquarium and provide optimal lighting for your aquatic plants and fish. With these materials, you’ll be able to create a custom LED aquarium light that’s both functional and aesthetically pleasing.
In order to build your own LED aquarium light, it is important to understand the different materials you will need and their purposes. The first material is the LED strip itself, which is the main source of light for your aquarium. LED strips come in different colors and intensities, so it is important to choose the right one for your specific aquarium needs. The second material is the heat sink, which is used to dissipate the heat generated by the LED strip. This is important to prevent the LEDs from overheating and getting damaged. The third material is the driver, which regulates the voltage and current going to the LEDs. This ensures that the LEDs are receiving the correct amount of power and will last longer. Finally, the aluminum channel is used to house the LED strip and give it a professional look. By using these materials correctly, you can build a high-quality LED aquarium light that will provide the perfect amount of light to your aquatic pets.
StepbyStep Instructions
Step-by-step instructions are an essential part of any DIY project, particularly when building your own LED aquarium light. Clear and concise instructions not only make the build process more efficient, but they also ensure the safety and success of the final product. In the case of building an LED aquarium light, it is crucial to follow the steps in order and take the time to understand each one before proceeding. With step-by-step instructions, you can easily track your progress and identify any mistakes before they become costly errors. In our DIY guide to building your own LED aquarium light, we have broken down the process into five simple steps. Each step is accompanied by detailed instructions and images to illustrate the process. By following these step-by-step instructions, you can quickly and easily build a high-quality LED aquarium light that will provide optimal lighting for your aquatic plants and animals. So, whether you are a seasoned DIY enthusiast or a beginner looking to take on a new project, our step-by-step instructions will guide you through the process with ease and confidence.
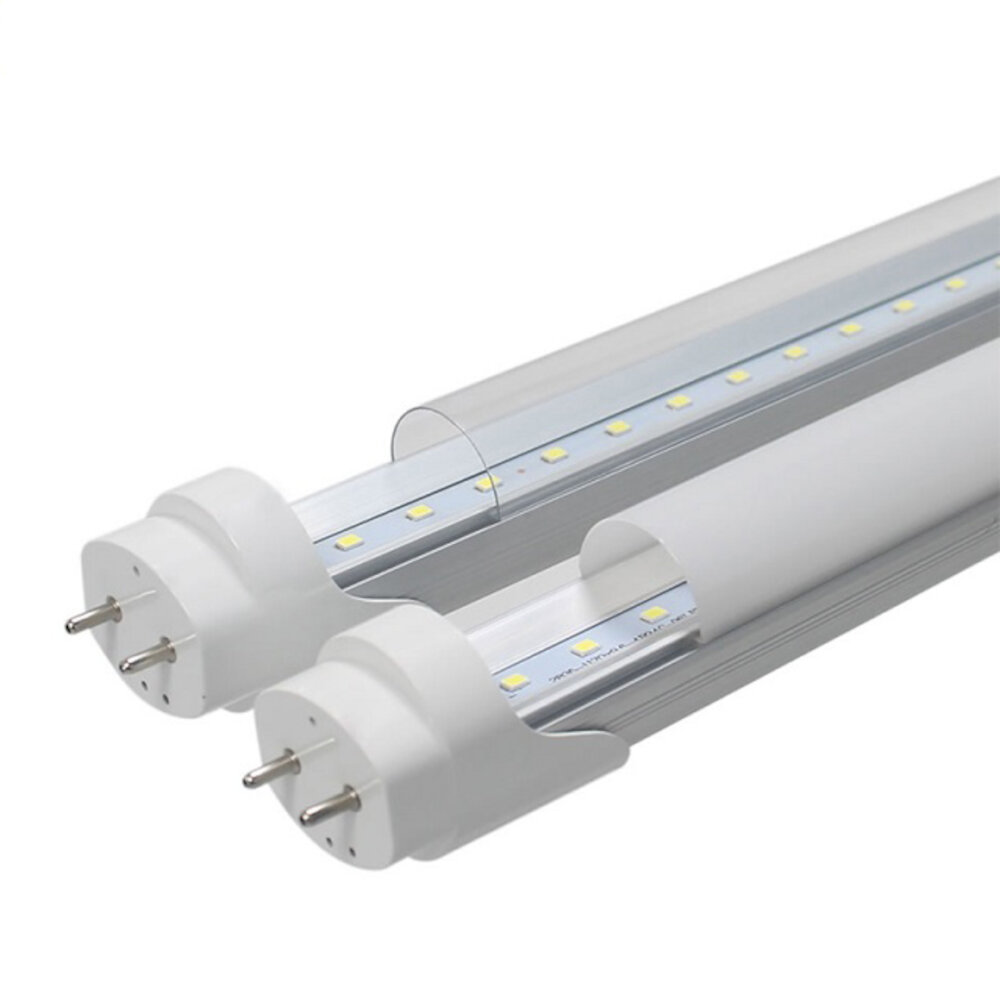
When it comes to building your own LED aquarium light, selecting the right LED lights is the crucial first step. The type of LED lights you choose determines the light spectrum that your aquarium inhabitants receive, which plays a vital role in the health and growth of your aquatic plants and animals. Consider the size of your aquarium, the type of plants and animals you have, and the depth of your tank when selecting LED lights. Look for high-quality LED lights that offer a wide range of color temperatures and wavelengths to ensure that your aquarium receives the optimal amount of light for photosynthesis and growth. In addition, make sure to choose LED lights that are energy-efficient and durable to save money and reduce maintenance requirements in the long run.
Step 2 in building your own LED aquarium light involves constructing the frame that will hold the light in place. This is a crucial step as the frame provides stability and support for the light, preventing it from falling into the water and potentially harming your aquatic pets. The frame can be made from a variety of materials such as PVC pipes, metal rods, or wooden planks. Careful consideration should be given to the size and shape of the frame to ensure that it fits the dimensions of your aquarium properly. Additionally, the frame should be designed in a way that allows easy access to the light for maintenance purposes. A sturdy and well-designed frame will ensure that your LED aquarium light is secure and functioning optimally for the enjoyment of your aquatic pets.
Step 3 of the DIY Guide to Build Your Own LED Aquarium Light in 5 Simple Steps involves wiring the LEDs. This crucial step requires attention to detail and precision as it involves connecting the LEDs to the power source. It is essential to ensure that the wiring is done correctly to prevent any safety hazards, such as electrical shock or fire. To start, you will need to solder the positive and negative wires to each LED before connecting them in series or parallel depending on your design. It is important to keep the wires organized and labeled to avoid confusion during the installation process. Once the wiring is complete, you can test the LEDs to ensure they are working correctly before moving on to the next step.
Step 4 of the DIY Guide Build Your Own LED Aquarium Light in 5 Simple Steps involves adding a power supply to your LED light. This step is crucial because without a power supply, your LED light will not function. You will need to choose a power supply that is capable of supplying the necessary voltage and amperage to your LED lights. It is important to ensure that the power supply you choose is of high quality and has the necessary safety features to prevent any electrical hazards. Once you have connected your power supply to your LED lights, you can test your light to ensure that it is functioning correctly. With a properly functioning LED aquarium light, you can create a beautiful and healthy environment for your aquatic plants and animals.
After successfully assembling the LED light, the next step is to mount it onto the aquarium. First, make sure the aquarium’s glass is clean and dry to ensure a secure mount. Then, position the light over the aquarium and adjust its height to your desired level. You can use mounting brackets or adhesive strips to attach the light to the aquarium. It’s essential to ensure that the light is stable and won’t fall into the water, potentially damaging the aquarium and harming the fish. Once you’re satisfied with the light’s position and stability, it’s time to power it up and enjoy the beautiful illumination it provides to your aquatic environment.
Tips and Tricks
When it comes to building your own LED aquarium light, there are some tips and tricks that can help make the process smoother and more successful. First, it’s important to choose high-quality LED chips and drivers that are appropriate for your tank’s needs. Look for chips with a high color rendering index (CRI) and a color temperature that matches the type of fish and plants in your tank. Additionally, make sure to choose drivers that provide enough power to adequately light your tank without overheating or causing damage. Another important tip is to carefully plan out the placement of your LEDs to ensure even coverage and avoid hotspots or shadows. Consider using a lighting calculator to determine the optimal spacing and placement for your specific tank size and shape. Additionally, make sure to evenly distribute the different colors of LEDs to create a natural-looking spectrum and enhance the colors of your fish and plants. In addition to these tips, there are some helpful tricks that can make the DIY process easier and more efficient. For example, consider using pre-made LED strips or panels to simplify the wiring and soldering process. You can also use thermal adhesive to attach your LEDs to the heatsink, which can help ensure efficient heat dissipation and prevent damage to your LEDs. Finally, don’t forget to test your light before installing it in your tank to ensure that everything is working properly and adjust as needed. With these tips and tricks in mind, you’ll be well on your way to building a customized and effective LED aquarium light.
Apart from the mentioned steps in the DIY guide for building an LED aquarium light, there are some additional tips and tricks to ensure a successful outcome. Choosing high-quality LED chips, heat sinks, and drivers is crucial in the process. It is also essential to calculate the correct wattage and voltage needed for the aquarium size and type of plants or corals. Additionally, using a reflector and diffuser can improve the light distribution and reduce hotspots. It is recommended to test the light intensity and adjust the spectrum according to the aquatic life’s needs. Finally, keeping the LED light clean and free of dust or algae is vital for optimal performance and longevity. Following these tips and tricks can help you build a custom and efficient LED aquarium light that suits your specific needs and preferences.
While building your own LED aquarium light can be an exciting project, it can also come with its own set of challenges. Common problems include issues with wiring, insufficient lighting, and incorrect placement of the LED lights. To troubleshoot these issues, start by double-checking all wiring connections, making sure they are secure and in the correct order. If you are still experiencing insufficient lighting, consider adding more LED lights or adjusting their placement. It’s also important to ensure that you are using the correct voltage and wattage for your specific LED lights. By following these suggestions, you can troubleshoot common problems and successfully build your own LED aquarium light.
Building your own LED aquarium light has numerous benefits such as cost-effectiveness, customization, and energy efficiency. Firstly, it is much cheaper than buying a pre-made LED light, as the cost of materials is relatively low. Secondly, by building your own LED light, you can customize it to your specific needs and preferences, and even add additional features such as timers and dimmers. Lastly, LED lights are highly energy-efficient, using less power than traditional aquarium lights, which can save you money on your electricity bill in the long run. Overall, building your own LED aquarium light is a practical and rewarding DIY project that can improve the health and appearance of your aquatic pets while also being cost-effective.
If you’re an aquarium enthusiast looking to add a personal touch to your underwater world, building your own LED aquarium light is an excellent option. Not only does it allow you to customize the lighting to your liking, but it’s also a fulfilling and rewarding experience. You don’t have to be an expert in electronics or engineering to give it a try. With this DIY guide, you can follow five simple steps to create a unique and efficient LED light for your aquarium. Don’t be afraid to dive into the world of DIY and unleash your creativity. Who knows, you might even discover a new passion or talent along the way!
Conclusion
In conclusion, building your own LED aquarium light in just 5 simple steps can be a fun and rewarding experience for any aquarium enthusiast. Not only does it allow you to customize the lighting to your specific needs, but it also saves money compared to purchasing pre-made lighting systems. By following the DIY guide provided, you can create a high-quality and efficient LED light that will enhance the beauty of your aquarium and promote the health of your aquatic plants and animals. So why not take on this DIY project and brighten up your underwater world with a unique and personalized LED aquarium light?
Related posts:
 Discover the Top LED Aquarium Lights for Optimal Fish Tank Illumination
 Create Unique Ambiance: Learn How to Make Custom LED Light Colors in 5 Simple Steps
 Ceiling Illumination Woes? Learn How to Easily Remove LED Lights with These Simple Steps
 DIY: Create a Black Light with LED Lights in 5 Easy Steps