Best Power Running Boards For Trucks: Top Electric Steps Compared
Power running boards make a tall truck easier to enter without leaving a fixed step hanging below the body all the time. The best choice is not one universal kit; it depends on your exact year, make, model, cab length, trim, wiring, and how the truck is used. For most buyers, start with AMP Research PowerStep as the premium pick, Rough Country as the value pick, Westin Pro-E for wet or salty climates, and Aries ActionTrac if the truck is lifted and needs a lower step.
This guide focuses on powered, retractable running boards for trucks and SUVs. If you are still deciding between fixed boards, nerf bars, and electric steps, see our running boards vs. nerf bars comparison first.

What Are Power Running Boards?
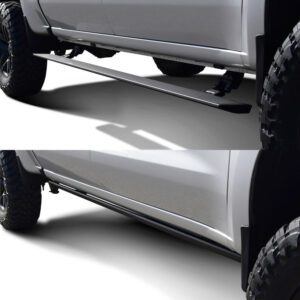
Power running boards are electric, retractable steps that deploy when a truck or SUV door opens and tuck back under the body when the door closes. They are different from fixed running boards because the step is available only when needed. That gives the truck a cleaner look, can preserve ground clearance, and can make a tall cab easier to enter.
The tradeoff is complexity. A fixed board is mostly brackets and a step surface. A powered board adds motors, wiring, sensors, hinges, lights, and a control module. That is why fitment, weather sealing, warranty, and replacement-part support matter as much as the step width or load rating.
Are Power Running Boards Worth It?
Power running boards are worth it if the truck is tall enough that entry is uncomfortable, but you do not want a fixed step visible all the time. They are especially useful for lifted trucks, family trucks, work trucks with frequent cab entry, and trucks used by shorter drivers or passengers.
They are less compelling if you want the simplest possible setup, regularly scrape the rocker area off-road, or need the cheapest step solution. In those cases, fixed running boards or nerf bars may be easier to maintain. Our running boards reviews guide covers more conventional options.
What Are Running Boards On A Truck?

On a truck, running boards are side steps mounted below the doors. They help the driver and passengers climb into the cab, and they can also reduce some splash and road-debris impact along the rocker area. A full-width board gives more foot area than a round nerf bar, while a power running board gives that step only when the door is open.
How Long Do Power Steps Last?
A good set of power steps can last years, but lifespan depends heavily on climate, use, and maintenance. Trucks in dry climates usually have an easier life than trucks exposed to road salt, mud, freezing rain, and repeated pressure washing. Daily work-truck use also cycles the motors and hinges more often than occasional weekend use.
Before buying, check the warranty term, motor availability, bracket availability, and maintenance instructions. A low-priced kit can become expensive if a failed motor, controller, or linkage is hard to replace later.
Are Running Boards Necessary?
Running boards are not mandatory, but they can be a practical upgrade. They make entry and exit easier, reduce the climb into taller cabs, and help passengers who may struggle with a high step-in height. On lifted trucks, they can move from nice-to-have to almost necessary.
If the truck already sits low enough for easy entry, fixed or powered boards may be more about appearance and convenience than need. If you regularly carry kids, older passengers, tools, or work gear, the convenience becomes more noticeable.
Are Running Boards Useful?

Yes, running boards are useful when they match the truck and the way it is used. For fixed boards, the main advantages are simple construction, lower cost, and constant access. For powered boards, the main advantage is a cleaner tucked-away look and a lower step that appears only when the door opens.
The useful details are easy to overlook: tread grip, drainage, step width, motor placement, wiring protection, and how the board behaves in snow or mud. Those details often matter more after six months of ownership than they do on the product page.
Can Running Boards Be Removed?
Most running boards can be removed, but powered boards require more care than fixed boards because of wiring, modules, door triggers, and sometimes lighting. Save the instructions, label hardware during removal, and check whether the kit required drilling or modified brackets. If the truck is leased or you expect to sell it, a no-drill kit is easier to reverse.
What Is The Best Brand Of Running Boards?
There is no single best brand for every truck. For powered boards, AMP Research is the premium default, Rough Country is a strong value option, Westin Pro-E is interesting for weather sealing, and Aries ActionTrac stands out for lifted-truck access. For fixed boards, brands such as APS, Tyger Auto, Westin, and others may make sense depending on vehicle fitment and budget.
The better question is not just which brand is best, but which brand has the right kit, bracket package, warranty, replacement parts, and installation support for your exact truck.
Best Power Running Boards Compared
Power running boards are not universal truck accessories. The right kit depends first on fitment, then on motor reliability, step drop, load rating, weather resistance, warranty, and replacement-part support. For most truck owners, AMP Research PowerStep is the safest premium pick, Rough Country is a strong value option, Westin Pro-E is a weather-focused alternative, Aries ActionTrac is best when you need an extra-low step for a lifted truck, and APS-style powered iBoard/iBot steps are best treated as budget options only after a careful fitment check.


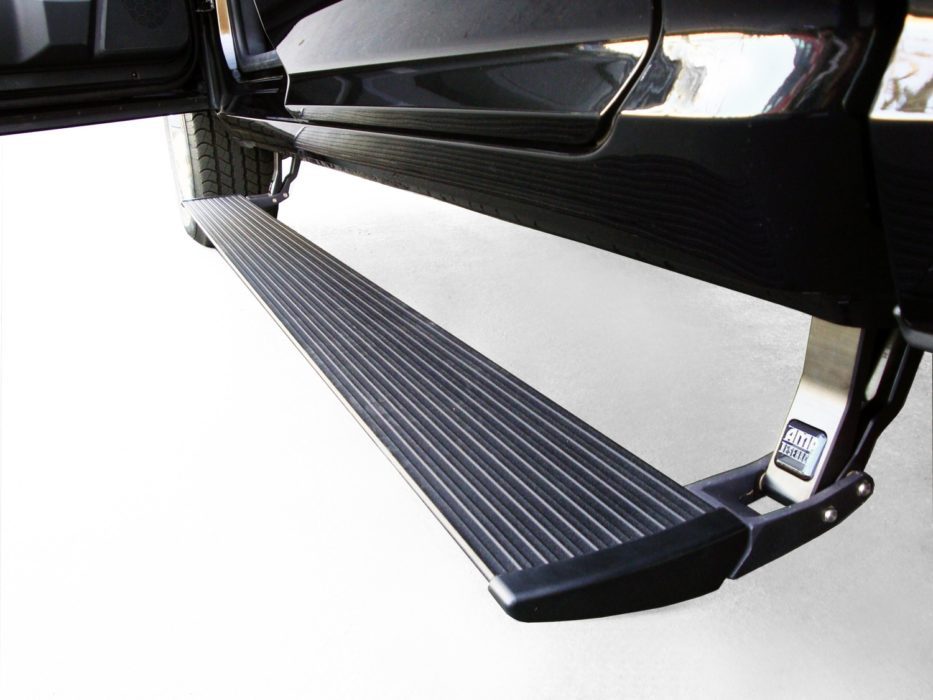
Best Overall: AMP Research PowerStep
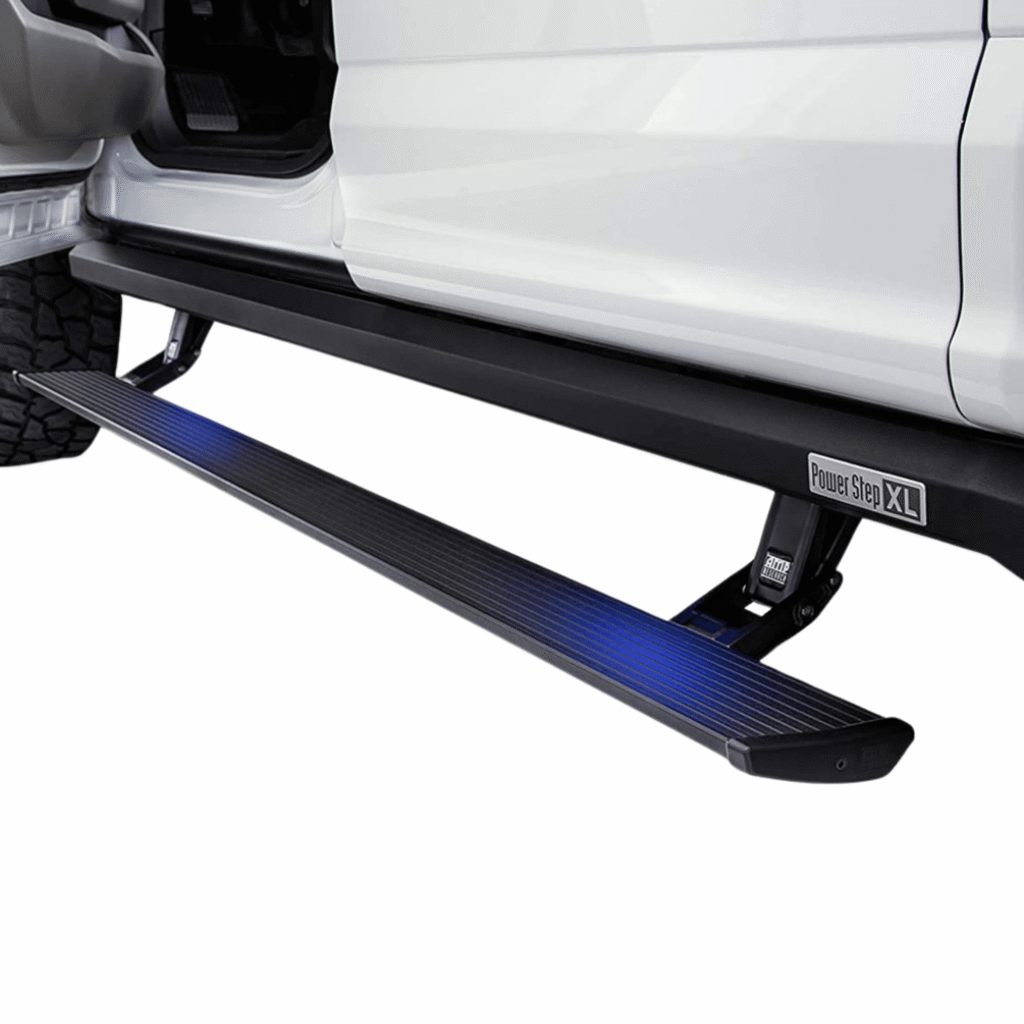
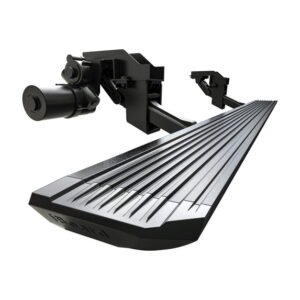
AMP Research PowerStep is the premium default recommendation if you want a proven power running board family and are willing to pay more for fitment support, brand confidence, and a cleaner retracting look. AMP describes the PowerStep as an automatic power-retractable running board with corrosion-resistant die-cast aluminum construction and a military-grade black PTFE coating. The brand also emphasizes vehicle-specific design, which is exactly what matters most in this category.
The practical advantage is simple: the step deploys when the door opens and tucks away when the door closes. That gives you an easier step-in height without leaving a fixed board hanging below the rocker panel all the time. AMP is also the best fit for buyers who want a mainstream premium product family rather than a random marketplace listing.
- Choose it if: you want the safest premium recommendation and broad vehicle-specific support.
- Watch out for: old SKU-specific listings. Do not assume one AMP kit fits every Silverado, Sierra, F-150, Ram, Tundra, or SUV.
Price check
Check Current Price on AmazonAmazon listings can be vehicle-specific. Verify your exact year, make, model, cab length, trim, and body style before checkout.
Best Value: Rough Country Power Running Boards
Rough Country Power Running Boards are the value pick for buyers who want powered steps from a recognizable truck-accessory brand without going straight to the most expensive premium option. On the Chevy/GMC configurable kit checked for this update, Rough Country lists a 6-inch lightweight aluminum running board, dual-motor technology, integrated LED lights, safe-stop obstruction detection, manual override, and a 660 lb weight-capacity claim per side.
This is a stronger recommendation than chasing old discontinued Amazon widgets because Rough Country keeps the product family organized around configurable vehicle fitment. That said, the fitment notes are not optional reading. Rough Country specifically calls out body-style differences, gas/diesel compatibility, and possible contact issues with aftermarket traction bars on the checked application.
- Choose it if: you want a strong middle-price option with current truck-market support.
- Watch out for: cab configuration, model-year breaks, and aftermarket suspension or traction-bar interference.
Price check
Check Current Price on AmazonAmazon listings can be vehicle-specific. Verify your exact year, make, model, cab length, trim, and body style before checkout.
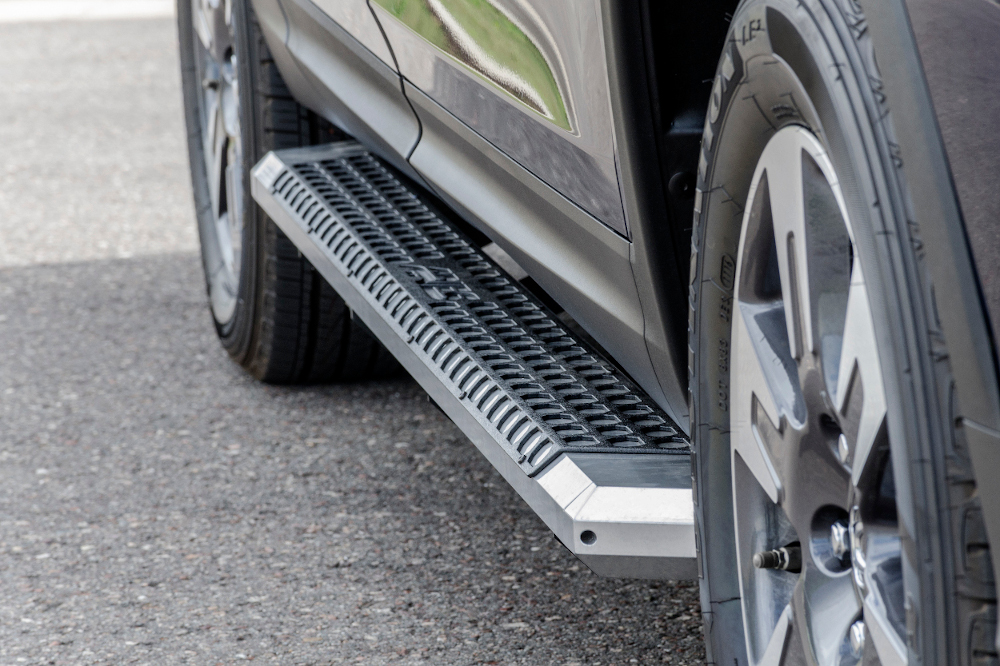
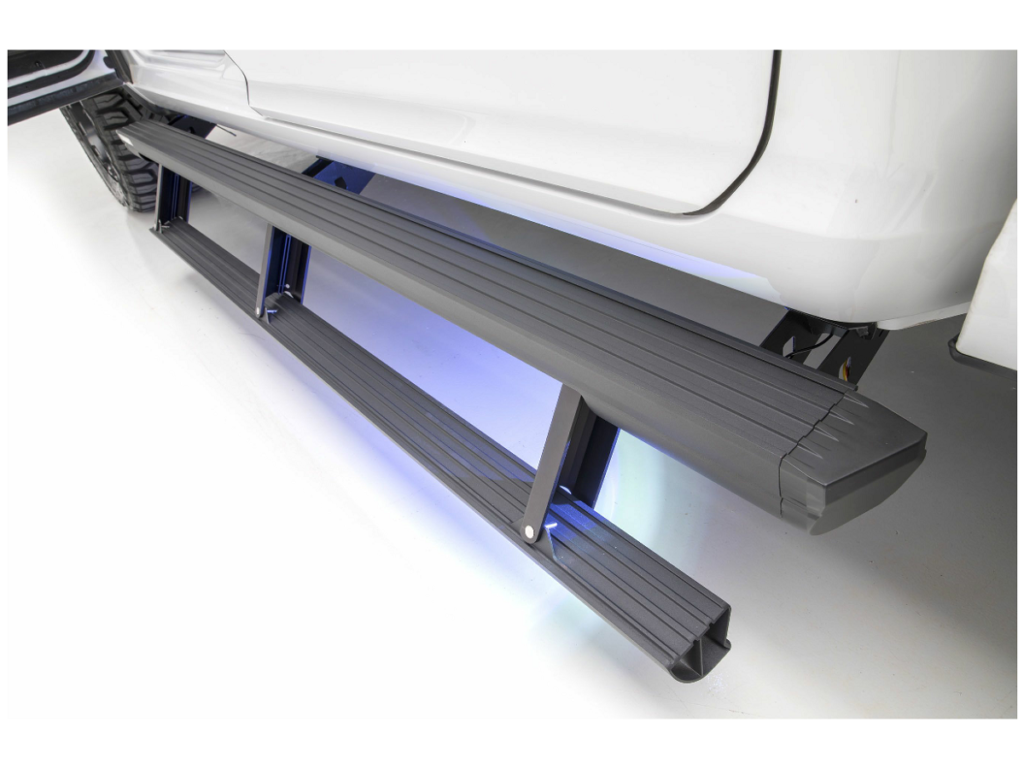
Best For Bad Weather: Westin Pro-E Power Running Boards

Westin Pro-E Power Running Boards are the weather-focused pick. Westin lists two waterproof IP68-rated motors per side, integrated LED lights, a 6-inch aluminum step surface, corrosion-resistant aluminum construction, textured black powder coating, a 300 lb per-side capacity claim, and a 5-year warranty claim on the product page checked for this update.
This is the option I would look at first if the truck sees snow, rain, road salt, or regular winter use. The sealed-motor and corrosion-resistance claims are more important here than flashy product photos. The caveat is confidence level: Westin Pro-E looks strong on specs, but AMP and Rough Country may be easier to research across more owner discussions and fitment examples.
- Choose it if: winter roads, road salt, rain, and motor sealing are your biggest concerns.
- Watch out for: lower review volume than the biggest-name powered step families.
Price check
Check Current Price on AmazonAmazon listings can be vehicle-specific. Verify your exact year, make, model, cab length, trim, and body style before checkout.
Best For Lifted Trucks: Aries ActionTrac Powered Running Boards
Check Aries ActionTrac fitment
Aries ActionTrac is the specialty pick for taller trucks. Instead of acting like a normal retractable board, it uses a step-within-a-step design. Aries lists a 3-inch powered step that drops 8 inches when the door opens, a 4-inch top step for roof access, integrated LED lights, powder-coated 6061-T6 aluminum, obstruction detection, and a 650 lb static weight-capacity claim on the checked application.
That extra drop is the reason to buy it. If the truck is lifted, or if passengers need a lower first step, ActionTrac can make more sense than a flatter board that stays too high. I would not position it as the best budget choice; it is a purpose-built access solution for tall trucks and SUVs.
- Choose it if: the truck is lifted or the driver/passengers need a lower powered step.
- Watch out for: application-specific length, mounting kit, and warranty terms.
Price check
Check Current Price on AmazonAmazon listings can be vehicle-specific. Verify your exact year, make, model, cab length, trim, and body style before checkout.
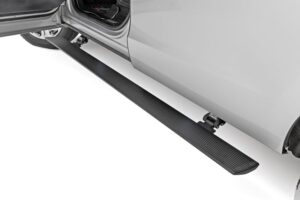
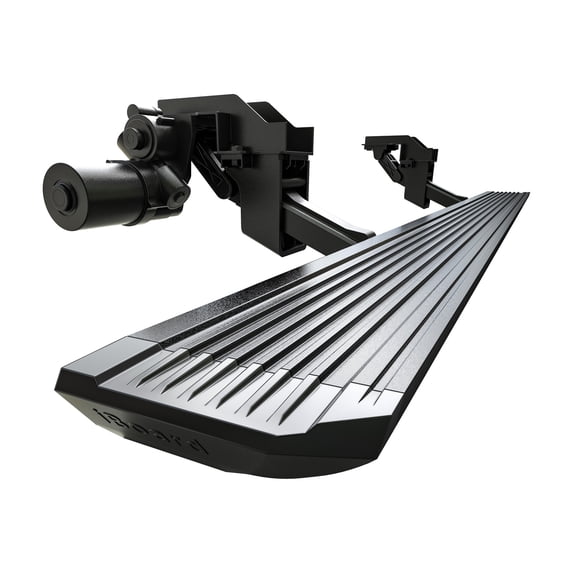
Best Budget Electric Option: APS iBoard / iBot Power Side Steps
Search APS/iBoard fitment on Amazon
APS-style powered iBoard or iBot side-step listings can be worth checking when budget is the main priority. Treat this as the most heavily caveated option in the list. A lower price does not help if the wiring support is weak, the brackets do not match the cab, or replacement parts are hard to get later.
If you use Amazon or another marketplace for this category, do not buy from the product photo alone. Confirm year, make, model, cab length, bed/body style, trim, mounting hardware, warranty, and seller support before checkout.
- Choose it if: you need a lower-cost powered step and can verify the exact vehicle listing.
- Watch out for: vague compatibility claims, missing brackets, and limited long-term support.
Price check
Check Current Price on AmazonAmazon listings can be vehicle-specific. Verify your exact year, make, model, cab length, trim, and body style before checkout.
Spec references: AMP Research, Rough Country, Westin Pro-E, and Aries ActionTrac. Use these manufacturer pages for specifications and fitment details, but use the Amazon buttons above when you are ready to compare current listings.
Older Product We No Longer Recommend As A Main Pick
The old version of this article recommended Bestop PowerBoard as a budget choice. I would not keep it in the main ranked list now. Current replacement-part and support signals are weaker than the other product families above, and an eTrailer expert answer notes that Bestop running-board replacement parts may no longer be available for the case discussed there. If you already own Bestop PowerBoards, troubleshooting them may still make sense; for a new buyer, I would start with AMP, Rough Country, Westin, Aries, or a carefully verified budget listing instead.
Sources checked: AMP Research, Rough Country, Westin Pro-E, and Aries ActionTrac product-family pages were used to verify current positioning, fitment-sensitive language, motor/weather claims, and step-drop notes. Always confirm the exact vehicle application before buying.
How To Choose The Right Power Running Boards
Choose AMP Research PowerStep if you want the safest premium recommendation and broad vehicle-specific support. Choose Rough Country if price and value matter but you still want a recognizable truck-accessory brand. Choose Westin Pro-E if your biggest concern is snow, rain, corrosion, or motor sealing. Choose Aries ActionTrac if the truck is lifted or the driver and passengers need a lower step. Choose APS only when budget is the main priority and the exact listing clearly matches the vehicle.
If you are still comparing fixed steps against electric ones, read our guide to nerf bars vs. running boards and our broader guide on how to choose a running board for your truck. Ram owners can also compare options in our Ram 1500 running boards guide, and broader shoppers can use our running boards reviews page for fixed-board alternatives.
Common Fitment Mistakes
- Buying by truck name only and ignoring cab length.
- Assuming a 1500, 2500, and 3500 application uses the same brackets.
- Missing a model-year body-style split, such as classic vs. new-body trucks.
- Ignoring aftermarket traction bars, lift parts, rocker-panel damage, or previous bracket modifications.
- Buying an old SKU because the price is low, then discovering replacement motors or brackets are unavailable.
Power Running Board Maintenance
Power running boards live under the truck, so maintenance matters. Keep mud, ice, gravel, and road salt out of the hinges and moving arms. Rinse the boards after winter driving or off-road use, inspect wiring and connectors, and follow the manufacturer instructions for lubrication or cleaning. Do not assume every powered step wants grease; some manufacturers specify silicone spray or other light maintenance instead.
Final Recommendation
For most buyers, start with AMP Research PowerStep if the budget allows it. Move to Rough Country if you want a better value balance. Choose Westin Pro-E when weather resistance is the priority, and choose Aries ActionTrac when a lifted truck needs a lower powered step. Budget electric options can work, but only after you verify the exact vehicle fitment and seller support.
Summary
Power running boards are worth considering when you want easier cab access without leaving a fixed step exposed all the time. The best product is not simply the one with the highest load rating or the nicest product photo. It is the kit that fits your truck correctly, has clear installation support, and has motors, brackets, wiring, and replacement parts you can trust.
For most truck owners, AMP Research is the premium starting point, Rough Country is the value pick, Westin Pro-E is the weather-focused option, and Aries ActionTrac is the lifted-truck specialist. If you choose a budget electric option, slow down and verify the exact application before buying.
Last update on 2023-12-05 / Affiliate links / Images from Amazon Product Advertising API
