Easy Guide: Installing Running Boards on 2007 F150 in 7 Simple Steps
If you own a 2007 F150 and are looking for an easy way to enhance its look and functionality, installing running boards is an excellent option. Running boards not only add a stylish touch to your vehicle but also make it easier to get in and out. While it may seem like a daunting task, with the right tools and steps, you can install running boards on your 2007 F150 in no time. In this guide, we will provide you with a comprehensive, step-by-step tutorial on how to install running boards on your 2007 F150, making the process as easy as possible. Installing running boards on your 2007 F150 is not only a practical choice but also a cost-effective one. Instead of paying a professional to do it for you, you can save a significant amount of money by doing it yourself. Additionally, the process of installing running boards is relatively simple and can be done in just seven easy steps. With this guide, you’ll learn everything you need to know to install running boards on your 2007 F150, including the tools you’ll need, the steps to follow, and tips for ensuring that your running boards are installed correctly. So, let’s get started and add some style and functionality to your 2007 F150 by installing running boards in just seven simple steps!
Installing running boards on a 2007 F150 truck serves multiple purposes and offers numerous benefits. Firstly, it provides easy access to the truck’s cabin, especially for children and elderly people who may have difficulty getting in and out of the vehicle. Secondly, it enhances the truck’s appearance by adding a stylish and sleek accessory that complements the vehicle’s design. Thirdly, running boards protect the truck’s body from scratches and dents that may occur when entering or exiting the vehicle. Other advantages include providing a non-slip surface for passengers and enhancing the truck’s resale value. Overall, installing running boards on a 2007 F150 truck is a practical and useful addition that offers both functional and aesthetic benefits.
Step 1: Gather Required Materials
One of the most important steps in installing running boards on your 2007 F150 is to gather all the necessary materials. You need to make sure that you have everything you need before you start the installation process. This will not only save you time but also ensure that you do not have to make any unnecessary trips to the store. Some of the materials you will need include the running boards, brackets, screws, a drill, a screwdriver, and a measuring tape. It is important to ensure that the running boards and brackets are of the correct size and fit for your truck. In addition to the materials mentioned above, you may also need an extra pair of hands to help you with the installation process. While it is possible to install running boards on your own, having someone to help you can make the process much easier and quicker. You should also consider wearing gloves and protective eyewear to protect your hands and eyes from any potential injuries. Once you have gathered all the required materials, you can proceed to the next step of the installation process.
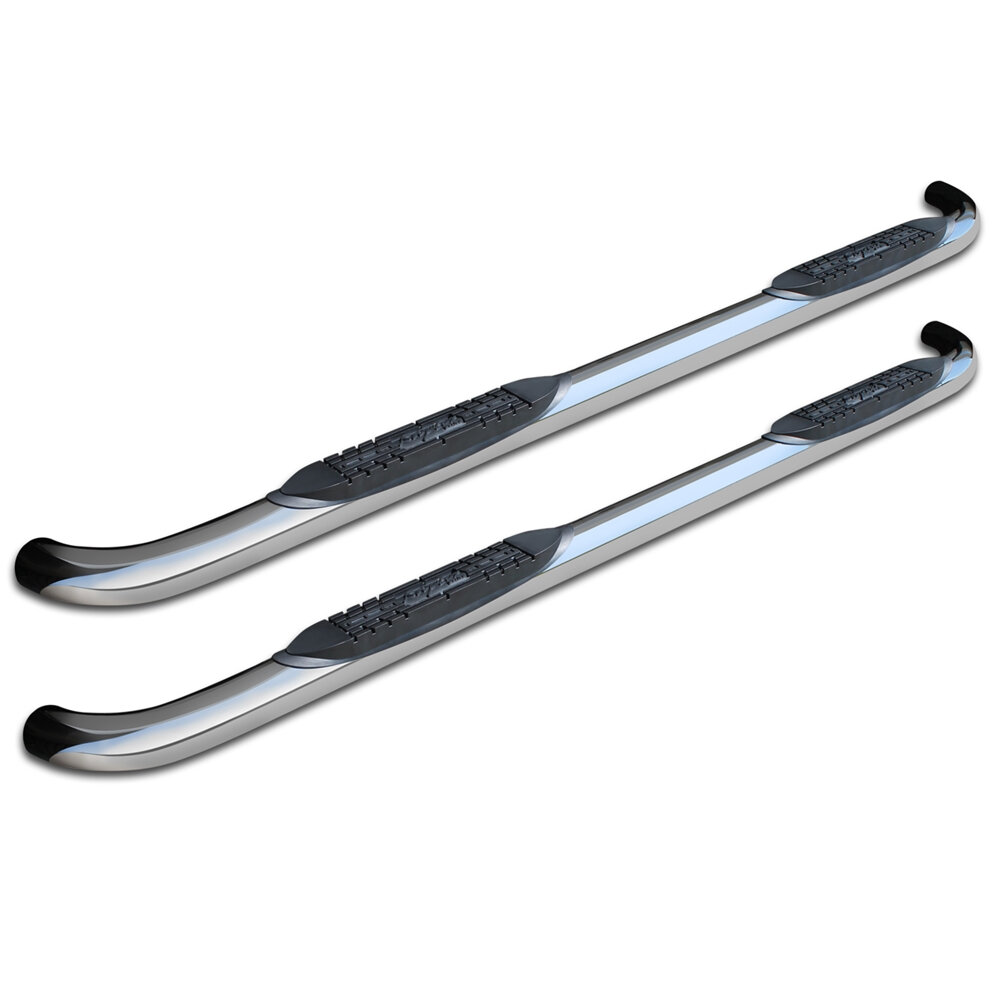
To successfully install running boards on your 2007 F150, you’ll need a few key materials. First and foremost, you’ll need the running boards themselves, which can come in a variety of styles and materials. You’ll also need mounting brackets to attach the running boards securely to your truck. Bolts and nuts are also essential for fastening everything together and ensuring that the running boards stay firmly in place. It’s important to choose high-quality materials that will withstand the wear and tear of regular use, so be sure to invest in parts that are specifically designed for your make and model of truck. With the right materials and a bit of patience, you can easily install running boards on your 2007 F150 and enjoy the added convenience and style they provide.
Finding the necessary materials to install running boards on your 2007 F150 can be a hassle, but there are several options available. One option is to visit your local auto parts store, such as AutoZone or Advance Auto Parts, where you can find running boards, brackets, and any necessary tools. Another option is to purchase these materials online through retailers such as Amazon or eBay. It is important to ensure that the products you purchase are compatible with your specific make and model of vehicle. Additionally, it is recommended to read reviews and compare prices before making a final purchase.
Step 2: Remove the Old Running Boards
Step 2 in the Easy Guide to Installing Running Boards on a 2007 F150 involves removing the old running boards. This step is crucial to ensure that the new running boards fit perfectly and are securely attached to the vehicle. The removal process may involve the use of various tools such as a socket wrench, pliers, or a screwdriver, depending on the type of running board being installed. It is important to have the necessary tools ready before beginning the removal process to avoid any unnecessary delays or complications. Removing the old running boards can be a bit of a challenge, especially if they are rusted, corroded, or have been in place for a long time. It is essential to take your time and work methodically to prevent causing any damage to the vehicle. It is also important to ensure that all bolts, screws, and clips are removed from the old running boards before attempting to remove them from the vehicle. Once the old running boards are removed, it is time to move on to the next step of the installation process.
Removing old running boards from a truck is a simple task that can be done with the right tools and precautions. To start, park the truck on a flat surface and engage the parking brake. Use a wrench or socket set to loosen and remove the bolts that secure the running board to the truck’s frame. If the bolts are rusted or difficult to remove, use a penetrating oil to loosen them. Once the bolts are removed, carefully lift the running board away from the truck. Be mindful of any wiring or sensors that may be attached to the running board and disconnect them before completely removing the board. Dispose of the old running board responsibly and inspect the truck’s frame for any damage or rust before proceeding with the installation of the new running boards.
In order to install running boards on your 2007 F150, you will need a few essential tools to complete the job. These tools include a socket set, a ratchet wrench, a torque wrench, a drill, drill bits, a center punch, a measuring tape, a marker, a level, and a rubber mallet. It’s important to have these tools on hand before you begin the installation process to ensure that you can complete the job efficiently and effectively. With these tools, you will be able to follow the 7 simple steps outlined in this guide and have your running boards installed in no time.
Step 3: Install the Mounting Brackets
The third step in installing running boards on a 2007 F150 is to install the mounting brackets. These brackets are what will hold the running boards in place and ensure that they are secure while in use. To begin, locate the mounting holes on the truck’s frame and align the brackets accordingly. It is important to ensure that the brackets are aligned correctly to avoid any issues with the running boards being unstable or wobbly. Once the brackets are in the correct position, use the hardware provided to attach them securely to the frame. This hardware may include bolts, washers, and nuts. Tighten the hardware firmly, but be careful not to over-tighten as this can cause damage to the truck’s frame. After the brackets are securely in place, attach the running boards to the brackets according to the manufacturer’s instructions. With the mounting brackets installed, the running boards will be securely attached to the truck and ready for use.
To properly install the mounting brackets on your truck’s frame, you should first locate the factory mounting points under the vehicle. Make sure to clean the area thoroughly before attaching the brackets. Once you have positioned the brackets, use a torque wrench to tighten the bolts to the manufacturer’s recommended torque specifications. It is important to ensure that the brackets are level and evenly spaced on both sides of the vehicle. Additionally, you should double-check that the brackets are securely fastened before moving on to installing the running boards. By taking the time to properly install the mounting brackets, you can ensure a safe and sturdy foundation for your running boards.
When installing running boards on your 2007 F150, it’s important to ensure that the brackets are both level and secure. To achieve this, it’s a good idea to use a level to ensure that the brackets are straight and at the same height on both sides of the vehicle. Additionally, make sure to use a torque wrench to tighten the bolts to the manufacturer’s recommended torque specification, as this will help ensure that the brackets are securely attached to the frame of the truck. Finally, it’s a good idea to periodically check the brackets and bolts to make sure that they remain tight and secure over time, as this will help ensure both your safety and the longevity of the running boards.
Step 4: Attach the Running Boards to the Brackets
Step 4 of installing running boards on a 2007 F150 involves attaching the running boards to the brackets. This step is crucial as it ensures that the boards are securely fastened to the vehicle. To start, align the brackets with the pre-drilled holes on the running board. Once aligned, use the provided hardware to attach the brackets to the running boards. It is important to ensure that the bolts are tightened to the recommended torque specification to prevent the running boards from becoming loose while driving. Attaching the running boards to the brackets is a relatively straightforward process that should take only a few minutes. However, it is important to check that the brackets are correctly aligned before proceeding to fasten them to the running boards. Improper alignment can cause the running boards to sit unevenly and may even cause damage to the vehicle. Additionally, it is essential to tighten the bolts to the recommended torque specification to ensure that the running boards are securely fastened to the vehicle and do not become loose while in use. By following these steps, you can safely and effectively install running boards on your 2007 F150.
Attaching the running boards to the mounting brackets securely is a crucial step in the installation process. To do this, first, align the mounting brackets with the pre-drilled holes in the running board. Then, insert bolts into the holes and tighten them with a wrench. It’s essential to ensure that the bolts are tightened securely to prevent any wobbling or unstable movements while getting in and out of the vehicle. Additionally, using a torque wrench to tighten the bolts to the manufacturer’s recommended torque setting will provide an extra layer of confidence in the stability of the running boards. Finally, double-check all bolts and screws before finishing the installation process to guarantee a safe and secure attachment.
When installing running boards on your 2007 F150, it is crucial to make sure they are level and properly aligned. To ensure proper alignment, first, check that the brackets are secured and tightened properly. Next, measure the distance between the running board and the vehicle’s body at both the front and rear brackets. If the distances differ, make adjustments to the brackets until they are even. It is also important to check the running board’s height and make sure it aligns with the vehicle’s bottom edge. Once the running board is level and properly aligned, tighten all bolts and screws securely to prevent any wobbling or shifting while in use.
Step 5: Tighten the Bolts and Nuts

Step 5 of the installation process involves the crucial task of tightening the bolts and nuts. After positioning the running boards in the desired place, it is crucial to secure them with the help of bolts and nuts. Tightening these components ensures that the running boards are attached firmly and will not come off while driving. It is essential to use the right tools and tighten the bolts and nuts as per the manufacturer’s instructions to ensure that they are not under or over tightened. Over tightening can cause the bolts to snap, while under tightening can cause the running boards to rattle or come off while driving. Therefore, it is imperative to tighten them to the right degree to ensure the safety of the driver and passengers. The installation of running boards on a 2007 F150 requires attention to detail and precision. Tightening the bolts and nuts is the final step of the installation process and should not be taken lightly. A loose or improperly tightened running board can lead to accidents and damage to the vehicle. Therefore, it is crucial to double-check the tightness of each bolt and nut and ensure they are secure. Additionally, it is advisable to take the vehicle for a test drive to check the running boards’ stability and make any necessary adjustments. By following this step, you can ensure that the running boards are installed correctly and will serve their purpose for a long time.
It is crucial to tighten the bolts and nuts correctly to ensure the running boards are securely attached to the brackets. Firstly, use a torque wrench to tighten the bolts to the manufacturer’s recommended torque specifications. This will ensure that the bolts are tightened to the appropriate level and prevent over-tightening or under-tightening. Secondly, tighten the nuts using a wrench, making sure they are firmly in place. It is important to check the tightness of the bolts and nuts periodically to ensure they remain secure. Loose bolts and nuts can cause the running boards to detach from the brackets, leading to potential safety hazards. Therefore, it is essential to take the time to tighten the bolts and nuts correctly to ensure the running boards are securely attached to the brackets.
When installing running boards on your 2007 F150, it is important to be cautious about overtightening the bolts and damaging the truck. To prevent this from happening, there are a few helpful tips to keep in mind. Firstly, be sure to follow the manufacturer’s instructions carefully and use the recommended torque specifications for each bolt. Secondly, use a torque wrench to tighten the bolts gradually, checking the tightness after each turn until the proper torque is reached. Lastly, avoid using power tools, which can easily overtighten the bolts and cause damage. By following these simple steps, you can ensure a safe and secure installation of your running boards without causing any damage to your truck.
Step 6: Check the Alignment and Levelness
Step 6 of the Easy Guide to Installing Running Boards on 2007 F150 in 7 Simple Steps is crucial to ensure that the running boards are aligned and level. The alignment must be accurate to ensure that the running boards sit correctly on the brackets and do not wobble or shift during use. The levelness is also important to provide a safe and comfortable stepping surface for passengers entering and exiting the vehicle. Checking the alignment and levelness requires a level and a measuring tape to ensure that the brackets are spaced equally on both sides of the truck. This step may require multiple adjustments to achieve the desired levelness and alignment, but it is worth the effort for the safety and comfort of passengers. Once the alignment and levelness of the brackets are checked and adjusted, the running boards can be attached to the brackets using the provided hardware. It is essential to follow the manufacturer’s instructions and use the correct tools to ensure that the running boards are securely fastened to the truck. The bolts should be tightened securely, but not over-tightened, to avoid damaging the brackets or the running boards. After the installation is complete, it is essential to test the running boards by stepping on them to ensure that they are securely fastened and level. By following this step-by-step guide, installing running boards on your 2007 F150 truck can be a straightforward and rewarding project.
Once the running boards have been installed on your 2007 F150, it’s important to check the alignment and levelness to ensure they are properly installed. Begin by standing at the front of the truck and visually inspecting the running boards to ensure they are even and parallel with the ground. Next, use a level to check the levelness of the running boards. Place the level on the running board and adjust the brackets as needed to achieve a level surface. It’s important to check both the driver and passenger side running boards to ensure they are both properly aligned and level. Once you’ve made any necessary adjustments, give the running boards a gentle shake to make sure they are securely attached to the truck.
If adjustments are needed during the installation of running boards on your 2007 F150, there are a few tips to keep in mind. First, make sure to carefully read the instructions and double-check that you have all the necessary tools before beginning. If you encounter any issues during the installation process, don’t hesitate to consult online resources or reach out to customer support for assistance. It may also be helpful to take a step back and assess the situation before making any further adjustments. Finally, be patient and take your time to ensure that the running boards are properly installed and secure. With these tips in mind, you can successfully install running boards on your 2007 F150 and enjoy the added convenience and style they provide.
Step 7: Test the Running Boards
Step 7: Test the Running Boards, is the last but one of the most crucial steps in the process of installing running boards on your 2007 F150. This step ensures that you have correctly installed the running boards, and they are safe and secure for use. To test the running boards, stand on them one at a time and apply pressure to confirm that they can handle your weight without wobbling or bending. You can also have a friend stand on the opposite side of the running board to test their stability. If the running boards are not stable or wobble, you may need to re-adjust the brackets or bolts to ensure that they are correctly aligned. Testing the running boards also allows for any final adjustments to be made. You may notice that the running boards are not level or are too high once you test them. If this is the case, you can make the necessary adjustments to ensure that they are aligned correctly with the vehicle’s body. Once you have tested the running boards and made any necessary adjustments, you can rest assured that they are secure and safe for use. Testing the running boards is a crucial step that should not be skipped.
Once the running boards are installed on your 2007 F150, it is crucial to test them to ensure they are sturdy and safe to use. First, apply pressure on the center of the board with your foot to test its strength. Next, check the brackets and bolts to ensure they are tightly secured. You can also apply lateral pressure to the board to see if it wobbles or moves from side to side. If it does, make sure the brackets are securely attached to the frame of the truck. Lastly, stand on the board and jump up and down a few times to test its durability. If the board can withstand your weight without bending or breaking, then it is safe for use. Always double-check the running boards before using them to prevent any accidents or injuries.
Testing is an essential part of the installation process, but it’s not uncommon to encounter issues along the way. If you find that something isn’t working as it should, don’t panic. Instead, take a step back and assess the situation. Try to isolate the problem and determine what might be causing it. It’s often helpful to refer back to the instructions to ensure that you’ve followed all the steps correctly. If you’re still having trouble, consider reaching out to the manufacturer or consulting online resources for troubleshooting tips. Above all, don’t rush through the testing process. It’s better to take your time and identify any issues upfront than to discover them after the fact.
The article titled \Easy Guide Installing Running Boards on 2007 F150 in 7 Simple Steps\ provides a comprehensive guide on how to install running boards on a 2007 F150. The installation process is broken down into seven simple steps, which are easy to follow and require minimal tools. The key points of the installation process include removing the old running boards, cleaning the vehicle’s surface, installing the brackets, attaching the running boards, making necessary adjustments, and securing all the bolts and nuts. The article also provides helpful tips and precautions to ensure a smooth installation process. Overall, the article offers a clear and concise guide for anyone looking to install running boards on their 2007 F150.
Installing running boards on a 2007 F150 truck is not only a matter of appearance but also of practicality and safety. These accessories provide a non-slip surface for getting in and out of the vehicle, especially for passengers with limited mobility. Running boards also protect the door sills from scratches and dings, which can accumulate over time and reduce the resale value of the truck. Moreover, running boards can enhance the aerodynamics of the vehicle by reducing drag and improving fuel efficiency. They can also serve as a platform for carrying cargo or cleaning hard-to-reach areas of the truck. In short, running boards are a versatile and beneficial addition to any 2007 F150 truck, and their installation is easy and affordable.
Dear readers, we hope that our article on installing running boards on a 2007 F150 has been helpful to you. We understand that everyone may have different experiences when it comes to DIY projects, and we would love to hear about yours. Whether you encountered any challenges or have some tips to share with others who are planning to install running boards, we encourage you to share your thoughts in the comments section below. Your feedback will not only help us improve our content but also create a community of DIY enthusiasts who can learn from each other’s experiences. Thank you for reading and we look forward to hearing from you!
Conclusion

In conclusion, installing running boards on a 2007 F150 is a manageable task that requires some basic technical skills and the right tools. By following the simple steps outlined in this guide, anyone can add a touch of style and functionality to their truck. Whether it’s for easy access, improved safety, or enhanced aesthetics, running boards are a great addition to any F150. From measuring and drilling to bolting and tightening, each step is crucial to ensure a secure and stable installation. So, take your time, be patient, and enjoy the result of your hard work. With these simple instructions, you’ll be stepping up onto your new running boards in no time!
