Why Your LED Light isn’t Working: Troubleshooting Tips for Faulty Illumination
LED lights have become increasingly popular in recent years due to their energy efficiency and long lifespan. However, despite their many advantages, these lights can sometimes experience faults and fail to illuminate properly. If you’re experiencing this issue with your LED lights, don’t worry! There are a number of simple troubleshooting tips you can use to identify and fix the problem. The first step in troubleshooting your LED light is to identify the root cause of the issue. This can be caused by a number of factors, ranging from a faulty bulb or wiring to incorrect installation or a damaged transformer. By understanding the underlying cause of the problem, you’ll be better equipped to address it effectively and get your LED light back up and running in no time. So, let’s dive into some common troubleshooting tips to help you get your faulty illumination back on track!
LED lights, short for \light-emitting diode\ lights, are a more energy-efficient and eco-friendly alternative to traditional incandescent and fluorescent bulbs. They work by passing a current through a semiconductor, which emits light in a specific color. LED lights have several advantages over other lighting options, including their longer lifespan, lower energy consumption, and durability. They also emit less heat, making them safer to use and reducing the risk of fire. LED lights are also available in a wide range of colors and can be easily dimmed or brightened, making them a versatile option for any lighting need. Despite their many benefits, however, LED lights can still experience faults and malfunctions, which require troubleshooting to resolve.
When the LED lights go out, it can be a frustrating experience. Faulty illumination can be caused by a variety of factors, including wiring issues, power surges, or faulty bulbs. Troubleshooting tips can help you quickly identify the root cause of the problem and get your LED lights back up and running. Understanding the importance of troubleshooting tips for faulty illumination is critical for anyone who wants to keep their LED lights functioning properly. Troubleshooting can save you money by helping you avoid unnecessary repairs or replacements. Additionally, it can help you avoid safety hazards associated with faulty wiring or other electrical issues. Proper maintenance and troubleshooting can help ensure that your LED lights continue to provide reliable and efficient illumination for years to come.
Check the Power Source
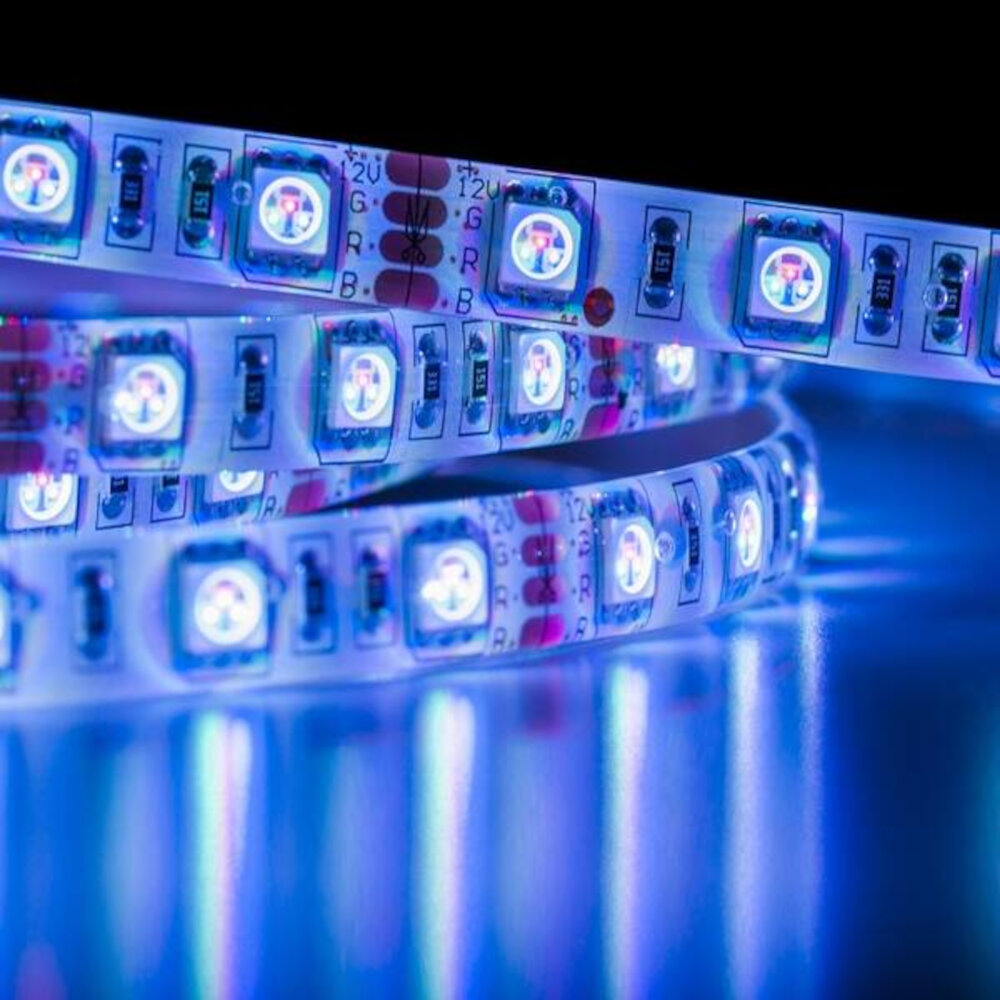
The first step in troubleshooting a faulty LED light is to check the power source. This may sound obvious, but it’s surprising how often people overlook this step. Make sure that the light is receiving power and that the outlet or switch that it’s connected to is functioning properly. If the light is plugged in, try unplugging it and plugging it back in again to ensure that the connection is secure. If the light is connected to a switch, make sure that the switch is turned on and that the wiring is not damaged or loose. If the power source is not the issue, it’s possible that there is a problem with the LED driver. The LED driver is the component that regulates the power supply to the LED light, and if it’s not functioning properly, the light may not work. Check the LED driver for any signs of damage or wear and tear. If it looks damaged, it may need to be replaced. Additionally, it’s important to make sure that the LED driver is compatible with the LED light. If the LED driver is not designed for the specific type of LED light, it may not function properly.
If your LED light isn’t working, the first thing to check is the power source. This step is crucial because it can save you time and effort in troubleshooting other potential issues. A faulty or disconnected power source can cause an LED light to malfunction, and it may seem like the light itself is broken. Therefore, before inspecting the wiring, the bulb, or any other component of the light, it is essential to ensure that it is receiving power correctly. This means checking that the switch is on, the outlet is functional, and the power cord is securely plugged in. By taking this simple step, you can quickly identify the root cause of the problem and avoid unnecessary repairs or replacements.
If your LED light isn’t working, one of the first things to check is the power source. Begin by ensuring that the light is properly plugged in or that the batteries are fully charged. If the light is plugged in, try plugging it into a different outlet to ensure the outlet itself is not the issue. If the light is battery operated, make sure the batteries are inserted correctly and that they are not dead or low on power. Additionally, check for any visible damage or loose connections in the power source that may be preventing the light from functioning properly. By checking the power source first, you can quickly troubleshoot and potentially resolve the issue with your LED light.
One of the common reasons why your LED light may not be working is due to power source issues. This can include a faulty power outlet or a damaged power cord. Firstly, check that the power outlet is working by plugging in another device. If the outlet is not working, reset the circuit breaker or replace the fuse. If the power cord is damaged, replace it with a new one. Additionally, ensure that the power source is supplying enough voltage to the LED light. If not, use a voltage regulator to increase the voltage to the required level. By addressing power source issues promptly, you can restore your LED light’s functionality and avoid any potential safety hazards.
Check the Bulb

The H2 title \Check the Bulb\ is a crucial step in troubleshooting any LED light that isn’t working. The first thing to do when checking the bulb is to turn off the power source to avoid electrocution. After that, you need to remove the bulb from its socket and inspect it for any visible damage, such as cracks or burnt marks. If you find any damage, then you need to replace the bulb with a new one. However, if the bulb looks fine, then you can test it using a multimeter to check for continuity. If the bulb doesn’t have continuity, then it’s faulty, and you need to replace it. Checking the bulb is an essential step in troubleshooting any LED light that isn’t working. Sometimes, the problem might not be with the bulb itself, but with the socket or wiring. In this case, you need to inspect the socket and wiring for any visible damage, such as loose or disconnected wires. If you find any damage, then you need to fix it before inserting a new bulb. Additionally, if you have multiple LED lights that aren’t working, then you can swap the bulbs and sockets to identify the faulty one. Once you’ve identified the problem, you can fix it and enjoy the bright illumination of your LED lights again.
Checking the bulb after connecting the power source is a crucial step in troubleshooting a faulty LED light. It helps ensure that the bulb is correctly installed, and any loose connections are fixed before further analysis. Moreover, bulbs have a limited lifespan, and they may burn out without warning. Therefore, it is essential to check the bulb’s condition to determine if it needs replacement. In addition, checking the bulb can help pinpoint the cause of the problem, whether it is a power source issue, a faulty bulb, or a wiring problem. In short, taking the time to check the bulb after connecting the power source can save time and money in the long run by identifying and fixing the issue promptly.
If your LED light isn’t working, the first thing you should check is the bulb. Start by turning off the power to the fixture and letting it cool down. Then, carefully remove the bulb and inspect it for any signs of damage, such as cracks or blackened areas. If the bulb appears to be in good condition, use a multimeter to check its continuity. This can help you determine if the bulb is functioning properly or if it needs to be replaced. Additionally, it’s important to ensure that the bulb is the correct size and type for the fixture, as using the wrong bulb can cause it to malfunction. By taking these steps, you can quickly diagnose and resolve issues with your LED lighting.
There are several potential issues that can cause an LED light to stop working. One of the most common culprits is a faulty bulb. If the bulb is not securely screwed in, it may not make proper contact with the socket, resulting in intermittent or no illumination. In this case, simply unscrew the bulb and reattach it, making sure it is firmly in place. Another common issue is a burned-out bulb, which can be replaced easily by purchasing a new LED bulb that is compatible with your fixture. If the bulb is not the issue, check the wiring and connections to ensure they are properly connected and functioning correctly.
Check the Wiring

If your LED light isn’t working, one of the first things to check is the wiring. Faulty wiring is a common issue that can cause problems with LED lights, and it’s important to ensure that all of the wiring is properly connected and in good condition. Start by checking the wiring connections at both the light fixture and the power source. Make sure the wires are connected properly and that there are no loose connections. If any wires are damaged or frayed, they should be replaced before attempting to use the LED light again. It’s also important to check the voltage of the power source to ensure that it is compatible with the LED light. LED lights require a specific voltage range to operate correctly, and if the voltage is too high or too low, it can cause the light to malfunction or not work at all. Use a multimeter to test the voltage of the power source and compare it to the recommended voltage range of the LED light. If the voltage is outside of the recommended range, you may need to use a different power source or install a voltage regulator to ensure that the LED light is receiving the correct amount of power. By checking the wiring and voltage of your LED light, you can troubleshoot and resolve many common issues that can cause faulty illumination.
While power source and bulb issues are two common culprits for LED light malfunctions, checking the wiring is equally important. Faulty wiring can cause a range of issues, including flickering lights, dimming, and complete power failure. It’s essential to inspect the wiring for any damage or loose connections, as these can disrupt the flow of electricity and prevent the light from functioning correctly. Even if the wiring appears intact, it’s a good idea to double-check the connections and ensure they’re secure. By taking the time to check the wiring, you can identify and resolve any issues that may be preventing your LED light from working correctly, saving you time, money, and frustration in the long run.
If your LED light isn’t working, one possible explanation could be faulty wiring. To check the wiring, start by turning off the power to the light fixture. Then, remove the cover or casing to access the wiring. Look for any loose or disconnected wires, as well as any signs of damage such as frayed wires or burnt spots. Use a multimeter to test the continuity of the wires and make sure they are properly connected. If there are any issues with the wiring, repair or replace the affected parts as needed. It’s important to take caution and follow proper safety procedures when working with electrical wiring.
One of the most common issues with LED lights is faulty wiring. Poorly connected wires or damaged wiring can cause the lights to flicker or not work at all. To troubleshoot this issue, inspect the wiring and look for any signs of damage or loose connections. If there is visible damage, the wiring should be replaced. If the connections are loose, tighten them with pliers or wire strippers. Additionally, using the correct wire gauge for the LED lights can prevent future wiring issues. It is important to ensure that the wiring is installed correctly to avoid any safety hazards and to ensure proper functioning of the LED lights.
Call a Professional
When you’ve exhausted all the troubleshooting tips and your LED light still isn’t working, it may be time to call a professional. While it may be tempting to try and fix the problem yourself, especially if you’re handy with electrical work, it’s important to remember that dealing with electricity can be dangerous. A professional electrician has the training and expertise to diagnose and fix the issue safely and efficiently. They also have the necessary tools and equipment to test the electrical circuits and determine the root of the problem. Hiring a professional can save you time and money in the long run, as they can prevent further damage to your LED light or electrical system. Additionally, a professional can offer advice on avoiding future issues and improving the overall safety of your home or business. When looking for an electrician, be sure to choose one with a good reputation and proper licensing and insurance. Don’t hesitate to ask for references or a portfolio of previous work to ensure you’re making the right choice. With the help of a professional, you can have your LED light shining brightly once again.
If you have tried all the troubleshooting tips and your LED light is still not working, it may be time to call a professional. A trained electrician will have the expertise and tools to diagnose and fix the issue quickly and safely. Attempting to fix electrical issues on your own can be dangerous and may cause further damage to your lighting system or even your home’s wiring. A professional will also be able to ensure that your LED light is installed and wired correctly, reducing the risk of future problems. Don’t hesitate to reach out to a professional if you are unsure about how to fix your faulty illumination.
When it comes to troubleshooting a faulty LED light, it’s crucial to choose a qualified professional to avoid further damage and ensure that the light is fixed correctly. A qualified professional possesses the necessary knowledge and experience to diagnose the issue accurately and provide efficient solutions. Making the mistake of choosing an unqualified technician may result in further damage to the LED light or even cause electrical hazards, risking your safety. Therefore, it’s essential to do thorough research and choose a qualified professional with a proven track record of successful repairs. Remember, compromising on the quality of repair work can lead to more significant problems in the long run.
When seeking professional service for your LED light, it is important to expect a level of expertise and efficiency. A professional should have a thorough understanding of the technology behind LED lighting and be able to accurately diagnose any issues. They should also have access to the necessary tools and equipment to repair or replace any faulty components. Additionally, a professional should provide clear communication throughout the process, explaining the problem and the steps being taken to resolve it. Overall, a professional service should provide a reliable and effective solution to ensure your LED light is working properly.
In summary, there are several troubleshooting tips you can follow if your LED light isn’t working properly. First, check if the light is receiving power and if the cables are properly connected. Next, inspect the light bulb or strip to make sure it’s not damaged or burnt out. If the issue persists, try resetting the light or replacing any faulty components. Additionally, ensure that the light is compatible with your power source and that it’s installed correctly. By following these troubleshooting tips, you can quickly and easily identify and resolve any issues with your LED light, ensuring that it provides the illumination you need.
Proper maintenance of LED lights is crucial to ensure their longevity and optimal performance. LED lights are prone to failure if they are not maintained properly, and a lack of maintenance can lead to issues such as flickering, dimming, or complete failure. Regular cleaning of the LED lights and their fixtures is essential to prevent dust and dirt buildup, which can reduce the light output and lifespan of the LED bulbs. Additionally, proper installation and use of LED lights in the right environment can prevent overheating and damage to the fixtures. Overall, investing time and effort in the maintenance of LED lights can save you money in the long run by avoiding costly repairs and replacements.
In conclusion, troubleshooting a faulty LED light can be a frustrating and time-consuming process, but with the right approach, it can be resolved quickly and easily. Always start by checking the power source and connections, and then move on to inspecting the LED driver and the bulbs themselves. If you still can’t identify the issue, seek professional help from an electrician or qualified technician. Remember to always prioritize safety, and never attempt to repair electrical components unless you have the necessary skills and expertise. By taking these steps, you can ensure that your LED light is working smoothly and efficiently, providing reliable and cost-effective illumination for your home or business.
Conclusion
In conclusion, troubleshooting your LED light is not as daunting as it may seem. By following the tips outlined, you can quickly identify and rectify the problem causing the faulty illumination. Remember to start with the basics, such as checking the power source and connections, before moving on to more complex issues. Don’t be afraid to consult the manufacturer’s instructions or seek professional help if needed. With a little bit of effort and patience, you can have your LED light shining brightly once again, providing you with the illumination you need.

