Upgrade Your Home Lighting: A StepbyStep Guide on How to Easily Change Your Ceiling Light to LED
Lighting plays a crucial role in creating an ambiance that sets the tone for any space. It can make or break the overall look and feel of a room. With the advancement in technology, LED lights have become a popular choice among homeowners for their energy efficiency, durability, and versatility. If you’re still using traditional light bulbs, switching to LED will not only save you money on your energy bills but also help reduce your carbon footprint. In this step-by-step guide, we’ll walk you through the process of upgrading your home lighting by replacing your ceiling light with an LED fixture. Whether you’re a DIY enthusiast or a complete novice, this guide will provide you with all the information you need to make the switch. From choosing the right LED fixture to installing it, we’ve got you covered. So, let’s get started and upgrade your home’s lighting to LED!
Good lighting can have a significant impact on the atmosphere of a home. Adequate lighting can make a room feel larger and more welcoming, while poor lighting can make a space feel cramped or uninviting. Additionally, good lighting can improve energy efficiency by reducing the need for additional fixtures or the unnecessary use of electricity. Upgrading to LED lighting is an excellent way to improve the atmosphere of your home while also reducing your energy consumption. LEDs use significantly less energy than traditional lighting, and they last much longer, making them a smart choice for homeowners who are looking to make their homes more energy-efficient. By upgrading to LED lighting, you can enjoy a more comfortable, inviting home while also reducing your carbon footprint and saving money on your energy bills.
LED lights have numerous advantages over traditional incandescent bulbs. Firstly, they are highly energy-efficient and use up to 75% less energy, resulting in significant long-term cost savings. Moreover, they last up to 25 times longer than incandescent bulbs, reducing the need for frequent replacements. LED lights are also more durable, as they are resistant to shock, vibrations, and extreme temperatures. Additionally, they emit less heat, making them a safer option for use in the home. Finally, LED lights are available in a wide range of colors and designs, allowing homeowners to customize their lighting to suit their style and preferences. Overall, upgrading to LED lights is a smart investment that can improve energy efficiency, reduce maintenance costs, and enhance the aesthetic appeal of any home.
Upgrading your home lighting to LED can provide energy efficiency, cost savings, and a brighter, more modern look. To upgrade your ceiling light to LED, follow these simple steps. First, turn off the power to the fixture at the circuit breaker. Then, remove the old light fixture, carefully disconnecting the wires. Next, attach the mounting bracket for the new LED fixture and connect the wires according to the manufacturer’s instructions. Finally, install the LED bulbs and attach the fixture to the mounting bracket. With these steps, you can easily upgrade your home lighting to LED and enjoy the benefits of this modern technology.
Step 1: Choose the Right LED Light

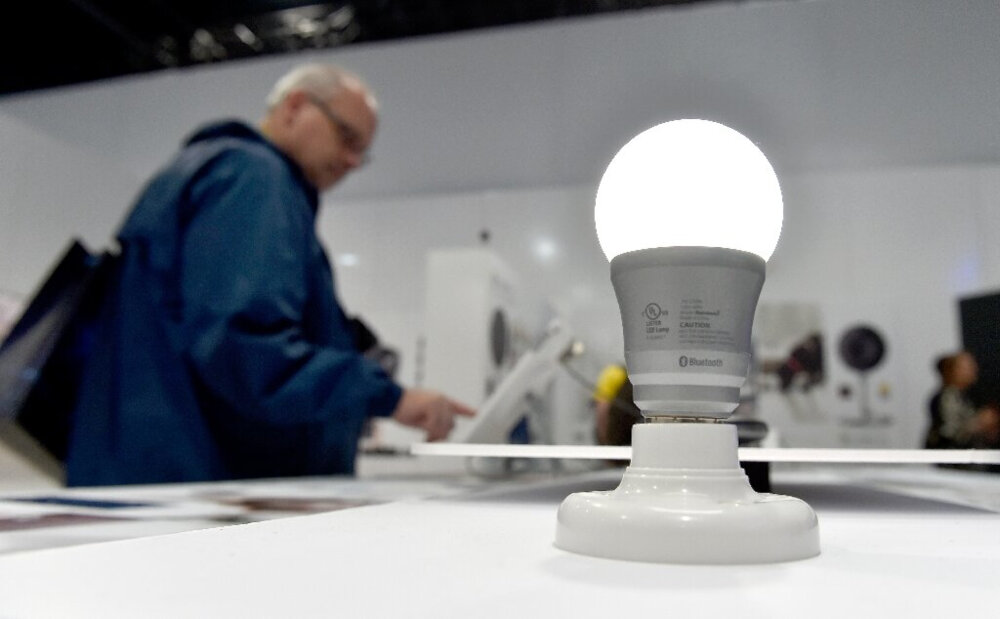
When it comes to upgrading your home lighting to LED, the first step is to choose the right LED light. LED lights come in a variety of shapes, sizes, and colors, so it’s important to understand your lighting needs and preferences before making a purchase. Some LED lights are designed to be dimmable, while others are not. Some LEDs emit warm, yellow-toned light, while others produce bright, cool-toned light. To choose the right LED light, consider the room where the light will be installed and the purpose of the light. For example, in a bedroom or living room, warm-toned LED lights may be more desirable for creating a cozy and relaxing atmosphere. In a work area, cool-toned LED lights may be preferred for providing bright and focused lighting. Additionally, if you plan on using a dimmer switch, make sure to choose an LED light that is compatible with dimming technology to avoid any issues with flickering or buzzing. Taking the time to select the right LED light can make a big difference in the overall look and feel of your space. Once you have determined your lighting needs and preferences, it’s time to start shopping for the right LED light. Look for reputable brands and read reviews from other customers to ensure you are getting a high-quality product. Keep in mind that LED lights may have a higher upfront cost compared to traditional incandescent bulbs, but they are more energy-efficient and have a longer lifespan, which makes them a worthwhile investment in the long run. With the right LED light, you can enjoy brighter, more efficient lighting in your home while reducing your energy costs and environmental impact.
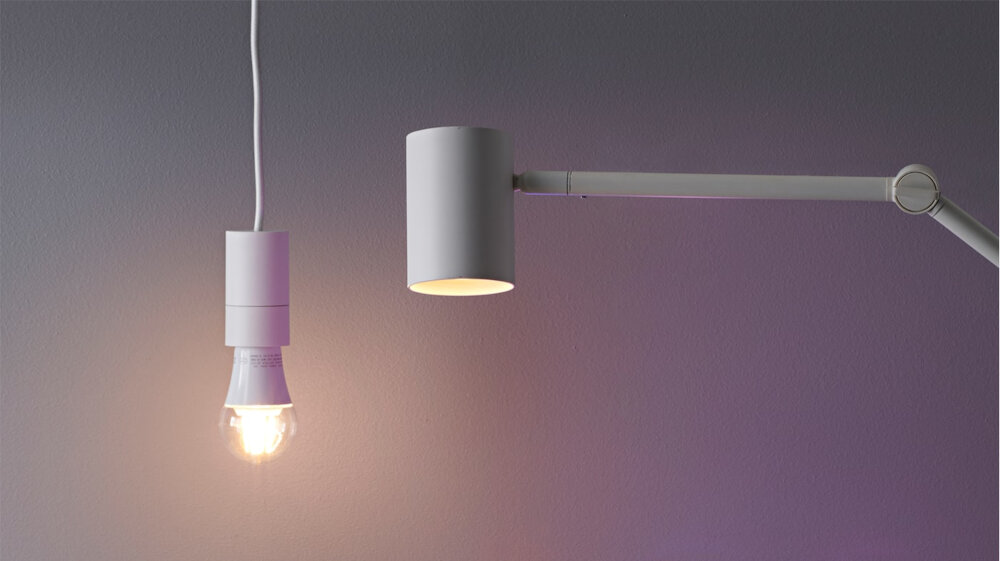
Understanding LED light bulb specifications is crucial to ensure that you choose the right bulb for your needs. The most important specification to consider is the brightness or the lumen output, which determines how bright the bulb will be. The color temperature, measured in Kelvin (K), is also essential, as it determines the color of the light emitted. A warm white light typically has a color temperature of around 2700K, while a cool white light is around 5000K. Additionally, the wattage of an LED bulb is not a good indicator of its brightness, as LEDs use less power than traditional incandescent bulbs. Instead, look for the lumen output to determine the bulb’s brightness, and choose a color temperature that suits your preferences and needs.
When upgrading your home lighting to LED, it’s essential to choose the right size, brightness, color temperature, and dimming capabilities. The size of the LED bulb should fit your fixture and socket, and it’s crucial to check that before making a purchase. Brightness is measured in lumens, and you should choose the right amount for the space you intend to light up. Color temperature is measured in Kelvin, and it determines the warmth or coolness of the light. A lower number indicates a warmer, yellowish light, while a higher number indicates a cooler, bluish light. Finally, dimming capabilities are essential for creating a cozy and inviting atmosphere in your home. Make sure your LED bulbs are compatible with your dimmer switch for optimal performance.
When it comes to upgrading your home lighting, it’s important to consider both the prices and brands of LED ceiling lights. While it’s tempting to go for the cheapest option, it’s important to remember that quality is key when it comes to lighting. Investing in a reputable brand may cost more upfront, but it can save you money in the long run as they tend to last longer and have better energy efficiency. Additionally, be sure to compare prices across different retailers to ensure you’re getting the best deal possible. It’s important to strike a balance between quality and affordability to ensure that you’re getting the most value for your money.
Step 2: Gather Tools and Materials
In order to upgrade your home lighting and change your ceiling light to LED, you will need to gather the necessary tools and materials. This step is crucial to ensure that the installation process goes smoothly and efficiently. Some of the tools and materials you will need include a ladder, wire strippers, wire nuts, a voltage tester, and of course, your LED ceiling light. It’s important to make sure that you have all of the necessary tools and materials before beginning the installation process to avoid any potential delays or setbacks. When gathering your tools and materials, it’s important to consider the specific requirements of your LED ceiling light. Some lights may require additional tools or materials, so it’s important to carefully review the manufacturer’s instructions before beginning the installation process. Additionally, you may want to consider purchasing additional materials such as electrical tape or cable ties to help secure the wiring and ensure a safe and secure installation. By taking the time to gather all of the necessary tools and materials, you can ensure that your LED ceiling light installation goes smoothly and efficiently, resulting in a bright, energy-efficient lighting solution for your home.
Before starting the process of changing your ceiling light to LED, it is important to have all the necessary tools and materials to ensure a smooth transition. The essential tools needed for this project include a ladder, wire stripper, wire nuts, and pliers. Additionally, you will need a voltage tester to ensure that the power is off before starting any electrical work. It is also important to have the LED light fixture and the appropriate bulbs on hand, as well as electrical tape to secure any loose wires. Having all these tools and materials ready will make the process of upgrading your home lighting an easy and stress-free experience.
When upgrading your home lighting, it’s essential to prioritize safety and preparation. Firstly, ensure the power is turned off at the circuit breaker before beginning any work. Secondly, gather all necessary tools beforehand, including a ladder, wire cutters, and a screwdriver. It’s also crucial to read the instructions thoroughly and follow them step-by-step. Additionally, have a friend or family member assist you in holding the light fixture while you make the necessary connections. Lastly, dispose of any old light bulbs and fixtures safely to prevent injury or damage to the environment. By taking these safety and preparation measures, you can enjoy your newly upgraded LED ceiling light with peace of mind.
Step 3: Turn off the Power and Remove the Old Light
In step 3 of upgrading your home lighting, it is essential to turn off the power and remove the old light to avoid any potential electrical hazards. Before starting any work, locate the circuit breaker that powers the light fixture and turn it off. You can also use a non-contact voltage tester to ensure that there is no live power running through the wires. Once the power is off, remove the light bulb and unscrew the mounting screws that hold the fixture to the ceiling. Be cautious while removing the old light as it may be heavier than expected. If you are unsure or uncomfortable, seek professional help. After removing the old light, inspect the wires to ensure they are in good condition, and there are no signs of damage or fraying. If you find any problems, it is best to call an electrician to fix them before proceeding. Next, disconnect the wires from the old fixture, making sure to label them with tape or a marker to avoid confusion when installing the new light. It is also a good idea to take a picture of the wiring setup for future reference. Once the wires are disconnected, remove the mounting bracket and any other hardware that held the old fixture in place. With the old light removed, you are now ready to install the new LED light fixture and enjoy the benefits of energy-efficient, long-lasting lighting.
Turning off the circuit breaker is a crucial step in upgrading your home lighting. This safety measure ensures that there is no electrical current flowing through the wires while you are working on the installation process. To turn off the circuit breaker, locate the electrical panel in your home and identify the breaker that controls the lighting circuit. Flip the switch to the \off\ position and check that the lights have turned off before proceeding with the installation. It’s important to take the time to turn off the circuit breaker to avoid any potential electrical hazards and ensure a successful and safe lighting upgrade.
Before you upgrade your ceiling light to LED, it is important to safely remove the old light fixture. The first step is to turn off the power supply to the fixture by flipping the circuit breaker or removing the fuse. Once the power is turned off, remove the screws or bolts that hold the fixture in place and carefully lower it down. Make sure to disconnect the wires by unscrewing the wire nuts and separating the wires, and then remove the mounting bracket. If there is any damage to the wiring or mounting bracket, it is important to replace them before installing the new LED fixture. Always use caution and follow safety guidelines when removing the old fixture to avoid any potential hazards or accidents.
When it comes to upgrading your home lighting, dealing with wiring and mounting hardware can be a daunting task. To make the process easier, it’s important to plan ahead and gather all the necessary tools and materials before beginning. Be sure to turn off the power to the room where you’ll be working, and use a voltage tester to double-check that the wires are not live. When mounting the new light fixture, follow the manufacturer’s instructions carefully and make sure it is securely attached to the ceiling. Finally, take the time to neatly organize and secure any wiring, using cable ties or clips if necessary. With these tips in mind, you can confidently tackle the wiring and mounting of your new LED ceiling light.
Step 4: Install the LED Light Fixture
After completing the previous steps, it is finally time to install the LED light fixture. First, turn off the electricity to the ceiling light by switching off the circuit breaker. Next, remove the old fixture and disconnect it from the electrical wires. Make sure to follow the instructions provided with the LED fixture carefully. Connect the wires to the appropriate terminals, and secure the fixture to the ceiling using the screws provided. Once the fixture is securely in place, turn the electricity back on and test the LED light. LED lights are known for being energy-efficient and long-lasting, so you can enjoy your new lighting for years to come. It is important to note that while LED lights are more expensive than traditional incandescent bulbs, they are much more energy-efficient and can save you money in the long run. In addition, LED lights emit less heat and are less likely to burn out, making them a safer and more reliable lighting option. Installing an LED light fixture is a simple and effective way to upgrade your home lighting, and with the right tools and instructions, you can easily do it yourself. So why not make the switch to LED and enjoy the benefits of modern, energy-efficient lighting in your home today?
Attaching the mounting bracket is a crucial step in the process of upgrading your home lighting to LED. To begin, turn off the power supply to the ceiling light and locate the mounting bracket that came with your new LED fixture. Next, hold the bracket up to the ceiling and use a pencil to mark the spots where the screws will go. Once you have marked the spots, drill pilot holes for the screws and then attach the bracket to the ceiling using the screws provided. Make sure that the bracket is secure and level before proceeding to the next step. Taking the time to properly attach the mounting bracket will ensure that your new LED fixture is installed safely and securely, giving you peace of mind and a bright, energy-efficient light source for years to come.
Wiring the fixture to the electrical box is an essential step in upgrading your home lighting to LED. Before starting, ensure that the power is turned off to avoid any electrical hazards. Begin by removing the old fixture and exposing the wires in the electrical box. Connect the black wire from the LED fixture to the black wire in the box and the white wire from the fixture to the white wire in the box. If there is a green or bare copper wire from the fixture, connect it to the green or bare copper wire in the box. Make sure to secure the wires with wire nuts and gently push them into the box. Once the wiring is complete, attach the fixture to the electrical box with screws and turn on the power to test the LED lighting.
Securing and testing the new light is a crucial step in the process of upgrading your home lighting to LED. First and foremost, ensure that the power supply to the old fixture is turned off before removing it. This can be done by switching off the circuit breaker or removing the fuse. Once the old fixture is removed, carefully follow the instructions provided with the new LED light to install it securely. Once the installation is complete, turn the power supply back on and test the new light to ensure that it is functioning properly. It is important to note that testing the new light should be done before fully securing it in place, in case any adjustments need to be made. Taking the time to properly secure and test the new light will ensure that your home is safely and efficiently illuminated with LED lighting.
Step 5: Enjoy Your New LED Ceiling Light!

After following the previous steps carefully, your new LED ceiling light is now installed and ready to use. Take a moment to appreciate the new brightness and clarity that LED lighting provides. LED lights are known for their energy efficiency, longevity, and versatility. They produce clear and bright light that is easy on the eyes, making them a popular choice for both residential and commercial settings. With your new LED ceiling light, you’ll enjoy the benefits of better lighting without worrying about high energy bills or frequent bulb replacements. Now that you have upgraded your home lighting, you can sit back and enjoy the ambiance created by your new LED ceiling light. Whether you’re reading a book, cooking a meal, or working on a project, you’ll appreciate the clear and bright lighting that LED technology provides. Plus, with the long lifespan of LED lights, you won’t have to worry about replacing bulbs anytime soon. So, sit back, relax, and enjoy the benefits of your new LED ceiling light. It’s the perfect finishing touch to any room in your home.
Adjusting the brightness and color temperature of your LED ceiling light can significantly enhance the ambiance of your home. To get the perfect lighting, begin by choosing the right color temperature based on your preferences and the mood you want to create. Cooler temperatures are ideal for productivity while warmer temperatures are suitable for relaxation. Next, adjust the brightness to match the activity you’re doing in each room. Dim the lights in the bedroom for sleep and increase the brightness in the living room for socializing. Finally, experiment with different lighting scenarios until you find the perfect setting for your space. Remember, the right lighting can make all the difference in the look and feel of your home.
If you’re looking to further upgrade your home lighting beyond just changing your ceiling lights to LED, there are several options to consider. One option is to install dimmer switches, which allow you to adjust the brightness of your lights to fit the mood or activity. Another option is to add accent lighting, such as under-cabinet lighting in the kitchen or wall sconces in the living room, to create a more inviting atmosphere. Smart lighting systems, which can be controlled by your phone or voice commands, are also becoming increasingly popular. Lastly, consider incorporating natural light sources, such as skylights or larger windows, for a more sustainable and energy-efficient lighting option. Whatever your preference, upgrading your home lighting can enhance your living space and improve your overall quality of life.
Upgrading your home lighting to LED has numerous benefits, including energy efficiency, durability, and cost-effectiveness. LED lights use up to 75% less energy than traditional incandescent bulbs, reducing your energy bills and carbon footprint. They also have a longer lifespan, lasting up to 25 times longer than incandescent bulbs, which means you’ll save money on replacements. Additionally, LED lights emit less heat, reducing the risk of fire and making them safer to use. Upgrading to LED lights is easy and can be done in just a few simple steps. First, choose the right LED bulb for your fixture, ensuring that it will fit and provide the right amount of light. Then, turn off the power to the fixture and remove the old bulb. Finally, insert the new LED bulb and turn the power back on to enjoy your new, energy-efficient lighting.
If you want to enjoy the benefits of improved home lighting, it’s time to take action and upgrade your ceiling lights to LED. Not only will LED lights provide brighter and more energy-efficient illumination, but they also last longer than traditional light bulbs. This means less time and money spent on maintenance and replacements. Plus, LED lights come in a variety of styles and colors, allowing you to customize your lighting to fit your personal taste and home decor. Don’t wait any longer to upgrade your home lighting and start reaping the benefits of a brighter and more efficient space.
Conclusion
In conclusion, upgrading your home lighting to LED is a worthwhile investment that can enhance the overall ambiance of your living space while also reducing your energy bills. With this step-by-step guide, you can easily change your ceiling light to LED and enjoy the benefits of brighter, more efficient lighting. From choosing the right LED bulb to safely installing it, this guide provides all the information you need to successfully upgrade your home lighting. So why wait? Take the first step towards a brighter, more energy-efficient home today!
Related posts:
 Upgrade Your Home Lighting: A Beginner’s Guide on How to Easily Change an LED Ceiling Light
 Upgrade Your Home Lighting: A StepbyStep Guide on How to Change Your LED Light Fixture
 Upgrade Your Home Lighting: Quick and Easy Guide on How to Change LED Flush Mount Light
 Upgrade Your Space: How to Easily Change LED Ceiling Lights