Upgrade Your Space: How to Easily Change LED Ceiling Lights
Are you tired of the dull and outdated lighting fixtures in your home? If you’re looking to upgrade your space, changing your ceiling lights to LED fixtures is a great place to start. Not only do LED lights offer brighter and more energy-efficient lighting, but they also come in a wide range of styles, colors, and shapes to suit your decor needs. Upgrading your ceiling lights may seem like a daunting task, but it doesn’t have to be. With a few simple steps and the right tools, you can easily change your old fixtures to modern, energy-saving LED lights. Not only will this improve the overall aesthetics of your room, but it will also save you money on your energy bills in the long run. In this article, we’ll guide you through the process of changing your LED ceiling lights, providing you with helpful tips and tricks along the way.
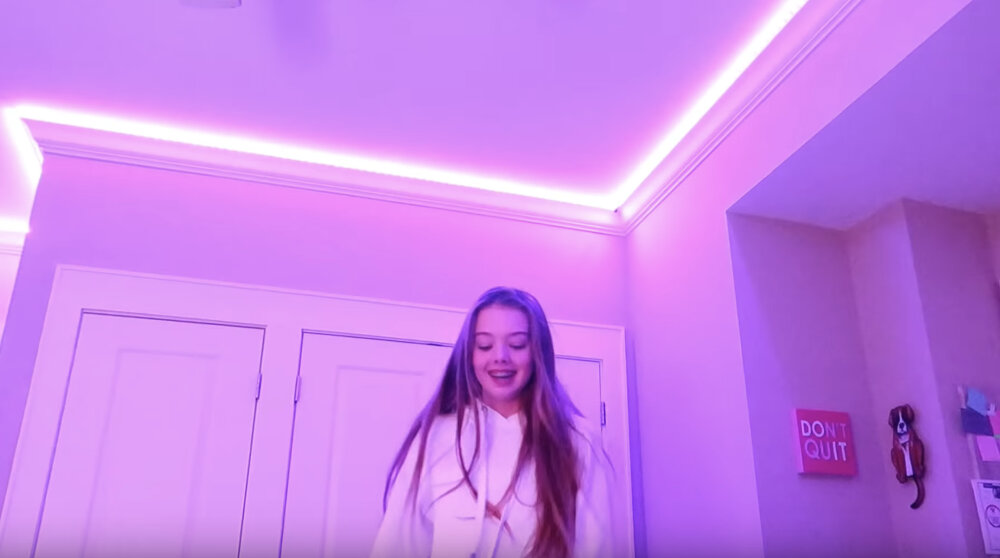
The importance of lighting in a space cannot be overstated. Lighting can completely transform the ambiance and mood of a room, making it crucial to choose the right type of lighting for your space. Whether you need bright lighting for a workspace, soft lighting for a relaxing atmosphere, or accent lighting to highlight specific features, LED ceiling lights provide the versatility and energy efficiency needed to create the perfect lighting environment. Upgrading to LED ceiling lights not only enhances the overall look and feel of your space, but also saves money on energy bills and reduces environmental impact. So, if you want to create a welcoming and functional space, consider upgrading your lighting with LED ceiling lights.
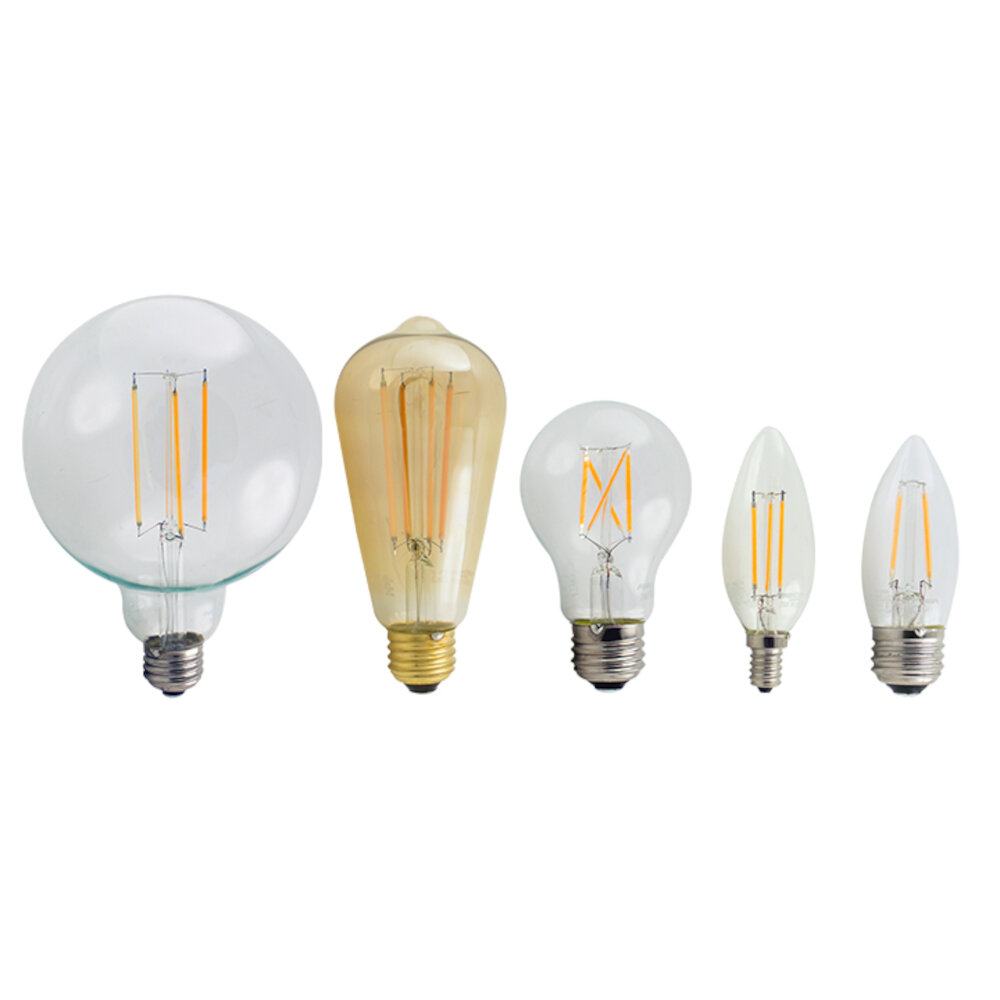
LED lights have become increasingly popular in recent years due to their numerous benefits. Firstly, they are extremely energy efficient, using up to 80% less energy than traditional incandescent bulbs. This means they can significantly reduce your energy bill and have a positive impact on the environment. Additionally, they have a longer lifespan than traditional bulbs, lasting up to 25 times longer. This means you can save money in the long term by not having to replace bulbs as frequently. LED lights also emit less heat than traditional bulbs, making them safer and more comfortable to use. Finally, they come in a variety of colors and styles, allowing you to easily customize the lighting in your space to fit your personal style and needs.
It’s essential to upgrade old fixtures to keep up with the latest trends and technology. Old fixtures not only look outdated but also consume more energy, resulting in higher electricity bills. LED ceiling lights are becoming increasingly popular due to their energy efficiency and longer lifespan. Upgrading to LED ceiling lights can enhance the overall ambiance of your space and provide brighter and more natural lighting. Additionally, LED lights are available in a variety of colors and styles, allowing you to choose the perfect fit for your space. By upgrading to LED ceiling lights, you can save money on energy bills while enjoying a more modern and sophisticated look in your home or business.
Gather Necessary Materials
Upgrading your space and modernizing it with LED ceiling lights is an exciting project that can transform any room. However, before starting the installation process, it’s essential to gather all the necessary materials to save time and prevent any delays. Firstly, ensure you have the correct size of LED light panels to fit your ceiling space. You can measure your existing light fixture or the area where you want to install the new LED lights. It’s also crucial to check the wattage and lumens of the LED panels to ensure they provide adequate brightness for your room. Additionally, you’ll need a screwdriver, wire nuts, and electrical tape to complete the installation process. Secondly, you’ll need to switch off the power supply to the ceiling lights before starting. This will prevent any electrical accidents and ensure your safety. You can locate the circuit breaker box and switch off the power supply to the room where you want to install the LED lights. Ensure you have a stable ladder or step stool to reach the ceiling safely. It’s also helpful to have a work light or flashlight to illuminate your workspace. By gathering all the necessary materials beforehand, you’ll have a stress-free installation process and enjoy your new LED ceiling lights sooner.
Before you start changing your LED ceiling lights, make sure you have all the necessary materials on hand. You will need a ladder or step stool to reach the ceiling, a screwdriver to remove the existing light fixture, wire strippers to connect the new light fixture to the electrical wiring, wire nuts to secure the electrical connections, and of course, the new LED ceiling light itself. It is also important to turn off the power to the existing light fixture at the circuit breaker to avoid any electrical accidents. Having all these materials ready beforehand will ensure a smooth and successful upgrade of your space with new LED ceiling lights.
When it comes to choosing the right LED lights for your space, there are several things to consider. First and foremost, you should determine the purpose of the lighting. Is it for general illumination, task lighting, or accent lighting? Once you have identified the purpose, you should also consider the color temperature and brightness of the LED lights. The color temperature can range from warm white to daylight, and the brightness can vary from dim to bright. Additionally, you should look for LED lights that have a high color rendering index (CRI) to ensure that the colors in your space appear true to life. Finally, consider the style of the LED lights and how they will complement your decor. By taking these factors into consideration, you can choose the right LED lights to upgrade your space and create the desired ambiance.
When it comes to upgrading your space by changing LED ceiling lights, it is important to prioritize safety precautions. Before attempting any electrical work, make sure to turn off the power at the circuit breaker to avoid electrocution. Use a sturdy ladder and wear non-slip shoes to prevent falls. Additionally, ensure that the new LED lights are compatible with the existing wiring and follow the manufacturer’s instructions carefully. If you are unsure about any step of the process, it is best to hire a licensed electrician to ensure the safety of yourself and your home. By taking these precautions, you can enjoy your newly upgraded space with peace of mind.
Remove Old Fixtures
If you’re looking to upgrade your space and give it a modern touch, changing your old fixtures is a great way to start. The first step in this process is to remove the old fixtures. This can be done by turning off the power supply to the fixture and then carefully removing any screws or clips holding it in place. Once the fixture is free, disconnect any wires and gently lower it down. Be sure to dispose of the old fixture properly, either by recycling it or taking it to a waste disposal facility. Removing old fixtures can be a daunting task, especially if they have been in place for many years. However, it is an essential step in order to upgrade your space and bring it up to date with modern lighting trends. By taking the time to properly remove old fixtures, you can ensure that your new LED ceiling lights are installed safely and securely. Plus, with LED technology, you’ll be able to enjoy energy-efficient lighting that will save you money on your energy bills over time. So, if you’re ready to upgrade your space and make a statement with your lighting, start by removing those old fixtures today.
Removing old fixtures is an important step in upgrading your space with new LED ceiling lights. Firstly, turn off the power supply from the circuit breaker. Next, remove the old fixture’s cover and unscrew the nut holding the fixture in place. Gently pull the fixture down and disconnect the wires by unscrewing the wire nuts. If the fixture is hardwired, remove the wire nuts and untwist the wires. After the old fixture is removed, check the wiring and ensure that there are no loose or damaged wires. If necessary, make any repairs or replacements before installing the new LED ceiling lights. Keep in mind that safety should always be a top priority when working with electrical fixtures.
When it comes to upgrading your space with LED ceiling lights, there are a few common mistakes to avoid. First and foremost, make sure you choose the right size and type of fixture for your space. Installing a fixture that is too small or too large can throw off the entire aesthetic of the room. Another mistake to avoid is not considering the color temperature and brightness of the LED bulbs you choose. Make sure to select bulbs that complement the colors and mood of your space. Finally, don’t forget to properly install the fixture and follow all safety precautions. Skipping steps or taking shortcuts can lead to costly and dangerous mistakes. By avoiding these common mistakes, you can easily upgrade your space with beautiful and functional LED ceiling lights.
When it comes to handling electrical wiring, safety should always be your top priority. Always turn off the power supply before starting any work and wear protective gear such as rubber gloves and safety glasses. Use high-quality tools and equipment and make sure to follow the manufacturer’s instructions. Avoid working on wet surfaces and never touch exposed wires or terminals with bare hands. Before connecting any wires, always check and double-check the circuit to make sure it is properly grounded and wired correctly. Finally, once you have completed your work, test everything thoroughly to ensure that all connections are secure and functioning properly. By following these tips, you can ensure that your LED ceiling light upgrade is not only successful but also safe and long-lasting.
Install New LED Lights
If you’re looking to upgrade your space, a great way to do it is by installing new LED lights. LED lights are a popular choice among homeowners because they are energy-efficient, long-lasting, and come in a variety of styles and colors to suit any decor. Whether you’re looking to replace your old, outdated light fixtures, or you simply want to add some extra lighting to your space, installing new LED lights is a great way to enhance the ambiance of your home. The process of installing new LED lights is relatively simple, and can be completed by anyone with basic DIY skills. First, you’ll need to choose the right type of LED lights for your space. There are several different types of LED lights available, including recessed lights, surface-mount lights, and pendant lights. Each type has its own unique features and benefits, so it’s important to choose the right one for your needs. Once you’ve chosen your LED lights, you’ll need to turn off the power to your existing light fixtures, remove them from the ceiling, and then install the new LED lights in their place. With a little bit of patience and some basic tools, you can easily upgrade your space with new LED lights and enjoy a brighter, more energy-efficient home.
Installing new LED lights is a simple process that can elevate any room. To begin, turn off the power to the existing light fixture and remove it from the ceiling. Next, connect the wires from the existing electrical box to the new LED fixture, following the manufacturer’s instructions. Once the wiring is complete, attach the new fixture to the ceiling using the hardware provided. Finally, turn the power back on and test the new LED lights to ensure they are working properly. With just a few steps, you can easily upgrade your space with new LED ceiling lights, providing energy-efficient and stylish lighting for any room.
Proper placement and alignment are crucial factors to consider when upgrading your space with LED ceiling lights. To ensure uniform illumination, it is recommended to install the lights in a grid-like pattern. This means placing them equidistant from each other, forming a straight line, and aligning them parallel to the walls. It is also essential to take into account the height of the ceiling, as this will affect the brightness and spread of the light. For tall ceilings, it is advisable to use a combination of direct and indirect lighting to achieve balanced illumination. Additionally, it is crucial to use the appropriate fixtures and hardware for installation to ensure a secure and stable placement. By following these tips, you can upgrade your space with LED ceiling lights that provide optimal lighting and enhance the overall ambiance of your home or office.
After installing new LED ceiling lights, it’s crucial to test them thoroughly to ensure they are working correctly. Start by turning off the power at the circuit breaker and then switch on the lights. Check each light to ensure they are illuminating evenly and brightly. If any lights are flickering or not working at all, double-check the wiring connections and make any necessary adjustments. It’s also essential to test the lights in different lighting conditions to ensure they provide the desired ambiance and brightness. By taking the time to test the new lights, you can ensure a successful upgrade and enjoy a well-lit, energy-efficient space.
Troubleshooting
Troubleshooting is an essential step in any home renovation project, especially when it comes to upgrading your ceiling lights to LED. While the installation process may seem straightforward, unexpected issues can arise. For instance, you may encounter wiring problems or find that the existing fixture is not compatible with LED bulbs. To avoid frustration, it’s important to troubleshoot the problem as soon as possible. Start by checking the wiring connections, ensuring they are tight and secure. If this doesn’t solve the issue, use a voltage tester to determine if power is flowing through the wiring. If not, you may need to call in an electrician to resolve the issue. Another common issue when changing LED ceiling lights is compatibility. Not all fixtures are designed to work with LED bulbs, and using the wrong type can create flickering or other problems. Before purchasing new lights, check the fixture’s compatibility with LED bulbs. If it’s not compatible, you may need to replace the fixture altogether. Additionally, make sure the bulb you choose is the correct size and shape for your fixture. Using the wrong bulb can cause damage, and in some cases, even create a fire hazard. By troubleshooting these potential issues, you can ensure a smooth and successful LED ceiling light upgrade.
Installing LED lights has become a popular trend due to their energy efficiency and long-lasting lifespan. However, there are some common issues that can arise during the installation process. One issue is compatibility with existing fixtures or wiring, which can be solved by ensuring that the LED lights and fixtures are compatible with each other. Another issue is incorrect wiring, which can cause flickering or dimming of the lights. It is important to follow the manufacturer’s instructions carefully and to seek professional assistance if necessary. Additionally, selecting the right color temperature and brightness level can impact the overall ambiance of the space, so it is important to consider these factors when choosing LED lights for your ceiling.
When it comes to upgrading your home, one of the easiest changes to make is switching out your old ceiling lights for new LED ones. However, there are some common problems that can arise during this process. One issue is finding the right size and style of LED light to fit your space and decor. To solve this problem, it’s important to measure your current fixture and do some research on the different styles available. Another problem is compatibility with your existing wiring. In this case, it’s best to consult with a licensed electrician to ensure a safe and proper installation. Finally, some LED lights can be too bright or too dim for your liking. To address this, consider choosing a light with adjustable brightness or installing a dimmer switch. With these solutions in mind, upgrading your space with LED ceiling lights can be a simple and rewarding project.
If you plan to change your LED ceiling lights, it’s essential to know when to call a professional electrician. While changing a light fixture may seem like a simple task, it involves working with electricity, which can be dangerous. If you are unsure how to safely disconnect and reconnect your wiring, it’s best to leave the job to an expert. Additionally, if you need to run new wiring, install a new switch or dimmer, or replace an old electrical box, it’s crucial to have a licensed electrician handle the job. A professional electrician can ensure that the installation is done correctly, safely, and up to code, giving you peace of mind and a well-lit space.
LED lights are becoming increasingly popular in households due to their numerous benefits. One of the main advantages is their energy efficiency. LED lights consume less energy compared to traditional lighting fixtures, which translates into lower electricity bills. They are also long-lasting and durable, with a lifespan of up to 50,000 hours. LED lights emit less heat, making them safer to use and reducing the risk of fire hazards. Additionally, they are available in various color temperatures, from warm to cool, which can enhance the ambiance of a room. LED lights are also environmentally friendly, as they do not contain harmful substances such as mercury. Overall, upgrading to LED ceiling lights can provide a cost-effective, long-lasting, and eco-friendly lighting solution for any space.
Proper installation is crucial when upgrading your space with LED ceiling lights. Not only does it ensure that the lights function at their optimal level, but it also guarantees the safety of the occupants. Incorrect installation can result in electrical hazards, such as short circuits and fires. Additionally, a poorly installed ceiling light can compromise the overall aesthetic of the room. It is important to follow the manufacturer’s instructions and seek professional assistance if necessary to ensure that the LED ceiling lights are installed correctly. Taking the time and effort to properly install the lights will ultimately enhance the functionality, safety, and appearance of the space.
Upgrading and improving your living space is an excellent way to breathe new life into your home. Whether you’re looking to create a more modern look, increase energy efficiency, or just add a touch of personality, there are plenty of ways to achieve your goals. One of the easiest and most effective ways to upgrade your space is by changing your LED ceiling lights. Not only do LED lights consume less energy, but they also have a longer lifespan and produce brighter and more natural light. Additionally, there are now a variety of LED light styles and colors available, making it easy to customize your lighting to fit your needs and personal style. So, if you’re looking to give your home a quick and easy upgrade, consider changing out your old ceiling lights for LED lights and enjoy all the benefits they have to offer.
Conclusion
In conclusion, upgrading the lighting in your space can make a significant difference in the overall ambiance and functionality of the room. With LED ceiling lights, you can not only save energy and money but also customize the lighting to fit your personal preferences. Changing LED ceiling lights is a relatively easy and straightforward process that can be done by anyone with basic electrical knowledge. Whether you’re looking to create a cozy atmosphere or a bright workspace, upgrading your space with LED ceiling lights can transform the look and feel of your room. So, don’t settle for dull and outdated lighting—take the leap and upgrade your space today!
Related posts:
 Upgrade Your Home Lighting: A Beginner’s Guide on How to Easily Change an LED Ceiling Light
 Upgrade Your Lighting: How to Easily Change Fluorescent Lights to EnergyEfficient LEDs
 Upgrade Your Home Lighting: A StepbyStep Guide on How to Change Your LED Light Fixture
 Upgrade Your Home Lighting: Quick and Easy Guide on How to Change LED Flush Mount Light