Reuse Your LED Light Strips: A StepbyStep Guide on How to Remove and Reinstall with Ease
Are you tired of constantly buying new LED light strips for your home or office? Do you want to save money and reduce waste by reusing the ones you already have? Look no further than this step-by-step guide on how to remove and reinstall your LED light strips with ease. With just a few simple tools and techniques, you can transform your space with the same LED lights you already own. LED light strips are a versatile and eco-friendly lighting option that can be used for a variety of purposes, from accent lighting to under-cabinet illumination. However, they can be difficult to remove and reinstall once they have been installed. This guide will walk you through the process of safely removing your LED light strips from their current location, as well as preparing them for reinstallation in a new spot. Whether you’re a DIY enthusiast or just looking to save money and reduce waste, this guide is for you.
Reusing LED light strips can provide a range of benefits, both environmentally and financially. Firstly, by reusing LED light strips, you are reducing the amount of electronic waste that ends up in landfills, which is a significant contributor to environmental pollution. Additionally, since LED lights are energy-efficient, reusing them is a cost-effective way to provide lighting solutions for various spaces. Furthermore, LED light strips are versatile and flexible, making them an excellent choice for a wide range of applications, such as under-cabinet lighting, accent lighting, and even outdoor lighting. By reusing LED light strips, you can save money while also reducing your impact on the environment.
Knowing how to remove and reinstall LED light strips properly is essential in ensuring their longevity and maximizing their functionality. Mishandling these delicate and intricate components can lead to damage, causing them to malfunction or even stop working altogether. Properly removing them allows for easy replacement or relocation, while reinstalling them properly ensures a secure and stable connection. Additionally, being familiar with the proper removal and installation techniques can save time and reduce frustration when working with LED light strips. Overall, taking the time to learn how to handle LED light strips properly can result in longer-lasting and more effective use of these versatile lighting solutions.
Understanding LED Light Strips

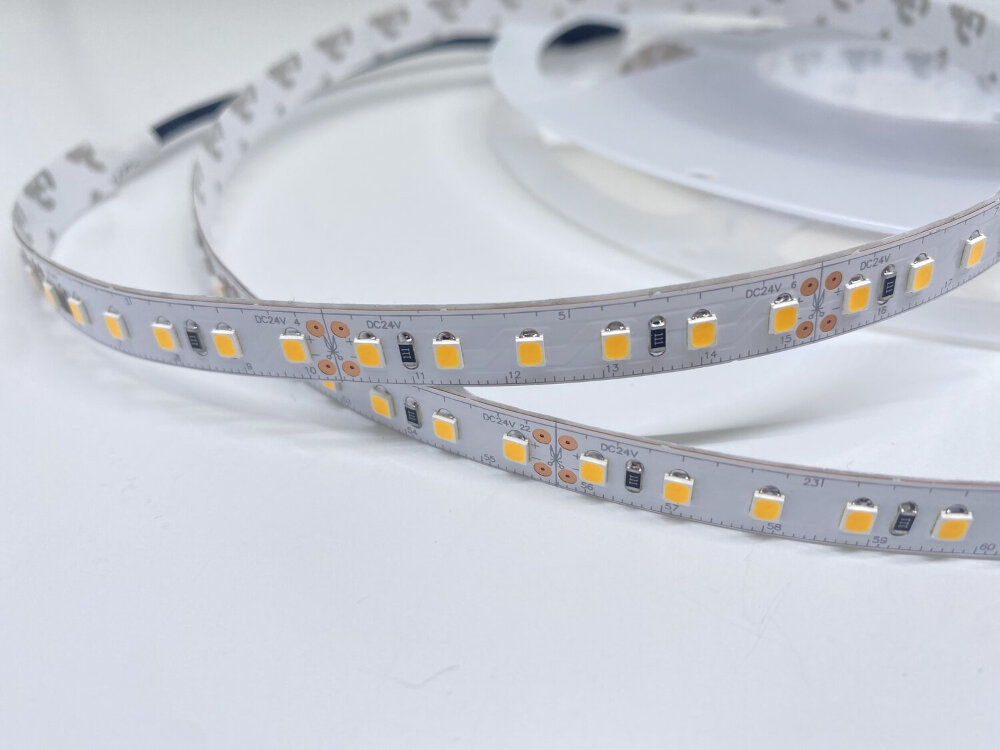
LED light strips have become increasingly popular in recent years due to their versatility and energy efficiency. These strips consist of a long, thin circuit board with small LED lights attached to it. The lights emit a bright and colorful glow, making them perfect for adding ambiance and decoration to any space. LED light strips come in a variety of lengths, colors, and brightness levels, making them ideal for any application. When it comes to understanding LED light strips, there are a few key things to keep in mind. Firstly, it’s important to know that LED stands for \light-emitting diode.\ These are small electronic components that emit light when an electric current passes through them. LED lights are much more energy-efficient than traditional incandescent bulbs, which is why they’re becoming increasingly popular for both residential and commercial applications. Additionally, LED light strips are typically powered by a low-voltage power supply, making them safe and easy to install. Whether you’re looking to add some ambiance to your living room, illuminate your kitchen cabinets, or add some flair to your car, LED light strips are a versatile and energy-efficient solution.
LED light strips are flexible circuit boards that contain light-emitting diodes (LEDs) that emit light in various colors. They are a popular lighting solution for both residential and commercial use due to their energy efficiency, low heat emissions, and durability. LED light strips work by converting electrical energy into light through the use of semiconductors. When an electrical current flows through the semiconductor material, it excites the atoms and produces light. LED light strips can be controlled by a remote, app, or voice assistant, making it easy to customize the color and brightness of your lighting. They are easy to install, making them a great choice for DIY projects.
LED light strips are versatile and can be used in various settings, including home décor, automotive lighting, and commercial spaces. There are different types of LED light strips available in the market, each with unique and specialized features. For instance, waterproof LED light strips are suitable for outdoor settings, while RGB LED light strips offer a vast array of color choices. Additionally, dimmable LED light strips allow for customized lighting levels, while smart LED light strips can be controlled using voice commands or a mobile app. Furthermore, multicolor LED light strips come with various color options, while single-color LED light strips emit a consistent hue throughout the length of the strip. LED light strips offer an excellent lighting solution for any setting, and selecting the right type of LED light strip depends on the intended use and personal preference.
When considering reusing LED light strips, there are several factors to take into account. Firstly, it is important to determine the length and width of the space where the strips will be installed, as this will determine the length and number of strips required. Secondly, the brightness and color temperature of the LED lights should be taken into consideration to ensure they provide the desired level of illumination and ambiance. It is also advisable to look for LED light strips with a high CRI (Color Rendering Index) to ensure that the colors of objects in the room appear as accurately as possible. Finally, the flexibility and durability of the LED light strips should be considered, as they will need to be bent and shaped to fit the space and withstand regular use.
Tools and Materials Required
When it comes to reusing LED light strips, having the right tools and materials is essential. First and foremost, you’ll need a screwdriver set that includes flathead and Phillips head screwdrivers. This will come in handy when removing the screws that hold the light strips in place. A pair of pliers can also be useful for gripping and twisting the screws if they’re particularly stubborn. Additionally, a pair of wire cutters or strippers will be needed to cut and strip the wires. In terms of materials, you’ll need replacement adhesive tape to reattach the light strips once they’ve been removed. There are a variety of adhesive tapes available, but it’s important to choose one that is strong enough to hold the weight of the light strips without damaging the surface it’s being attached to. Additionally, you may need extra wires or connectors if any have been damaged during the removal process. It’s always a good idea to have some extra wires and connectors on hand, just in case. With these tools and materials at the ready, you’ll be able to remove and reinstall your LED light strips with ease.
When it comes to removing and reinstalling LED light strips, having the right tools is important to make the process easier and more efficient. Some of the essential tools that you will need include a pair of pliers, wire cutters, a soldering iron, and a heat gun. Pliers can be used to grip and bend the metal contacts, while wire cutters are useful for cutting wires to the desired length. A soldering iron is required for soldering the wires to the contacts, and a heat gun can be used to soften the adhesive on the LED strip. With these tools in hand, you can easily remove and reinstall your LED light strips without damaging them or causing any harm to yourself.
To successfully reuse your LED light strips, you will need a few essential materials. First and foremost, you will need a screwdriver to remove the light strips from their current location. Additionally, you will need a cleaning solution, such as rubbing alcohol, to remove any residue left behind from the previous installation. To reinstall the LED light strips, you will need double-sided tape or adhesive clips to secure them in place. A power source, such as a battery pack or outlet, is also necessary to provide electricity to the LED lights. Finally, it may be helpful to have a pair of scissors or wire cutters to adjust the length of the light strips to fit your desired location. With these materials, you can easily remove and reinstall your LED light strips in a new location, providing a unique and customizable lighting experience.
StepbyStep Guide for Removing LED Light Strips
Removing LED light strips can be a tricky task, especially if you are not familiar with the process. However, with the right tools and step-by-step guidance, it can be a breeze. The first step is to switch off the power supply and disconnect it from the outlet. This is crucial to avoid any electrical hazards that may arise during the removal process. Next, you should remove any connectors or clips holding the LED light strip in place. Gently pull the strip away from the surface and take note of any adhesive residue left behind. You can use a heat gun or hairdryer to soften the adhesive and remove it easily. Once the LED light strip is removed, you can clean the surface with a damp cloth and let it dry completely before reinstalling the strip. If you plan on reusing the LED light strips, you should handle them carefully to avoid any damage. Store them in a dry and cool place to prevent any moisture or heat damage. With these simple steps, you can remove and reinstall LED light strips with ease and reuse them for other projects.
Before removing the LED light strips, it is essential to prepare the area to avoid any damage. Start by turning off the power supply to the LED lights to ensure safety. Next, clean the area around the LED light strips with a dry cloth to remove any dust or debris that may have accumulated. This ensures that the surface is smooth and free of dirt, which makes it easier to remove the adhesive tape. If the LED light strips are attached to a surface using screws, use a screwdriver to remove them carefully. Overall, proper preparation of the area for removal ensures that the process is smooth and damage-free.
Disconnecting LED light strips is a relatively simple process that requires some basic knowledge of electronics. In order to do this, you will need to locate the power supply and unplug it from the wall outlet. Once this is done, you can then disconnect the LED light strips from the power supply. It is important to be careful when doing this, as there may be exposed wires that could cause a shock. In addition, you will need to ensure that you disconnect the LED light strips in the correct order, as this can impact the overall functioning of the system. Overall, disconnecting LED light strips is a straightforward process that can be done with minimal effort and expertise.
Removing the adhesive tape is a crucial step when attempting to reuse LED light strips. The tape can be stubborn and difficult to remove, but there are several methods you can use to make the process easier. One effective technique is using a hairdryer to heat up the tape, which softens the adhesive and allows it to be peeled off more easily. Another option is using a solvent, such as rubbing alcohol or nail polish remover, which can dissolve the adhesive and make it easier to remove. It’s important to be patient and gentle when removing the tape to avoid damaging the LED light strips, but with the right tools and techniques, it is possible to remove the tape and reinstall the lights for another use.
Removing LED light strips from a surface might seem like a daunting task, but with the right tools and technique, it can be done with ease. The first step is to ensure that the power source is turned off to avoid any electrical hazards. Next, gently peel off the adhesive backing of the light strip, being careful not to damage the surface underneath. If the adhesive is particularly strong, you can use a heat gun or hair dryer to soften it up. Once the strip is removed, use rubbing alcohol to clean any leftover adhesive residue. With these simple steps, you can remove your LED light strips with ease and reuse them in any new location you desire.
StepbyStep Guide for Reinstalling LED Light Strips
If you’re looking to reuse LED light strips that you’ve previously installed, you may be wondering how to go about removing them without causing damage. Fortunately, the process is relatively simple and can be done with just a few tools. Once you’ve removed the strips, you can then reinstall them in a new location, giving your space a whole new look. Here’s a step-by-step guide to help you through the process. First, gather your tools. You’ll need a flathead screwdriver, a pair of pliers, and some rubbing alcohol. Next, locate the end of the LED strip that has a connector plug. Use the flathead screwdriver to gently pry the plug from the strip. Be careful not to damage the plug or the strip. Once the plug is removed, use the pliers to gently pull the strip away from the surface it’s attached to. If the strip is stuck, you can use the flathead screwdriver to carefully pry it away. Once the strip is removed, use the rubbing alcohol to clean the surface and remove any adhesive residue. To reinstall the strip, simply plug it back in and attach it to the new location using the adhesive backing or clips.
Before reinstalling your LED light strips, it is crucial to prepare the area to ensure a smooth and successful installation. Start by removing any debris or dust from the surface where the strips will be placed. Use a damp cloth to wipe down the area and let it dry completely before proceeding. Next, measure the length of the surface where the strips will be installed and cut the LED strip to the appropriate length accordingly. Make sure to leave some extra length for any corners or turns. Finally, ensure that the power source is turned off before reinstallation to avoid any electrical hazards. Following these steps will help you prepare the area for reinstallation and ensure that your LED light strips are securely and safely installed.
Before attempting to remove and reinstall LED light strips, it is crucial to clean the surface where they will be installed. This step is often overlooked, but it is essential for a successful installation. A dirty surface can hinder the adhesive’s ability to stick, leading to a weakened bond or even causing the strips to fall off. Use a clean cloth and a mild cleaning solution to remove any dust, dirt, or grease from the surface. Avoid using harsh chemicals that could damage the surface or the LED light strips. Once the surface is clean and dry, you can proceed with the removal and reinstallation of the LED light strips with confidence.
One of the essential steps in reusing LED light strips is applying the adhesive tape. To ensure that the strips stay in place, it is crucial to use a high-quality adhesive tape that can withstand the weight of the LED lights. Start by cleaning the surface where you will apply the tape with a clean cloth to remove any dirt or dust particles. Then, carefully peel off the backing of the tape and apply it to the surface where you want to install the LED strips. Make sure to press down firmly on the tape to ensure a secure bond. Once the tape is in place, carefully attach the LED strips to the tape, taking care to align them correctly. A well-applied adhesive tape can ensure that your LED light strips stay in place for a long time, providing you with the perfect illumination for your space.
If you are planning to reuse your LED light strips, reinstalling them is a crucial step. Firstly, ensure that the surface is clean and dry to avoid any damage to the adhesive. Secondly, carefully align and apply the strips by pressing firmly to ensure a strong hold. It is also important to reconnect the power source correctly and test the lights before securing the strips in place permanently. With proper attention to detail and careful handling, reinstalling LED light strips can be a breeze, giving you the flexibility to reuse them in various settings and create a unique ambiance in your space.
Reusing LED light strips can be a cost-effective and eco-friendly way to enhance any space. Not only do LED lights consume less energy and have a longer lifespan than traditional bulbs, but they also offer a wide range of colors and brightness options. However, it’s crucial to remove and reinstall them properly to avoid damaging the strips and ensure they function effectively. Improper handling can lead to broken connections or damage to the adhesive backing, which can cause the lights to malfunction or fall off. By taking the time to carefully remove and reinstall your LED light strips, you can enjoy their benefits for years to come while minimizing waste and saving money on energy bills.
To ensure a successful LED light strip reuse, there are a few final tips and recommendations to keep in mind. First, make sure to clean the surface where the strip will be applied thoroughly, as any dirt or debris can affect the adhesive. Secondly, avoid bending or twisting the strip too much during installation, as this can damage the LED lights or cause the strip to malfunction. Additionally, use a good quality power supply that matches the voltage and current requirements of the LED light strip to prevent overheating or short circuit. Finally, always follow the manufacturer’s instructions and be patient during the installation process to ensure a safe and effective reuse of your LED light strips.
Conclusion
In conclusion, reusing LED light strips is not only an eco-friendly practice but also a cost-effective solution. With the step-by-step guide provided, removing and reinstalling your LED light strips has never been easier. By following these simple steps, you can easily transform any space in your home with colorful and energy-efficient lighting. So, don’t throw away your old LED light strips, give them a new life and enjoy the benefits of sustainable living. Not only will you be reducing waste, but you’ll also be saving money and contributing to a brighter and greener future.