Effortlessly Remove LED Light Strips from Your Wall with These Simple Steps
LED light strips are a popular choice for homeowners and interior designers looking to add a touch of ambiance to their living spaces. With their versatility and ease of installation, it’s no wonder why LED light strips have become a popular choice in modern home decor. However, there may come a time when you need to remove these light strips from your walls, whether it’s because you’re moving to a new house or simply want to change up your home’s aesthetic. Fortunately, removing LED light strips from your wall is a fairly simple process that can be done with just a few basic tools and a bit of patience. In this article, we will provide you with step-by-step instructions on how to effortlessly remove LED light strips from your walls. We’ll cover everything from the tools you’ll need to the best techniques for removing the strips without damaging your walls or the strips themselves. Whether you’re a DIY enthusiast or just looking to make some changes to your home’s decor, our guide will help you remove those pesky LED light strips in no time. So, let’s get started and learn how to remove LED light strips from your walls with ease!
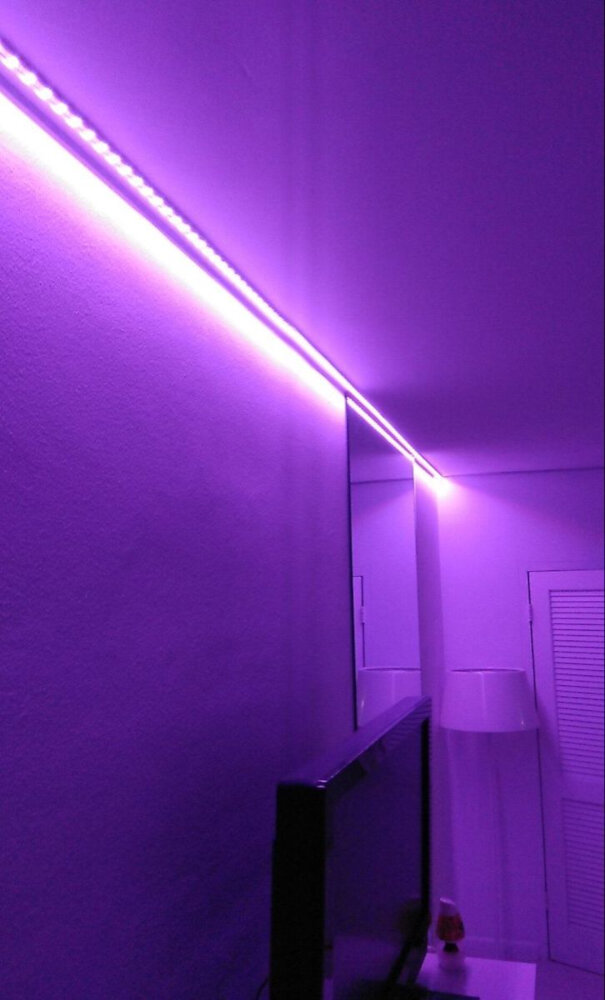
LED light strips have gained immense popularity in recent years due to their versatility and ease of use. The ability to bend and shape the strips around any object has made them a favorite among interior designers and DIY enthusiasts. LED light strips can be used to create stunning accent lighting, provide task lighting, or even as a primary source of illumination. They are commonly used to highlight architectural features, such as coves, niches, and columns, or to provide ambient lighting in bedrooms, living rooms, and kitchens. LED light strips are also a popular choice for outdoor lighting, particularly for illuminating pathways, patios, and gardens. With their low energy consumption, long lifespan, and customizable features, it’s no wonder why LED light strips have become a go-to lighting solution for many people.
Knowing how to remove LED light strips from your wall without damaging it is crucial to maintain the wall’s integrity and avoid costly repairs. Damaged walls not only look unsightly, but they can also compromise the structural integrity of the building, leading to more significant problems in the long run. By removing the LED light strips safely, you can ensure that you don’t damage the paint or wallpaper, leaving them looking as good as new. Additionally, if you plan on reusing the LED light strips or installing new ones, removing them without damaging the wall will make the process much more comfortable and efficient. Therefore, it’s essential to learn how to remove LED light strips from your wall without causing any damage.
Step 1: Turn Off the Power
Removing LED light strips from your wall may seem like a daunting task, but it’s actually quite simple. The first and most important step is to turn off the power. This step is critical to ensure your safety and prevent damage to the LED light strip. Before starting the removal process, locate the circuit breaker and turn off the power supply. This will also prevent any electrical shocks or accidents from occurring during the task. If you’re unsure about which circuit breaker controls the power supply to your LED light strip, consult an electrician, or simply turn off the main power supply to your home. Turning off the power supply before removing LED light strips from your wall is essential. It will prevent any electrical current from flowing through the LED light strip and reduce the risk of electric shock. Additionally, it will prevent any accidental damage to the LED light strip or other electrical components. Remember to always double-check that the power supply is off before beginning the removal process. Taking this simple precaution will ensure that the removal process is safe, efficient, and hassle-free. So, make sure to turn off the power supply before removing your LED light strips from the wall.
Turning off the power before removing LED light strips is of utmost importance for several reasons. First and foremost, it ensures the safety of the person removing the strips. Since LED light strips are usually powered by electricity, leaving the power on while removing them can result in electrical shocks or even electrocution. Secondly, turning off the power prevents damage to the LED light strips. When the power is on, the strips are still active, and removing them can cause a short circuit, which can damage the strip or even render it useless. Lastly, turning off the power before removing the LED light strips is a practical way to conserve energy and save money on the electric bill. By doing so, you are preventing energy wastage, which can add up over time and increase your monthly expenses. In conclusion, turning off the power before removing LED light strips is crucial for safety, preventing damage, and conserving energy.
To turn off the power of your LED light strip, you need to follow a few simple steps. First, locate the power source, which is typically a power adapter or plug connected to an electrical outlet. Then, unplug the power adapter or plug from the electrical outlet. If you cannot locate the power source, you can turn off the power by flipping the switch on your circuit breaker labeled with the room or area where your LED light strip is located. It is crucial to turn off the power before removing the LED light strip from your wall to avoid any electrical accidents or injuries. By following these steps, you can effortlessly turn off the power of your LED light strip and proceed with the removal process safely.
Step 2: Remove the Adhesive
Removing LED light strips from your wall can be a daunting task, especially when it comes to removing the adhesive. However, with the right tools and techniques, the process can be effortless. The second step in removing LED light strips from your wall involves removing the adhesive. This step is crucial to ensure that your wall remains undamaged and free from any residue. To remove the adhesive, start by using a hairdryer to heat up the adhesive for a few minutes. This will help to loosen the adhesive and make it easier to remove. Once the adhesive is heated up, use a plastic scraper or a credit card to gently scrape off the adhesive. Be careful not to apply too much pressure as this can damage the wall. If the adhesive is still stubborn, you can use a solvent such as rubbing alcohol or vinegar to dissolve the adhesive. Apply the solvent to a cloth and gently rub the adhesive until it comes off. Finally, use a clean cloth to wipe off any remaining residue.
Adhesives are a great way to stick things to walls, but they can be difficult to remove without causing damage. The longer an adhesive has been on a surface, the harder it becomes to remove. Adhesives can leave behind a residue that is not only unsightly but can also damage the paint or wallpaper. When trying to remove adhesive from a wall, it’s important to use the right tools and methods. Using harsh chemicals or abrasive tools can cause more harm than good. It’s best to start with a gentle approach and work your way up to more aggressive methods if necessary. With patience and the right techniques, you can remove adhesive from your wall without causing any damage.
Removing adhesive without causing damage can be a tricky task, especially when it comes to LED light strips on your wall. However, there are a few tips to make this process effortless. Firstly, use a hairdryer or heat gun to soften the adhesive. This will make it easier to peel off without causing any damage to the wall. Secondly, use a plastic scraper or credit card to gently scrape the adhesive, making sure not to apply too much pressure. If there is still some residual adhesive left on the wall, use rubbing alcohol or vinegar to dissolve it. Lastly, avoid using sharp objects such as knives or blades as they can cause significant damage to your wall. By following these tips, you can remove LED light strips from your wall without any hassle or harm.
Step 3: Gently Pull the Strip
Once you have loosened the adhesive with the help of a heat gun, it is time to gently pull the LED light strip away from the wall. This step requires a lot of patience and care to ensure that the strip does not break or damage the wall. Start by pulling the strip slowly and steadily, applying equal pressure on both ends. If you feel resistance, stop pulling and use the heat gun to loosen the adhesive further. As you pull the strip, make sure to keep it close to the wall to prevent it from bending or kinking. Avoid jerking or yanking the strip as this can cause it to break or damage the wall. It is important to note that if the LED light strip has been in place for a long time, there may be some residual adhesive left on the wall. To remove this, use a scraper or putty knife to gently scrape away the adhesive. Be careful not to damage the wall surface while doing so. Once you have removed the strip, clean the wall with a mild detergent and warm water to remove any remaining adhesive or dirt. With these simple steps, you can effortlessly remove LED light strips from your wall without any hassle or damage.
It is crucial to be gentle when removing LED light strips from your wall to prevent any damage to the adhesive or the wall surface. If the strips are pulled too harshly, it can cause the adhesive to tear off, leaving behind a sticky residue that is difficult to remove. Moreover, it can also damage the wall surface, leaving unsightly marks or even causing cracks. Therefore, it is recommended to use a slow and steady pulling motion while gently peeling off the adhesive from the wall surface. This will not only ensure that the LED light strips are removed effortlessly but also help maintain the integrity of the wall surface.
Removing an LED light strip from your wall can be a daunting task, especially if you’ve never done it before. However, it’s not that complicated if you have the right tools and follow the right steps. Here’s a step-by-step guide to help you remove the strip easily. Firstly, unplug the LED light strip from its power source. Secondly, use a putty knife or a flathead screwdriver to gently pry one end of the strip away from the wall. Thirdly, slowly pull the strip away from the wall, using the putty knife or screwdriver to help loosen it. Fourthly, remove any adhesive residue left on the wall using a cleaning solution such as rubbing alcohol or vinegar. Lastly, store the LED light strip in a safe place for future use. By following these easy steps, you can effortlessly remove LED light strips from your wall without causing any damage to your wall or the strip.
Step 4: Clean the Wall
The fourth step in removing LED light strips from your wall is to clean the wall. This step is crucial in ensuring that your wall remains in good condition after the removal process. Start by removing any residue left behind by the light strips using a scraper or putty knife. Next, use a gentle cleaning solution and a soft cloth to wipe down the area. If your wall is painted, be sure to use a cleaning solution that is safe for painted surfaces. Once you have thoroughly cleaned the area, allow it to dry completely before moving on to the next step. Cleaning the wall is an essential part of the LED light strip removal process. Failing to clean the wall properly could result in damage to the wall or the paint. It could also make it difficult to apply new LED light strips in the future. By taking the time to clean the wall properly, you can ensure that it is ready for whatever you choose to do with it next. So, be sure to take this step seriously and put in the extra effort to leave your wall looking as good as new.
Cleaning the wall after removing the LED light strips is crucial to maintaining the aesthetic appeal of your room. The adhesive residue left behind by the strips can be unsightly and ruin the appearance of your walls. Moreover, leaving the residue on the surface can make it difficult to stick a new LED strip or any other décor element in the same spot. Besides, the residue can trap dust and dirt, making the wall look filthy and uninviting. Therefore, it is essential to clean the surface thoroughly with a mild detergent and warm water to ensure that it is free from any adhesive residue or grime. By doing so, you can restore the wall’s original appearance and prepare it for the next décor element, giving your space a fresh and inviting look.
Cleaning your walls is an important task that can help to maintain their appearance and prevent the build-up of dirt and grime over time. To clean your walls properly, start by removing any dust or cobwebs with a soft-bristled brush or vacuum cleaner. Next, use a mild cleaning solution, such as a mixture of water and mild detergent or vinegar, to wipe down the walls with a soft cloth or sponge. Be sure to avoid using abrasive cleaners or scrubbing too vigorously, as this can damage the paint or wallpaper on your walls. Finally, rinse the walls thoroughly with clean water and allow them to dry completely before replacing any LED light strips or other fixtures. By following these simple tips, you can keep your walls looking their best and ensure that your LED light strips are easy to remove whenever necessary.
It is crucial to know how to remove LED light strips from a wall without causing any damage as it not only helps to preserve the aesthetics of the wall but also saves you from the hassle of costly repairs. LED strips are usually attached to walls using adhesive tapes or clips, and improper removal techniques can result in the tape tearing off chunks of paint or plaster. Knowing the right approach to detach the strip without leaving any residue or marks on the wall surface is essential. This guide provides simple steps that anyone can follow to remove LED light strips effortlessly without damaging the wall. By following these steps, you can ensure a smooth and stress-free removal process, leaving your wall intact and ready for the next decoration project.
The article titled \Effortlessly Remove LED Light Strips from Your Wall with These Simple Steps\ outlines a straightforward and uncomplicated process for removing LED light strips from walls. The steps are easy to follow, and the instructions are clear and concise. The article emphasizes that the process does not require any special tools or skills, making it accessible to anyone. The simplicity of the steps outlined in the article is a testament to the writer’s knowledge and expertise in the subject matter. Anyone looking to remove LED light strips from their walls can do so with confidence and ease, thanks to this informative article.
If you’re tired of struggling to remove LED light strips from your walls, these simple steps can help make the process a breeze. With just a few tools and some patience, you can easily take down your light strips without damaging your walls or leaving behind any unsightly residue. So why not give it a try? By following these steps, you can save yourself time and frustration, and enjoy a cleaner, more streamlined look in your home. Whether you’re redecorating, moving to a new place, or simply looking for a change, these tips are sure to come in handy. So go ahead and give it a try – your walls (and your sanity) will thank you!
Conclusion
In conclusion, removing LED light strips from your wall can be a simple and hassle-free task with the right steps. Whether you’re taking them down to replace them, or simply want to redecorate your space, the process can be effortless and stress-free. By following the steps outlined in this guide, you can remove your LED light strips quickly and easily without causing any damage to your walls or fixtures. So, go ahead and give it a try, and enjoy the freedom to change up your lighting whenever you like!