Quick Guide: Resetting Your LED Light Remote in a Snap

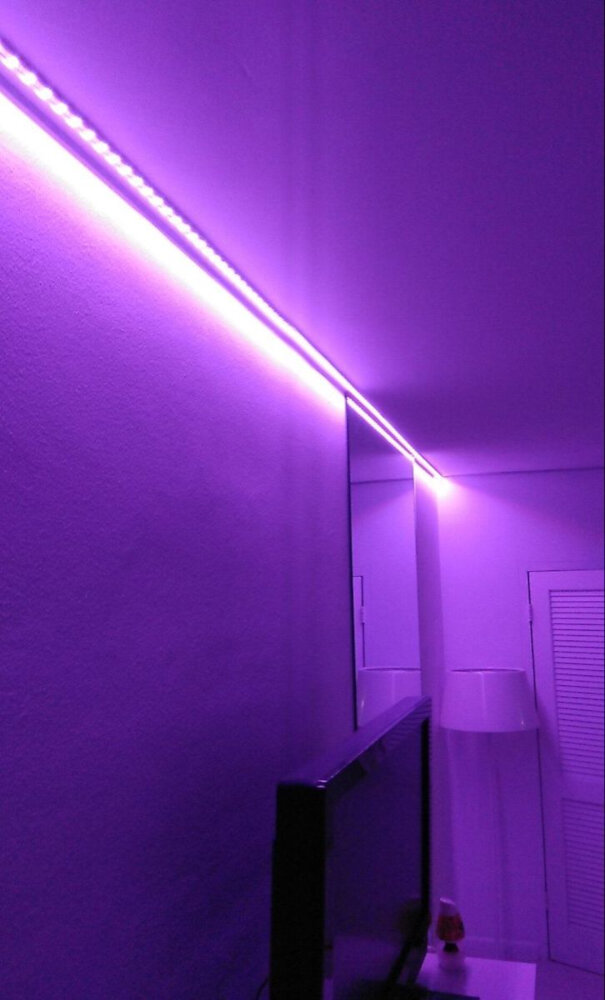
In the world of modern technology, LED lights have become an essential part of any household or commercial space. With the help of LED lights, you can create a vibrant and energetic atmosphere that can enhance your mood and productivity. However, like any other electronic device, LED lights are also prone to malfunctioning, and one of the most common issues people face is with the remote control. If you’re struggling to reset your LED light remote, you’ve come to the right place. In this quick guide, we’ll provide you with step-by-step instructions on how to reset your LED light remote in a snap. To begin with, resetting your LED light remote is not rocket science, and you don’t need any technical expertise to do it. With a few simple steps, you can get your remote back to working condition in no time. The process of resetting your LED light remote involves clearing the memory of the remote control, which erases all the saved settings and restores it to its default settings. Whether you’re using a single-color LED light or a multi-color LED light with different modes, the resetting process is almost the same for all types of LED lights. So, let’s dive into the step-by-step guide on how to reset your LED light remote.
LED light remotes are tiny devices that allow you to control your LED lights wirelessly from a distance. They are available in a range of styles and designs, each with its unique features and functions. These remotes have become an essential accessory for LED light users, as they provide convenience and ease of use. They allow you to switch lights on and off, change colors, adjust brightness, and even set timers without having to get up from your seat. LED light remotes are an excellent way to add ambiance to your home or office and create a comfortable environment that suits your mood. They are a must-have for anyone who wants to take full advantage of their LED lights, and resetting them is a simple task that can be done in a snap.
LED light remotes are convenient and easy to use, but they can sometimes experience common issues that can be frustrating for users. One of the most common issues is a malfunctioning or unresponsive remote, which can be caused by low battery levels, interference from other devices, or a damaged remote. Another issue is the remote not being able to properly communicate with the LED light, resulting in the wrong colors or brightness levels being displayed. Additionally, some remotes may have difficulty pairing with the LED light or may require frequent resetting to maintain functionality. These issues can be resolved by performing a simple reset process, which can help to restore the remote’s functionality and ensure that it works properly with your LED light.
Check the Batteries
The check the batteries step is a crucial part of resetting your LED light remote. If you’re having trouble with your remote, the first thing you should do is check the batteries. If the batteries are low or dead, the remote won’t work, and resetting it won’t fix the problem. Make sure to replace the batteries with fresh ones before attempting to reset your remote. It’s also important to note that some remotes require specific types of batteries, so be sure to read the instructions carefully. If you’re still having trouble with your remote after replacing the batteries, there may be a problem with the remote itself. In this case, it may be best to contact the manufacturer or a professional to help you troubleshoot the issue. It’s important to take care of your LED light remote and keep it in good working condition to ensure that you can control your lights easily and efficiently. By checking the batteries regularly and replacing them when necessary, you can avoid many common problems and extend the life of your remote.
Batteries play a crucial role in operating LED light remotes, and their performance can significantly impact remote functionality. As batteries begin to lose power, they may not provide the necessary voltage to power the remote. This can cause the remote to send weak signals or no signals at all, resulting in the inability to control the LED lights. On the other hand, using the wrong type of battery or mixing new and old batteries can also affect the remote’s performance. It is essential to use the correct type of battery and to replace them all at once to ensure the remote functions correctly. Therefore, it is crucial to pay close attention to battery usage and replacement to maintain a reliable LED light remote.
If your LED light remote is not responding, it could be that the batteries need to be replaced. Checking and replacing batteries is a simple process that can be done in a few easy steps. First, locate the battery compartment on the back of the remote and use a screwdriver to remove the cover. Next, carefully remove the old batteries and dispose of them properly. Then, insert the new batteries, making sure to match the positive and negative ends correctly. Finally, replace the cover and test the remote to ensure it is working properly. By following these simple steps, you can easily check and replace the batteries in your LED light remote, ensuring that it continues to function as expected.
Reprogram the Remote
If you’re having trouble with your LED light remote, one of the best things you can try before calling in a professional is reprogramming it. This process can be relatively simple and straightforward, and it can help you get your lights up and running again in no time. To reprogram your remote, start by checking the user manual that came with your LED lights. This manual should have instructions on how to reprogram the remote, as well as any codes or settings you need to be aware of. Once you have the manual handy, follow the instructions carefully. This may involve pressing certain buttons in a specific sequence or holding down a button for a certain amount of time. Be patient and take your time, as rushing through the process can lead to errors and further delays. With a bit of patience and attention to detail, you should be able to reprogram your remote and get your LED lights working again in no time.
Reprogramming an LED light remote can be an effective solution to resolve some of the issues that may arise while using it. In some cases, the remote may lose its programming due to various factors such as low battery, interference, or accidental resetting. This can result in the inability to control the LED lights or the remote failing to respond to commands. By resetting and reprogramming the remote, users can regain control over their LED lights and ensure smooth functionality. Reprogramming the remote involves a few simple steps, such as pressing specific buttons in a certain sequence or using a reset button. With a little bit of patience and effort, users can easily reprogram their LED light remote and enjoy uninterrupted use of their lighting system.
If your LED light remote is not working as it should, reprogramming it can be a quick and easy solution. First, locate the reset button on the back of the remote and hold it down for a few seconds until the LED light flashes twice. Next, press and hold the power button on the remote while pointing it at the LED light until the light turns off and then back on again. Release the power button and press any other button on the remote to complete the reset process. Your LED light remote should now be reprogrammed and ready to use again. Remember to check the battery level and replace it if necessary to ensure optimal performance.
Reset the Remote

Resetting the remote for your LED light is the ultimate solution to fix any issues caused by the remote. Sometimes the remote may stop functioning, or its signal is not being received by the LED light, causing a blackout. Resetting the remote will clear any obstructions or interferences caused by other devices or signals. To reset the remote, you need to locate the reset button on the remote and press it for a few seconds. After the reset, the remote will be back to its default settings, and you will have to reprogram it to your preferred settings. This simple process will save you the time and money you would have spent on professional assistance. Resetting the remote is a straightforward process that requires no technical expertise. It is an essential step that should be taken to maintain the functionality of your LED light. In case you encounter any issues, it is advisable to reset the remote before seeking professional help. It is also important to ensure that your remote is compatible with your LED light model. Before resetting the remote, you should also ensure that the batteries are fully charged and in good condition. This will ensure that the remote functions efficiently after resetting. Resetting your LED light remote is a simple, cost-effective solution that will keep your LED light shining brightly for longer.
Resetting your LED light remote can be a quick and effective solution to resolve more complex issues that may arise. Sometimes, the remote may encounter problems such as unresponsive buttons, intermittent connectivity, or failure to turn on or off the lights. These issues can be quite frustrating, especially if you’ve tried everything else to fix them. By resetting your remote, you essentially restore it to its default settings, which can often fix these complex issues. Resetting your remote is a simple process that involves pressing a few buttons in a specific sequence, depending on the brand and model of your remote. It’s a quick and easy solution that can save you time, effort, and money in the long run.
If your LED light remote is not responding to your commands or is malfunctioning, resetting it might be the solution. Here is a step-by-step guide to resetting your LED light remote in a snap. Firstly, remove the batteries from the remote and press all the buttons for 10 seconds to discharge any remaining power. Secondly, reinsert the batteries into the remote and press any button to ensure that the remote has power. Thirdly, hold down the power button and the button for the LED light color you desire until the light on the remote blinks twice. Finally, release the buttons, and the remote should be reset and ready to use. Following these simple steps can save you from buying a new remote and keep your LED light working correctly.
Contact the Manufacturer

If you have tried resetting your LED light remote and you are still experiencing issues, it may be time to contact the manufacturer. The manufacturer will have in-depth knowledge of the product and its functionalities, which can help you troubleshoot the problem effectively. To contact the manufacturer, check the packaging of your LED light remote for their contact information. If you cannot find it there, try looking online for the manufacturer’s website or customer service number. When contacting the manufacturer, be sure to have your LED light remote on hand, as they may ask for specific information such as the model number or serial number. Be clear and concise when explaining the issue you are experiencing and any steps you have already taken to try and resolve it. The manufacturer may be able to provide you with additional troubleshooting steps or offer to replace the remote if it is found to be defective. Contacting the manufacturer may take a little extra time and effort, but it can be a valuable resource in resolving any issues you are having with your LED light remote.
If you have followed the steps mentioned in the quick guide to resetting your LED light remote and still can’t get it to work, it may be time to contact the manufacturer for further assistance. This could be the case if the remote is not responding, the LED lights are not turning on, or if you have tried multiple times with no success. The manufacturer will have a better understanding of the product and may be able to provide troubleshooting tips or replacements if necessary. It’s always better to reach out to the manufacturer if you’re unsure about any step in the process or if the issue persists after trying to reset the remote.
If you are experiencing issues with your LED light remote, it’s always best to seek support from the manufacturer. To get the best support possible, you should start by thoroughly reading the product manual and troubleshooting guide. This will help you identify and potentially solve the problem on your own. If you still need assistance, reach out to the manufacturer’s customer support team via phone, email, or live chat. Be sure to provide detailed information about the issue you’re experiencing, including any error messages or symptoms you’re seeing. Stay patient and polite throughout the process, and don’t be afraid to ask for additional help or clarification if needed. By following these tips, you’ll be well on your way to resolving any issues with your LED light remote in no time.
LED light remotes have become an essential component in controlling the lighting ambiance of homes and workplaces. They offer convenience, flexibility, and energy-saving benefits by allowing users to adjust the brightness, color temperature, and color of LED lights remotely. However, like any technology, LED light remotes can encounter common issues that can impede their functionality. These issues include signal interference, battery depletion, and improper pairing with the LED lights. Fortunately, resetting the LED light remote can quickly solve these problems and restore its optimal performance. By following the quick guide on resetting the LED light remote, users can overcome these common issues with ease and continue to enjoy the benefits of their LED lighting system.
In addition to resetting your LED light remote, there are a few tips to help maintain and troubleshoot it. Firstly, ensure that the remote’s batteries are fully charged or replaced. Weak batteries can cause the remote to malfunction. Secondly, make sure that the remote’s infrared sensor is clean and unobstructed. Dust or debris can prevent the remote from transmitting signals to the LED light. Lastly, check that the LED light is properly connected to its power source and that its settings are correct. If these steps do not solve the issue, consult the manufacturer’s manual or contact customer support for further assistance.
Conclusion
In conclusion, resetting your LED light remote may seem like a daunting task, but it is actually quite simple and can be done in just a few steps. By following the quick guide outlined above, you can easily reset your remote and have it working like new in no time. Remember to check the batteries, ensure that the remote is within range of the LED light, and follow the manufacturer’s instructions carefully. With a little patience and attention to detail, you can enjoy the many benefits of your LED light system with ease and convenience. So why wait? Reset your LED light remote today and bask in the glow of a well-lit and inviting home.