Quick and Easy Guide: How to Change a Bulb in an LED Ceiling Light

LED ceiling lights have become increasingly popular in recent years due to their energy efficiency and sleek design. While they are long-lasting and require minimal maintenance, there may come a time when you need to change a bulb. Whether it has burnt out or you want to switch to a different color temperature, knowing how to change a bulb in an LED ceiling light is a simple task that can be accomplished with just a few basic tools and a bit of know-how. In this quick and easy guide, we will walk you through the steps to change a bulb in an LED ceiling light. We will cover everything from selecting the right replacement bulb to safely accessing the fixture and removing the old bulb. With our expert tips and advice, you’ll be able to replace a bulb in no time and get your LED ceiling light shining bright once again. So, let’s get started!
Gather the Tools and Materials
When it comes to changing a bulb in an LED ceiling light, it is essential to gather all the necessary tools and materials before starting the process. The first tool that you need is a ladder that can help you reach the ceiling light easily. Make sure that the ladder is stable and placed on a flat surface to avoid any accidents. Additionally, you will need a screwdriver to remove the cover of the ceiling light. It is recommended to use a screwdriver that matches the screws on the light to prevent damage to the fixture. Furthermore, you will need a replacement LED bulb that matches the wattage and size of the old bulb. It is important to check the specifications of the LED bulb before purchasing to ensure compatibility with the ceiling light. Additionally, you may require a pair of gloves to avoid any injury or skin irritation while handling the bulb. Lastly, it is a good practice to switch off the main power supply to the room before starting the process to avoid any electric shocks. By gathering all the necessary tools and materials, you can change the bulb in an LED ceiling light quickly and effectively. In conclusion, changing a bulb in an LED ceiling light is a simple process that requires some basic tools and materials. By ensuring that you have a stable ladder, a screwdriver that matches the screws on the light, a replacement LED bulb that matches the wattage and size of the old bulb, gloves, and switching off the main power supply, you can complete the task with ease. Remember to read the instructions carefully and follow all safety precautions to avoid any accidents. By following this quick and easy guide, you can change the bulb in an LED ceiling light without any hassle.
Before you start changing your LED ceiling light bulb, it is crucial to follow safety protocols. The first step is to turn off the power source of the light fixture you are working on. This is a crucial safety measure that prevents electrocution and other potential hazards. You can switch off the power by either unplugging the fixture or turning off the circuit breaker. Make sure to double-check that the power is off by testing the light switch or using a circuit tester. It is advisable to wear protective gear such as rubber gloves and safety glasses when working with electricity. By taking these safety precautions, you can change your LED ceiling light bulb with confidence and avoid any accidents.
After you have switched off the power, the next crucial step in changing a bulb in an LED ceiling light is to determine the type of bulb you need. LED bulbs come in various shapes and sizes, and it is essential to identify the correct one to avoid damaging your fixture or causing an electrical hazard. Some common types of LED bulbs include A19, BR30, PAR20, and MR16. To determine the type of bulb, you can check the fixture’s manual or look for labeling on the current bulb. It is crucial to ensure that you purchase the right size and type of bulb to ensure proper illumination in your space. Once you have identified the correct bulb, you can proceed with the replacement process.
Step 3 of changing a bulb in an LED ceiling light is to gather the necessary tools and materials. This is an essential step that ensures that you have everything you need to complete the job successfully. The list of tools and materials required is relatively short and straightforward, including a ladder, a new LED bulb, a screwdriver, and a pair of gloves. It is important to ensure that the gloves are worn to prevent any injury or damage to the bulb during installation. The ladder should be sturdy and placed in a secure position to avoid any accidents while working at height. Additionally, it is vital to ensure that the replacement LED bulb is the correct size, wattage, and type to match the existing light fixture. Gathering the necessary tools and materials before starting the job ensures that you have everything you need to complete the task without any interruptions or delays.
Remove the Old Bulb
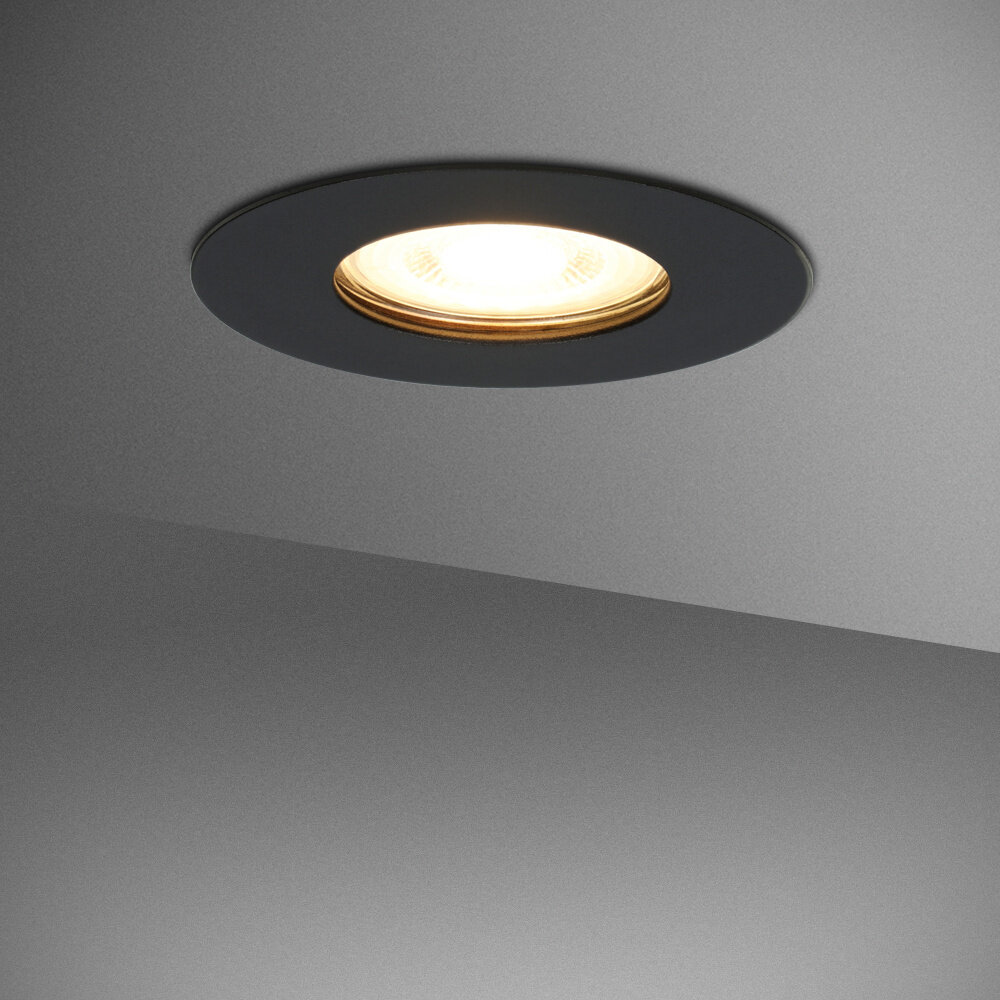
Before you begin changing the bulb in your LED ceiling light, it’s essential to remove the old one safely. Firstly, turn off the power source to the light by flipping the switch or turning off the circuit breaker. This step is crucial as it ensures your safety while handling the bulb. Next, wait for the bulb to cool down before touching it. LED bulbs can get hot and may cause burns if you handle them while they’re still warm. Once the bulb is cool enough to touch, gently twist it counterclockwise to release it from the socket. If it’s stuck, try wiggling it back and forth while pulling it out. Avoid applying too much pressure as it may damage the socket or break the bulb. After you’ve removed the old bulb, inspect the socket to ensure it’s in good condition. Look for any signs of damage, such as cracks or discoloration, which may indicate an electrical problem. If you notice any damage, it’s best to call an electrician to fix it before installing a new bulb. Additionally, check the wattage rating on the socket to ensure it’s compatible with the new bulb. Installing a bulb with a higher wattage than the socket can handle may cause it to overheat and damage the fixture. Once you’ve confirmed the socket is safe and compatible with the new bulb, proceed to the next step of installing the new LED bulb.
Before attempting to change a bulb in an LED ceiling light, it is imperative to allow the bulb to cool down completely. LED bulbs can become extremely hot during operation, especially if they have been in use for an extended period. Attempting to remove a hot bulb can lead to severe burns, causing injury and damage to the bulb. Therefore, it is essential to switch off the light and wait for the bulb to cool down completely before attempting to replace it. Additionally, it is advisable to wear gloves while handling the bulb to protect your hands from any accidental burns. Taking this simple precaution can make the bulb replacement process safer and smoother.
The second step in changing a bulb in an LED ceiling light is to remove the cover or shade that is covering the bulb. This can be done in a variety of ways depending on the type of fixture you have. Some covers simply twist off, while others may require you to remove screws or clips to release the cover. It’s important to be gentle when removing the cover to avoid damaging it or the fixture. Once the cover is removed, you will have clear access to the bulb and can proceed with replacing it.
Step 3 in changing an LED ceiling light bulb is to twist or unscrew the old bulb. This step requires a gentle approach, as the bulb may be fragile and prone to cracking. Depending on the fixture type, you may need to twist the bulb counterclockwise or simply pull it straight out. It’s important to avoid using excessive force or twisting the bulb at an angle, as this could damage the fixture or bulb base. If the bulb is stubborn, you may need to use a light grip or a pair of gloves to gain a better grip. With patience and care, you can easily remove the old bulb and move on to the next step of installing the new LED bulb.
Install the New Bulb
Installing a new bulb into an LED ceiling light fixture is a relatively simple process. First, make sure the power is turned off at the circuit breaker to avoid any electrical accidents. Then, locate the old bulb and gently twist it counterclockwise until it comes loose from the socket. If the bulb is stuck, try using a pair of pliers to gently loosen it. Once the old bulb is removed, take the new bulb and insert it into the socket, making sure it is securely in place. Finally, turn the power back on and test the light to ensure it is working properly. It’s important to choose the right type of bulb for your LED ceiling light fixture. LED bulbs come in a variety of shapes, sizes, and colors, so be sure to select one that matches the specifications of your fixture. Look for bulbs with a wattage and voltage that match your fixture’s requirements, and consider the color temperature of the bulb. Cool white bulbs are best for task lighting, while warm white bulbs are better for creating a cozy atmosphere. Additionally, if you’re concerned about energy efficiency, look for bulbs with the ENERGY STAR label, which indicates they meet strict energy efficiency guidelines set by the U. S. Environmental Protection Agency. By following these simple steps, you can easily install a new bulb in your LED ceiling light fixture and enjoy bright, efficient lighting in your home.
Step 1 of changing a bulb in an LED ceiling light requires inserting the new bulb, which may vary depending on the type of fixture you have. It is important to make sure the bulb is the correct type and wattage for your fixture to avoid any electrical issues or damage. First, turn off the power to the fixture by either switching off the circuit breaker or removing the light bulb from the socket. Then, carefully remove the old bulb by twisting it counterclockwise, and dispose of it properly. Next, take the new bulb and insert it into the socket, making sure to align the pins or threads correctly. Finally, turn on the power and test the new bulb to ensure it is working properly.
Once you have removed the old bulb, it’s time to install the new one. Take the LED bulb and gently twist or screw it into the socket in a clockwise direction. It’s essential to ensure that the bulb is securely fixed into the socket to prevent it from falling out or becoming loose, which could potentially damage the bulb or cause it to malfunction. Be sure not to overtighten the bulb as this can also cause damage. Once the bulb is properly screwed in, turn on the light switch to test it out. If the bulb doesn’t light up, double-check that it’s the correct wattage and that it’s correctly installed.
Step 3 in changing a bulb in an LED ceiling light is to replace the cover or shade. After successfully removing the old bulb and disposing of it properly, the next step involves putting the cover or shade back in place. This may require some careful maneuvering, particularly if the cover or shade is difficult to remove and replace. It’s important to ensure that the cover or shade is securely fastened, as this will help to protect the bulb and ensure that it functions properly. By following these simple steps, anyone can change a bulb in an LED ceiling light quickly and easily, without the need for professional assistance.
Turn On the Power and Test the Light

When it comes to changing a bulb in an LED ceiling light, the first step is to turn on the power and test the light. This is an essential step to ensure that the light is working correctly before you start the actual replacement process. It is important to turn off the power supply to the light fixture before attempting to change the bulb. This is because working with live wires can be dangerous and can result in electrocution. You can turn off the power supply by flipping the switch on the circuit breaker or by unplugging the light fixture. Once you have turned off the power supply, wait for a few minutes to allow the bulb to cool down before you start the replacement process. After you have turned off the power supply, it is time to test the light. This step is crucial because it allows you to identify any other issues with the light fixture before you start the replacement process. Turn on the power supply and check if the bulb is working correctly. If the light is not working, this could indicate a problem with the wiring or the socket. In such a case, it is best to call a professional electrician to inspect the light fixture and make any necessary repairs. If the light is working correctly, you can proceed with the replacement process. Testing the light before you start the replacement process can save you time and money by identifying any issues beforehand.
The first step in changing a bulb in an LED ceiling light is to turn on the power. This step is essential to ensure your safety and prevent any electrical accidents. Before you start, make sure that the power switch for the light fixture is turned off. Once you’ve located the switch, flip it on and check that the light is working correctly. If it is, turn the switch off again to prevent any accidental shocks while you’re replacing the bulb. It’s essential to remember that electricity can be hazardous, so always take precautions when handling electrical appliances.
Step 2 of changing a bulb in an LED ceiling light is testing the light. Once you have successfully removed the old bulb, it’s important to test the light fixture before installing the new one. This can be done by either turning on the light or flipping the switch to see if the fixture is still functioning properly. If the light fails to turn on, it may indicate that the issue is with the fixture itself and not the bulb. In this case, it may be necessary to call a professional electrician to diagnose and fix the problem. However, if the light turns on, then you can proceed with installing the new LED bulb. Testing the light is an essential step to ensure that the fixture is functioning properly and to avoid any potential hazards.
If you’re looking to replace a bulb in your LED ceiling light, it’s important to approach the task carefully and methodically. However, with the right tools and a bit of know-how, it’s a quick and easy job that anyone can do. Just remember to turn off the power and let the bulb cool down before you start, and take your time to ensure that you’re working safely and efficiently. With these simple steps, you’ll have your LED ceiling light shining bright and looking as good as new in no time.
Conclusion

In conclusion, changing a bulb in an LED ceiling light is a quick and easy task that can be done by following a few simple steps. It is important to ensure that the power is turned off and to handle the bulb with care to avoid damage or injury. With the right tools and a little bit of patience, anyone can replace a bulb in their LED ceiling light and enjoy the benefits of energy-efficient lighting. Don’t hesitate to give it a try and brighten up your space with a new LED bulb!

