Mastering Your LED Light Remote: A StepbyStep Guide to Get it Working
Light-Emitting Diode (LED) lights are popular for their energy efficiency and bright illumination. They are commonly used in homes, offices, and outdoor spaces because they last longer and consume less electricity than other lighting options. However, controlling these lights can be a daunting task for some, especially when it comes to using the remote control. If you’re struggling with your LED light remote, don’t worry, you’re not alone. This step-by-step guide will help you master your LED light remote and make it work efficiently. Whether you’re trying to set the mood for a romantic dinner or create an ambiance for a party, controlling your LED lights with a remote control can make the experience much more convenient and enjoyable. Unfortunately, many people struggle with the complexity of these remotes and give up, resorting to manual switches instead. With this guide, you’ll learn how to program and use your LED light remote with ease, and unlock the full potential of your lighting setup. So, let’s dive into the world of LED light remotes and get started on the path to effortless lighting control.
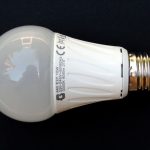
An LED light remote is an electronic device that allows you to control the lighting of your LED bulbs from a distance. It is a handheld tool that includes several buttons to adjust the color, brightness, and other settings of your LED lights. This remote is of great importance as it offers convenience and ease of use. With the LED light remote, you can adjust the lighting of your room from the comfort of your couch or bed without the need to get up and manually change the settings. The remote also offers versatility as it allows you to experiment with different lighting modes and colors, creating the perfect ambiance for any occasion. Overall, the LED light remote is an essential tool for anyone who wants to take full control of their LED lights and create a unique and personalized lighting experience.
The article \Mastering Your LED Light Remote: A Step-by-Step Guide to Get it Working\ is a comprehensive guide on how to effectively use an LED light remote. The article provides a detailed overview of the different types of LED light remotes available in the market and explains how to use them efficiently. The author explains the importance of understanding the different features and functions of the remote, such as color temperature and brightness, and provides step-by-step instructions on how to adjust them. The article also covers common problems that may arise when using an LED light remote and provides solutions to fix them. Overall, this article is an essential guide for anyone looking to master the use of their LED light remote.
Understanding the Components of Your LED Light Remote
An LED light remote is an essential tool that allows you to control the lighting in your home or office with ease. This remote is made up of several components that work together to enable you to switch your lights on and off, adjust the brightness, and even change the color. Understanding these components is crucial if you want to master your LED light remote and use it to its full potential. The first component of your LED light remote is the power button. This button allows you to turn your lights on and off with a simple press. The second component is the brightness adjustment button, which enables you to increase or decrease the brightness of your lights. Some LED light remotes also come with a color adjustment button that lets you change the color of your lights. Additionally, most LED light remotes come with a timer button that allows you to set a specific time for your lights to turn on or off. By understanding these components, you can easily customize your lighting experience to suit your needs and preferences.
When it comes to mastering your LED light remote, it’s important to understand the various buttons and features that it offers. Firstly, the power button is usually the largest and most prominent button on the remote. It’s used to turn the lights on and off with a single press. Next, the mode button allows you to cycle through different lighting modes such as strobe, fade, or flash. The speed button controls the speed at which the lights change or transition between modes. Additionally, the brightness button enables you to adjust the intensity of the lighting, while the color button can be used to select a specific color or cycle through different color options. Finally, some remotes may also include additional buttons for specific features such as a timer function, memory function, or DIY mode.
To master your LED light remote, it’s important to identify each button and its function. Start by reading the manual that comes with your remote, as it will give you a breakdown of each button and how to use it. Look for labels on the buttons, such as \power,\ \color,\ and \brightness,\ which can help you quickly identify their function. Experiment with each button to see how it affects your LED lights. If you’re still unsure, try searching online for a user guide or tutorial that can provide more detailed information. With a little practice and patience, you’ll soon be able to confidently control your LED lights with ease!
Pairing Your LED Light Remote with the Lights

Pairing your LED light remote with the lights is an essential step in getting your LED lights to work. It is a simple process that involves synchronizing the remote control with the lights. First, ensure that the LED lights are connected to a power source and are turned on. Second, locate the pairing button on the remote control and hold it down until the LED light on the remote flashes. Third, release the button and wait for the LED light on the remote to stop flashing. Finally, test the remote control by using it to turn the LED lights on and off. If the lights respond to the remote, then the pairing process was successful. Pairing your LED light remote with the lights is important because it allows you to control the lights from a distance. This means that you can turn the lights on and off, change the brightness, and even change the color of the lights without having to physically touch them. This is not only convenient but also adds to the ambiance of the room. Additionally, pairing your LED light remote with the lights ensures that the remote control is the only device that can control the lights. This prevents interference from other remote controls in the room, ensuring that your LED lights work seamlessly.
Pairing your remote with your LED lights is a crucial step in mastering your LED light system. To begin, ensure your LED lights are plugged in and turned on. Next, remove the insulation sheet from the remote’s battery compartment and insert the batteries. Point the remote at the control box, located near the power source, and press the \Pair\ button until the LED light on the control box begins to flash. Within 10 seconds, press any button on the remote to complete the pairing process. If successful, the LED light on the control box will stop flashing, indicating a connection has been established. Remember to keep the remote within a reasonable distance and angle for effective control of your LED lights. With these simple steps, you’ll be able to enjoy the convenience and versatility of your LED light system in no time.
If you are having trouble pairing your LED light remote, there are several troubleshooting tips you can try. First, make sure the remote is within range of the light and that the batteries are inserted correctly. If the remote still isn’t working, try resetting both the light and the remote. You can also try using a different remote or a different light to see if the issue is with the specific device. If none of these steps work, consult the manufacturer’s instructions or contact customer support for further assistance. Remember to be patient and persistent when troubleshooting, as it may take several attempts to successfully pair your LED light remote.
Adjusting LED Light Settings with the Remote
Adjusting LED Light Settings with the Remote is an essential feature that allows you to customize the lighting according to your preferences. The remote control enables you to change the brightness, color, and mode of the LED lights conveniently. It is a handy tool that eliminates the need to manually change the settings, making it a perfect addition to any LED light fixture. With the remote control, you can easily switch between different lighting modes, such as flash, strobe, and fade, to create the desired ambiance in your space. Moreover, you can adjust the color temperature of the LEDs to achieve a warm or cool lighting effect, depending on your mood and preference. To adjust the LED light settings with the remote, you need to ensure that the remote is compatible with your LED fixture. Once you have established the compatibility, you can turn on the LED lights and press the power button on the remote to activate it. Then, you can use the buttons on the remote to adjust the brightness, color, and mode of the LED lights. It is important to note that different LED light fixtures may have different remote controls, and the buttons may vary in functionality. Therefore, it is crucial to refer to the user manual or the manufacturer’s instructions to understand how to use the remote control properly. With these simple steps, you can easily adjust the LED light settings and enjoy the perfect lighting for any occasion.
The LED light remote is a powerful tool that allows you to adjust various settings to achieve the perfect lighting setup. The remote gives you complete control over the color temperature, brightness, and mode of your LED lights. You can adjust the color temperature to match the mood or ambiance of your space, from warm to cool tones. The brightness setting lets you adjust the intensity of the light, from dim to bright, to suit your needs. Furthermore, you can switch between various modes, such as flash, fade, and smooth, to create dynamic lighting effects. Mastering the different settings on your LED light remote will not only enhance the aesthetics of your space but also improve your overall experience with the lighting.
Adjusting the brightness, color, and other settings on your LED light remote can be a daunting task, but with this step-by-step guide, you’ll be able to master it in no time. First, make sure your LED light is properly connected and turned on. Then, locate the settings button on your remote and press it. From there, you can adjust the brightness by using the plus and minus buttons. To change the color, press the color button and cycle through the options until you find the perfect shade. Other settings, such as flash and fade, can also be adjusted using the appropriate buttons. Take the time to experiment with the settings and find the perfect combination to create the ambiance you desire.
When your LED light remote’s settings are not responding properly, there are a few troubleshooting tips you can try. First, make sure the remote has fresh batteries and is pointed directly at the light. Check that the light is securely plugged in and turned on. If the remote is still not responding, try resetting both the light and remote by unplugging the light for a few minutes and removing the batteries from the remote. Then, reinsert the batteries and plug the light back in. If all else fails, consult the user manual or contact customer support for further assistance. With these troubleshooting tips, you’ll be able to master your LED light remote and enjoy the perfect lighting for any occasion.
Advanced Tips and Tricks for Using Your LED Light Remote
The LED light remote is a powerful tool that can enhance your lighting experience, but it can be challenging to master all its features. However, with some advanced tips and tricks, you can get the most out of your LED light remote. First, try experimenting with different color combinations to create the perfect ambiance in any room. For example, using warm white and yellow tones can create a cozy atmosphere for a living room, while blue and green tones can create a calming effect in a bedroom. Another tip is to use presets to save your favorite lighting settings. This way, you can easily switch between different lighting modes without having to adjust the settings manually every time. Additionally, you can use the dimming function to create a more intimate or relaxing atmosphere. By adjusting the brightness of your LED lights, you can set the mood for any occasion, from a romantic dinner to a movie night with friends. With these advanced tips and tricks, you can master your LED light remote and create the perfect lighting experience for any occasion.
When it comes to using your LED light remote, there are a variety of tips and tricks to help you create the perfect lighting effect for any occasion. One useful technique is to experiment with the color and brightness settings to find the perfect balance for your space. Another helpful tip is to use the preset modes to quickly switch between different lighting effects, such as a relaxing ambiance or a party atmosphere. Additionally, you can use the timer function to set your lights to turn on and off automatically, creating a seamless and convenient experience. By mastering these tips and tricks, you’ll be able to create the perfect lighting environment for any occasion with ease.
The remote control for LED lights has various modes and functions that allow users to customize the lighting experience according to their preferences. Some of the modes include static colors, gradual color changing, and flashing. The static color mode allows users to choose a single color to illuminate the room, while the gradual color changing mode shifts between different colors to create a dynamic atmosphere. The flashing mode produces a strobe effect, perfect for parties and events. Additionally, the remote control has functions such as brightness adjustment, speed control, and power on/off. By mastering these modes and functions, users can fully enjoy the versatility of their LED lights and create the desired ambiance in their living space.
One common issue that people face while using LED light remotes is that they stop working suddenly. If you are facing this issue, there are some things you can try to get your remote functioning again. Firstly, check the batteries and ensure they are not dead or low in power. If the batteries are working fine, try resetting the remote by removing the batteries and pressing all the buttons on the remote simultaneously for 3-5 seconds. If this doesn’t work, check if there are any obstructions between the remote and the LED light controller. Sometimes, this can cause interference and prevent the remote from working correctly. Finally, if none of these steps work, try replacing the remote, as it may be damaged or faulty. By following these troubleshooting tips, you can easily identify and fix the issue with your LED light remote.
The article titled \Mastering Your LED Light Remote: A Step-by-Step Guide to Get it Working\ provides a comprehensive guide to help individuals effectively use their LED light remote. The article covers various topics such as understanding the basics of how LED light remotes work, identifying the different buttons on the remote, and troubleshooting common issues that may arise when using the remote. Additionally, the article provides tips on how to extend the lifespan of the remote and how to properly handle it to avoid damage. By following the step-by-step guide provided in the article, individuals can confidently use their LED light remote to control their LED lights and create the desired ambiance in their space.
Congratulations on mastering your LED light remote! With this tool, you can now easily control the brightness, color, and ambiance of your living space. To make the most of your remote, we recommend keeping it in a safe and accessible place, so you can easily find it when you want to adjust your lights. Additionally, make sure to read the manual and familiarize yourself with all the functions and features of your remote. Experiment with different color combinations and lighting effects to create the perfect atmosphere for any occasion. With a little practice and experimentation, you’ll soon be a pro at using your LED light remote to elevate your home lighting experience.
Conclusion
In conclusion, mastering your LED light remote may seem daunting at first, but with this step-by-step guide, you can easily get it working. By understanding the basic functions and buttons on your remote, you can control the color, brightness, and mode of your LED lights effortlessly. Remember to keep the remote pointed towards the receiver and within range for optimal performance. With a little patience and practice, you’ll soon be able to create the perfect ambiance in any room with your LED lights. So go ahead and experiment with different settings and enjoy the benefits of a well-lit and comfortable living space.