Light Up Your Space: A StepbyStep Guide on How to Cover LED Light Strips
Lighting is an essential element in any space. It sets the mood, enhances the ambiance, and can even affect our productivity. With the advent of LED light strips, it has become easier than ever to add some extra illumination to our homes. However, having a bare LED strip can be an eyesore and may not fit into the aesthetic of your space. That’s where covering the LED strip comes in. In this step-by-step guide, we will show you how to cover LED light strips, so you can light up your space in style. Whether you want to create a cozy atmosphere in your living room, add some mood lighting to your bedroom, or illuminate your kitchen cabinets, covering your LED light strips can help you achieve your desired look. From diffusing the light to creating a color filter, there are many ways to cover your LED light strips. We will take you through each step of the process and provide you with some creative ideas to transform your space. So, let’s get started and light up your space in a way that suits your style!
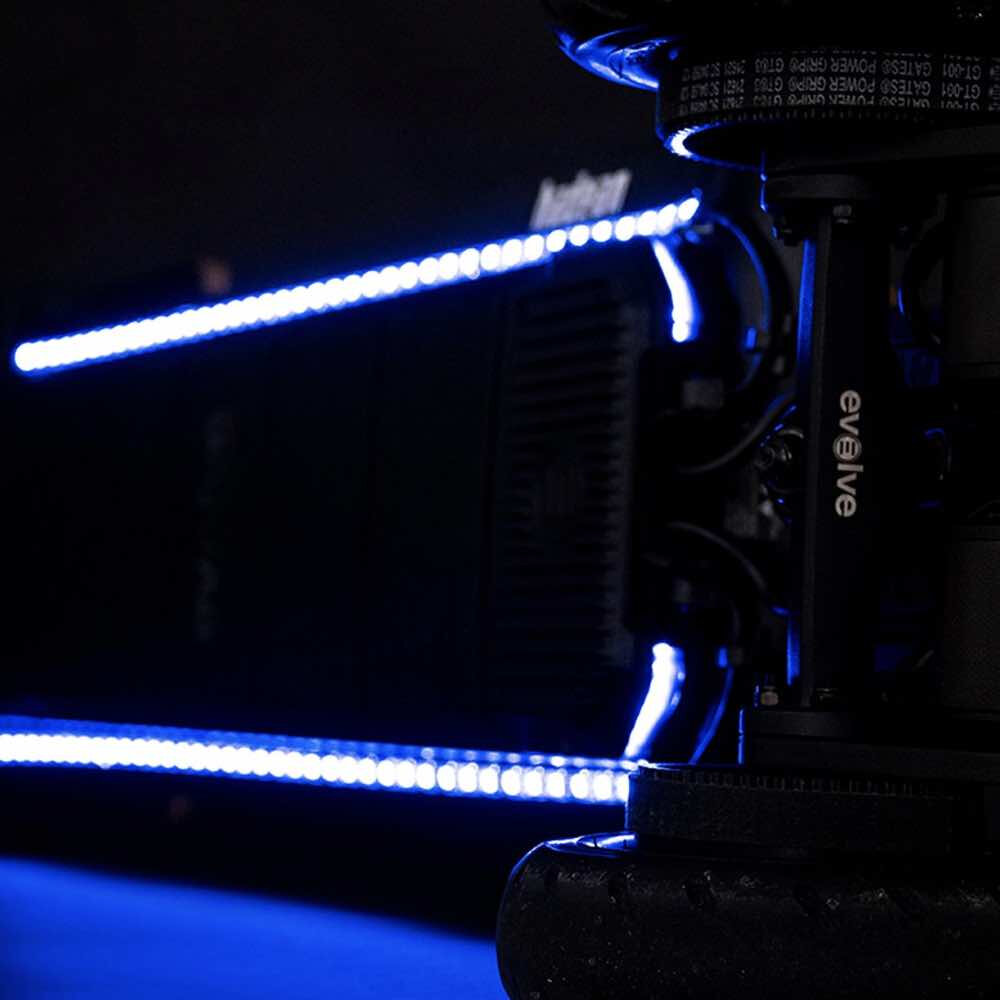
LED light strips are thin, flexible circuit boards that contain light-emitting diodes (LEDs) and are used for decorative and functional lighting. These strips are available in different colors, lengths, and densities, and can be cut or extended to fit any space. LED light strips are popular due to their energy efficiency, long lifespan, and versatility. They emit bright and vivid light, consume less electricity than traditional lighting, and can be controlled using remote or smart devices. LED light strips are commonly used for accent lighting in homes, offices, and commercial spaces, as well as for creating stunning visual effects in events and shows. With their affordability and ease of installation, LED light strips are a popular choice for anyone looking to brighten up their space.
Covering LED light strips is an essential step in creating a visually appealing and functional lighting design for any space. LED light strips emit bright and vibrant light, but without proper coverage, they can appear harsh and overwhelming. Additionally, covering LED light strips protects them from dust and other environmental factors, ensuring that they last longer and operate at their full capacity. By adding a diffuser or other type of light cover, you can soften the light and create a more subtle and inviting ambiance. Whether you’re looking to enhance your home décor, create an inviting workspace or improve the visibility and safety of your outdoor area, covering LED light strips is a crucial step in achieving your lighting goals.
The step-by-step guide on how to cover LED light strips is a comprehensive and detailed set of instructions that will help you add some sparkle to your living space. This guide takes you through each step from selecting the right materials to covering your LED light strips. Whether you want to create a warm and cozy ambiance or a vibrant and energetic atmosphere, this guide has got you covered. With easy to follow instructions, you’ll be able to transform any room in your home into a stunning and inviting space in no time. From selecting the right colors to creating custom designs, this guide will help you unleash your creativity and bring your vision to life. So, if you’re looking to add some light and color to your home, this step-by-step guide is the perfect place to start.
Materials Needed
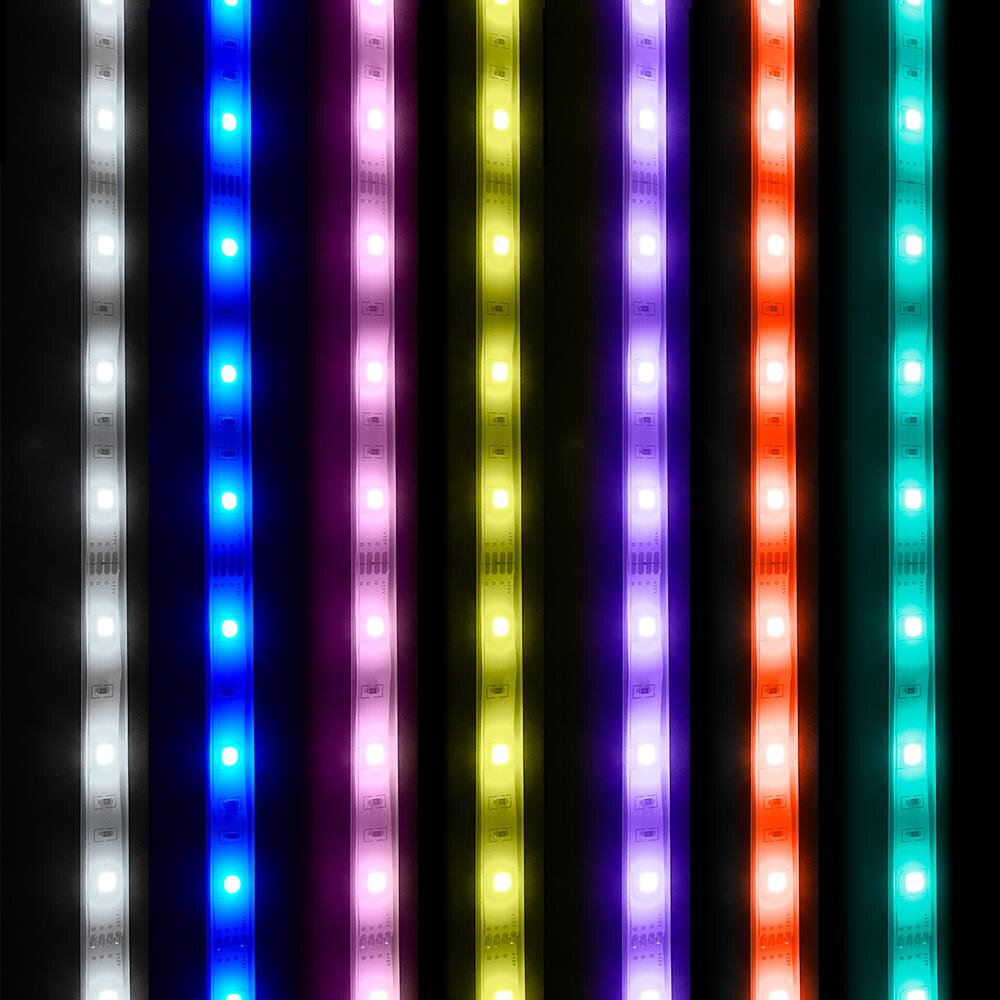
When it comes to covering LED light strips, materials are crucial. Without the right materials, the project can quickly become frustrating and ineffective. The first essential material is the LED light strips themselves. You can find these strips in various lengths, colors, and styles to fit your specific needs. It’s important to choose the correct length for your project, so you don’t end up short or with excess strip. Additionally, consider the color of the lights and how it will complement the overall aesthetic of the space. Another critical material is the cover for the LED light strips. There are many options available, including diffusers, lenses, and covers. The cover you choose will depend on the type of lighting effect you want to achieve. For example, a diffuser will soften the light and create a more subtle effect, while a lens will focus the light in a particular direction. Additionally, some covers offer protection for the LED light strips, which can be beneficial if you’re installing them in an area where they may be bumped or moved. Make sure you choose a cover that fits your specific LED light strips to ensure a secure and effective installation.
When it comes to covering LED light strips, it’s essential to have the right materials. First and foremost, you’ll need a suitable cover, such as aluminum channel or diffuser. This will protect the lights from dust and damage while also providing a smooth, polished appearance. Additionally, you’ll need mounting clips or tape to secure the cover in place, as well as a power source and controller for the LED lights. Depending on your specific project, you may also require wire connectors, soldering tools, or other accessories. By gathering all of the necessary materials beforehand, you can ensure a seamless and successful installation of your LED light strips.
When covering LED light strips, it is essential to choose the right materials to achieve the desired effect. The purpose of each material is crucial in creating a cohesive and aesthetically pleasing look. The aluminum channel serves as a protective casing for the LED strip while also providing a sleek and modern appearance. The diffuser cover helps to soften the harshness of the LED light and distribute it evenly across the room. The mounting clips secure the aluminum channel in place and ensure that the LED strip stays in position. Finally, the power supply and connector cables provide the necessary electrical components to power the LED strip and connect it to a power source. Each of these materials plays a critical role in creating a beautiful and functional lighting solution for any space.
StepbyStep Guide
A step-by-step guide is an excellent resource for anyone who wants to learn a new skill or complete a project. It provides a detailed, easy-to-follow process that allows individuals to complete a task in a structured and organized manner. A step-by-step guide can be especially useful for more complicated projects, such as covering LED light strips, as it breaks down the process into smaller, more manageable steps. By following a step-by-step guide, individuals can gain the confidence and knowledge they need to successfully complete a project. The Light Up Your Space A Step-by-Step Guide on How to Cover LED Light Strips provides individuals with a clear and concise roadmap for covering LED light strips. The guide details each step of the process, from gathering the necessary materials to attaching the light strips to the appropriate surface. The guide also includes helpful tips and tricks to make the process easier and more efficient. By following this step-by-step guide, individuals can take the guesswork out of covering LED light strips and create a beautiful, well-lit space that meets their needs and preferences.
Step 1 of the article \Light Up Your Space: A Step-by-Step Guide on How to Cover LED Light Strips\ involves measuring the LED light strips. This step is crucial because it ensures that you have the right amount of materials to cover the entire length of the strip, and it also helps you determine the size of the cover you will need. To begin, you will need a measuring tape or ruler and a piece of paper to record your measurements. Start by measuring the length of the LED light strip from end to end and write down this measurement on your paper. Next, measure the width of the strip, and again, record this measurement. Finally, measure the distance between each LED bulb to determine the spacing needed for your cover. With these measurements in hand, you can move on to the next step of covering your LED light strips.
The second step in covering LED light strips is choosing the right cover material. There are various materials that can be used to cover the LED light strips, such as diffusers, frosted plexiglass, and acrylic sheets. The material you choose will depend on the final aesthetic you want to achieve, the level of light diffusion you want, and the durability of the material. Diffusers are ideal for creating a softer light, while frosted plexiglass and acrylic sheets provide a more even and consistent diffusion of light. It’s important to choose a material that not only meets your aesthetic needs but also provides adequate protection for the LED light strips, ensuring they last as long as possible.
In Step 3 of the \Light Up Your Space\ guide, we will be cutting the cover material to fit the length of the LED light strip. It is important to measure accurately and use a sharp cutting tool to ensure a clean and precise cut. Depending on the type of cover material being used, it may be necessary to use a ruler or straight edge to guide the cut. If the cover material is flexible, such as silicone tubing, it can be gently stretched over the LED light strip once it has been cut to the appropriate length. It is important to take care when cutting the cover material as any mistakes will impact the overall appearance of the finished product.
After cutting the cover material to the desired length, it’s time to attach it to the LED light strips. The process is straightforward, but it requires precision and attention to detail. First, make sure the LED lights are turned off, and clean the surface of the strips with a dry cloth to remove any dust or debris. Then, peel off the adhesive backing of the cover material and carefully align it with the LED lights. Press down firmly and evenly, making sure there are no air bubbles or wrinkles. Repeat the process for the entire length of the LED light strips, and trim off any excess cover material with a sharp pair of scissors. Once done, turn on the LED lights and enjoy the new look of your space.
After completing the installation process of the LED light strips, it is essential to test them before turning on the main switch. Testing the covered LED light strips will ensure that the connections are correctly made, and the installation process is successful. To test the LED light strips, plug in the power cord and switch on the power supply. Observe the light strips closely, and make sure that all the LED bulbs are lit up evenly. If any of the bulbs are not functioning correctly, check the connections and correct them accordingly. Testing the LED light strips ensures that they are safe to use and will provide the desired illumination to your space.
Tips and Tricks
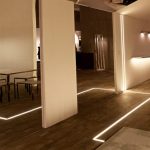
Are you looking to add some character to your living space? LED light strips are a great way to create a unique and inviting atmosphere in any room. However, it can be intimidating to figure out how to install and cover them. That’s where these tips and tricks come in handy. Firstly, take the time to plan out the placement of your LED light strips. Consider the purpose of the room and how you want the lighting to enhance the space. You can create a cozy and warm vibe by placing the strips under furniture or along the perimeter of the room. For a more dramatic effect, try placing the strips in unexpected areas such as behind artwork or under shelves. Once you’ve decided on the placement, measure the length of the strips and make sure you have enough to cover the entire area. Additionally, make sure you have the necessary tools such as a power source, connectors, and a remote control if applicable. With a solid plan in place, you’ll be able to confidently move on to the next steps of the installation process. Secondly, when it comes to covering your LED light strips, there are several options available. One popular method is to use diffusers or covers to soften the light and create a more even distribution. These can be purchased in a variety of materials such as plastic, silicone, or fabric. Another option is to install the strips in channels or tracks, which not only provides a sleek look but also protects the strips from damage. If you’re feeling creative, you can even use everyday materials such as wood or metal to create a custom cover that matches the style of your room. With these tips and tricks, you’ll be able to install and cover your LED light strips with ease, and transform your living space into a cozy and inviting haven.
When it comes to covering LED light strips, choosing the right cover material can make a big difference in the overall look and feel of your space. One popular option is polycarbonate, which is durable and shatter-resistant, making it a great choice for high-traffic areas or spaces where children and pets are present. Another option is acrylic, which is lightweight and easy to cut, making it a good choice for DIY projects. Glass is also a great option for creating a sleek and modern look, but it can be heavy and may not be suitable for all applications. Ultimately, the right cover material for your LED light strips will depend on your specific needs and preferences, so take the time to consider all your options before making a final decision.
There are numerous alternative ways to cover LED light strips that can add both functionality and aesthetic appeal to your space. One option is to use diffusers, which can soften the light and create a more even glow. Another possibility is to use aluminum channels, which can provide protection for your light strips while also adding a sleek, modern look. Fabric covers can be another option, as they can diffuse light and add texture to your space. If you’re feeling creative, you can even use unconventional materials such as wood or acrylic to cover your LED light strips, providing a unique and personalized touch to your lighting design. With so many options available, you’re sure to find a solution that fits your needs and style.
Maintaining covered LED light strips is crucial for their longevity and performance. It’s essential to keep them clean by wiping them down with a soft cloth regularly. Avoid using abrasive materials or harsh chemicals that could damage the cover or strip. Additionally, it’s crucial to check the wiring and connections for any signs of wear or damage. Ensure the connections are secure and free from any dirt or debris. If you notice any issues with the strip, address them promptly to prevent further damage. By following these maintenance tips, you can ensure your covered LED light strips stay in optimal condition and provide beautiful lighting for your space.
In summary, the step-by-step guide on how to cover LED light strips begins by determining the type of cover you need, followed by measuring the dimensions of the light strip. Next, cut the cover to the required length and attach it to the light strip using adhesive tape or clips. Secure the cover by pressing it down firmly, making sure it’s evenly spread across the light strip. Finally, connect the light strip to a power source and test it to ensure it’s working correctly. The guide provides an easy-to-follow process that anyone can use to improve the aesthetics of their space, and with a wide range of cover options, you can choose the perfect cover to match your style.
The importance of covering LED light strips cannot be overstated. Not only does it improve the aesthetics of your space, but it also protects the LED lights from dust, moisture, and other elements that can cause damage. Covering the LED light strips also helps diffuse the light and provide a more even glow, reducing harsh glare and creating a more comfortable atmosphere. Additionally, covering the LED light strips can enhance the longevity of the lights, as it prevents direct exposure to external factors that can cause wear and tear. Ultimately, covering LED light strips is a simple and cost-effective way to upgrade your space while ensuring the safety and longevity of your lighting investment.
Are you tired of the same old boring lighting in your living space? Do you want to add a personalized touch to your home decor? Look no further! Our step-by-step guide on how to cover LED light strips is the perfect solution for you. With just a few simple materials and easy-to-follow instructions, you’ll be able to create a unique and customized lighting solution that perfectly suits your style and needs. Don’t be intimidated by the process; our guide breaks it down into manageable steps that anyone can follow. So go ahead, give it a try, and watch as your space comes to life with a warm and inviting glow!
Conclusion
In conclusion, covering LED light strips is a simple and effective way to enhance the ambiance of any space. Whether you are looking to create a cozy atmosphere or a vibrant environment, there are countless options available to suit your style and preferences. By following the step-by-step guide outlined in this article, you can easily transform your space and make it truly shine. From choosing the right materials to installing the strips and adding finishing touches, this process is both fun and rewarding. So why wait? Grab your LED light strips and start experimenting with different coverings today!
Related posts:
 LED Light Strips: A StepbyStep Guide on How to Connect and Illuminate Your Space
 Linking LED Light Strips: A StepbyStep Guide to Illuminating Your Space
 Light Up Your Space: A StepbyStep Guide on How to Easily Connect 2 LED Light Strips
 Light Up Your Space: A StepbyStep Guide on How to Connect LED Light Strips