LED Tube Light Replacement: A StepbyStep Guide to Changing Your Old Bulbs

LED tube light replacement is a cost-effective way to upgrade your lighting system at home or in the office. The switch from traditional fluorescent bulbs to LED technology can result in significant energy savings while providing brighter, longer-lasting light. However, the idea of replacing old bulbs may seem daunting to some, especially without prior knowledge of the process. In this step-by-step guide, we will walk you through the process of replacing your old bulbs with LED tube lights, providing you with the necessary knowledge to make the switch with ease and confidence. One of the primary benefits of switching to LED tube lights is the significant energy savings they provide. LED technology uses up to 80% less energy than traditional fluorescent bulbs, resulting in lower energy bills and a reduced carbon footprint. Additionally, LED tube lights last significantly longer than their fluorescent counterparts, meaning fewer replacements and less waste. By following this guide, you can upgrade your lighting system to a more energy-efficient and sustainable option, all while saving money and enjoying the benefits of brighter, longer-lasting light.
LED tube lights have numerous benefits over traditional fluorescent bulbs. Firstly, they are more energy-efficient and can help reduce electricity bills significantly. Secondly, they have a longer lifespan, with some models lasting up to 50,000 hours, which means less maintenance and replacement costs. Thirdly, they are more environmentally friendly, as they do not contain hazardous materials such as mercury, which is commonly found in fluorescent bulbs. Additionally, LED tube lights produce less heat and emit less UV radiation, making them safer to use. Finally, they provide better lighting quality, with brighter and more natural-looking light that can enhance productivity and mood. Overall, switching to LED tube lights is a smart and practical investment for both homes and businesses.
Replacing old bulbs with LED tube lights is a game-changing move towards energy efficiency and cost savings. LED tube lights have a lifespan that is ten times longer than traditional fluorescent bulbs, which means that they require less frequent replacement, reducing the maintenance costs. Additionally, LED tube lights use up to 75% less energy than fluorescent bulbs, which translates into significant savings on electricity bills. Moreover, LED tube lights emit less heat than fluorescent bulbs, reducing the need for air conditioning, and ultimately lowering energy consumption even more. By making the switch to LED tube lights, individuals and businesses can save money, reduce their carbon footprint, and create a more sustainable future.
Gather Necessary Tools and Materials
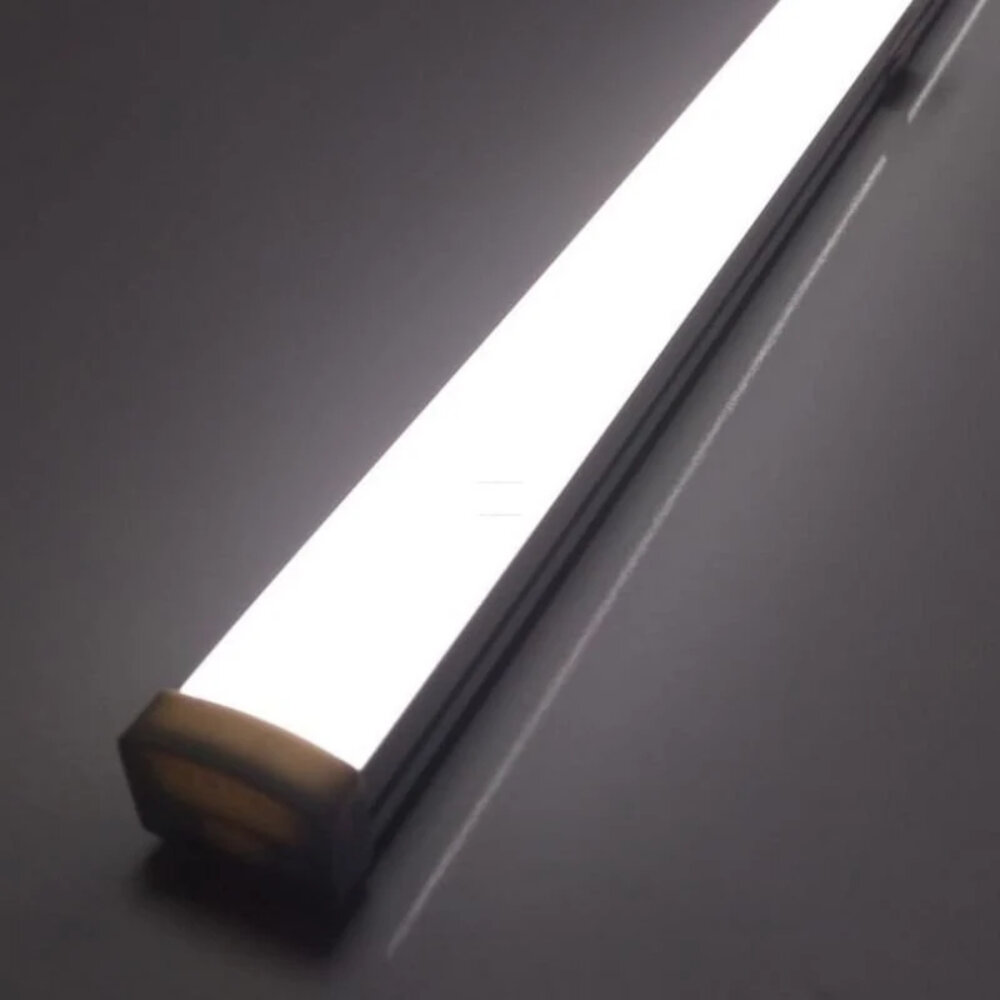
In order to replace your old bulbs with LED tube lights, it is crucial to gather all the necessary tools and materials beforehand. This will ensure that the process goes smoothly and efficiently, without any interruptions or delays. Some of the essential tools and materials you will need include a screwdriver, wire cutters, pliers, electrical tape, and of course, the LED tube lights themselves. Before beginning the replacement process, it is important to turn off the power supply to the old bulbs and ensure the circuit is completely de-energized. This will prevent any electrical accidents or mishaps from occurring during the replacement process. Once you have gathered all the necessary tools and materials, you can begin the replacement process. Start by removing the old bulbs from their sockets and carefully disconnecting any wires or connectors that are attached to them. Next, you will need to remove the ballast from the fixture, which is responsible for regulating the current that flows through the bulbs. This step may require some additional tools, such as a wire stripper or voltage tester, depending on the type of ballast you are dealing with. Once the ballast has been removed, you can connect the new LED tube lights directly to the fixture and reattach any wires or connectors as necessary. Finally, turn on the power supply and test the new lights to ensure they are working properly. With the right tools and materials, replacing your old bulbs with LED tube lights can be a simple and straightforward process.
Before starting the LED tube light replacement process, it is important to gather all the necessary tools and materials. The following items are required for this task: LED tube lights, wire strippers, pliers, a voltage tester, a ladder, a screwdriver, and safety gloves. It is also recommended to have a wiring diagram of the existing lighting fixture to ensure that the installation is done correctly. Additionally, it is important to make sure that the LED tube lights are compatible with the existing lighting fixture before beginning the replacement process. By having all the necessary tools and materials on hand, the LED tube light replacement process can be done quickly and efficiently.
In the process of replacing old bulbs with LED tube lights, several tools and materials are necessary. Firstly, a ladder or step stool is required to reach the old bulbs, especially if they are mounted high up. Secondly, a pair of gloves is essential to protect your hands from cuts and bruises that may arise during the process. A screwdriver is necessary to remove the old bulbs, and a wire stripper is needed to strip the wires in preparation for connecting the new LED tube lights. Moreover, wire connectors are necessary to join the wires securely, and a voltage tester is required to ensure that the wires are not live before beginning the process. Finally, the LED tube lights themselves are necessary to replace the old bulbs and provide long-lasting, energy-efficient lighting.
Turn Off Power and Remove Old Bulbs
When it comes to replacing your old fluorescent tubes with LED ones, the first thing you need to do is to turn off the power. This is crucial for your safety and the safety of others around you. You wouldn’t want to accidentally electrocute yourself or start a fire while changing your light bulbs. To turn off the power, you need to locate the circuit breaker or the switch that controls the lights you want to replace. Once you’ve found it, turn it off and make sure to put a sign or a note to inform others that you’re working on the lights and that they should not turn the power back on. After turning off the power, wait for a few minutes to make sure that the electricity has been completely discharged before proceeding to the next step. The next step is to remove the old bulbs. Depending on the type of fixture you have, this may require a bit of effort. Some fixtures have clips that you need to press down to release the bulbs, while others require you to twist the bulbs counterclockwise to remove them. If you’re having trouble, refer to the manufacturer’s instructions or consult a professional. Once you’ve removed the old bulbs, inspect the fixture for any damage or signs of wear and tear. This is also a good time to clean the fixture and the surrounding area to get rid of any dust or debris that may have accumulated over time. With the old bulbs out of the way, you can now proceed to install the new LED tubes.
Before starting the LED tube light replacement, it’s essential to turn off power to the fixture. Follow these simple step-by-step instructions to ensure your safety. Firstly, locate the circuit breaker panel and switch off the circuit breaker that powers the fixture you want to replace. If you’re unsure which circuit breaker controls the fixture, turn off the main circuit breaker to shut off all power in your home. After that, use a non-contact voltage tester to confirm that the power to the fixture is off. This tool will detect the presence of electricity without coming into contact with live wires. Finally, remove the old bulbs and start installing the LED tube light. Remember to follow the manufacturer’s instructions and take all necessary precautions to avoid accidents.
When removing old fluorescent bulbs from the fixture, it is important to take safety precautions to avoid injury or damage. First, turn off the power to the fixture and use a non-conductive tool, such as gloves or pliers, to gently twist and pull the bulb from the socket. Be careful not to break the bulb, as it contains toxic chemicals. Dispose of the bulb properly, following local regulations. It is recommended to wear protective eyewear and gloves during the process. Once the old bulb is removed, you can safely install the new LED tube light and enjoy its energy-saving benefits.
Install New LED Tube Lights
LED tube lights are a popular choice for homeowners who want to improve the lighting quality in their homes while also reducing energy usage. Installing new LED tube lights is a simple process that can be completed in just a few steps. The first step is to turn off the power to the existing light fixture. This can be done by flipping the circuit breaker or removing the fuse that powers the fixture. Next, remove the old fluorescent tube by gently twisting it and pulling it out of the fixture. Be sure to dispose of the old tube properly as it contains mercury and can be hazardous to the environment. Once the old tube has been removed, it’s time to install the new LED tube light. Insert one end of the LED tube into the fixture and gently twist it until it locks into place. Then, insert the other end of the tube into the fixture and twist it until it locks into place as well. Finally, turn the power back on to the fixture and test the new LED tube light to ensure that it is working properly. LED tube lights are a great investment that not only provide better lighting quality but also save on energy costs in the long run.
If you’re looking to replace your old bulbs with LED tube lights, it’s a relatively simple process. First, make sure the power is turned off to the fixture you’ll be working on. Next, remove the old tube by gently twisting it out of its sockets. Some fixtures may require you to remove a cover or casing first. Once the old tube is out, simply insert the new LED tube by lining up the pins and gently twisting it into place. Finally, turn the power back on and enjoy the energy savings and improved lighting quality of your new LED tube lights. It’s important to note that if you’re not comfortable working with electrical fixtures, it’s best to hire a professional electrician to do the job.
When installing LED tube lights, it is important to ensure proper alignment and installation to maximize their efficiency and lifespan. Firstly, turn off the power supply to avoid any electrical hazards. Then, remove the old light fixtures and clean the surface where the new LED tube will be installed. Make sure that the LED tube is compatible with the fixture and check for any damage or defects. Align the pins of the LED tube with the sockets of the fixture and gently push it in until it clicks. Finally, turn on the power and test the lights. If there are any issues with the installation or alignment, consult a professional electrician to avoid any further damage.
Test and Dispose of Old Bulbs
Before installing LED tube lights, it is imperative to test and dispose of old bulbs properly. Testing the old bulbs ensures that they are not functioning correctly and are ready for disposal. To test the bulbs, it is best to use a multimeter to check their voltage and resistance. If the bulbs do not light up or have a voltage reading of zero, they are no longer functioning correctly and need to be disposed of. Disposing of old bulbs is crucial to maintaining a safe and eco-friendly environment. Many old bulbs contain hazardous materials, such as mercury, which can be harmful to both humans and the environment. Therefore, it is essential to dispose of them correctly. One way to dispose of old bulbs is to take them to a recycling center or hazardous waste facility. Another option is to contact your local government to inquire about their disposal guidelines. By disposing of old bulbs correctly, you are not only protecting yourself and the environment but also contributing to a sustainable future.
To ensure that the new LED tube lights are functioning properly, there are several tests that can be done. The first step is to check the packaging and make sure that the product matches the specifications of the old bulb. Once the LED tube light is installed, turn on the switch and observe the light output. The light should be bright, consistent, and flicker-free. If the light output is not satisfactory, check the wiring connections and make sure they are properly secured. Another test that can be done is to use a multimeter to measure the voltage and current of the LED tube light. This will help to determine if the light is drawing the correct amount of power and if the wiring is functioning properly. Finally, it is important to check the lifespan of the LED tube light by monitoring its performance over time.
Proper disposal methods for old fluorescent bulbs are crucial to prevent environmental harm. These bulbs contain small amounts of mercury that can be toxic if released into the environment. To dispose of them, you should never throw them in the trash or recycling bin. Instead, search for local recycling programs that accept fluorescent bulbs. Many hardware stores and home improvement centers offer recycling services. Make sure to place the bulbs in a sealed container to prevent breakage during transport. It’s also essential to avoid vacuuming up any broken pieces and to wear gloves and safety glasses when handling them. Taking the extra step to dispose of your old fluorescent bulbs properly can help protect our planet and ensure the safety of those handling them.
Upgrading to LED tube lights offers numerous benefits to homeowners, including energy savings, increased longevity, and reduced maintenance costs. Unlike traditional fluorescent bulbs, LED tube lights consume less power and produce less heat, making them an efficient and eco-friendly lighting solution. Additionally, LED lights last significantly longer than their fluorescent counterparts, reducing the frequency of bulb replacements and the associated expenses. Replacing old bulbs with LED tube lights is a simple and cost-effective way to improve the quality of your lighting while also reducing your carbon footprint.
To ensure a successful LED tube light replacement, there are several final tips to keep in mind. First, make sure to turn off the power before beginning any work. This will reduce the risk of electrical shock or injury. Next, choose the right type of LED tube light for your fixture. Consider factors such as color temperature, brightness, and compatibility with your existing ballast. Additionally, it is important to properly dispose of your old fluorescent bulbs and ballast in accordance with local regulations. Finally, take the time to properly install and secure your new LED tube lights, making sure all connections are tight and secure. By following these tips, you can enjoy the many benefits of LED lighting while avoiding any safety hazards or installation issues.
Conclusion
In conclusion, LED tube light replacement is a simple and cost-effective way to upgrade your lighting system. By following the step-by-step guide provided, you can easily change your old bulbs and enjoy the benefits of energy-efficient and long-lasting LED lighting. Not only will this save you money on your energy bills, but it will also reduce your carbon footprint and contribute to a more sustainable future. So, don’t hesitate to make the switch to LED tube lights and start enjoying the many benefits they offer.


