How to Make Your Own LED Light Box in 5 Easy Steps
Creating a DIY LED light box is an excellent way to add a professional touch to your photography or artwork without breaking the bank. This versatile lighting tool is perfect for capturing high-quality images, enhancing the details in your sketches, or displaying your collectibles. With just a few essential tools and a little bit of patience, you can easily make your own LED light box in five simple steps. The LED light box is a great tool for creative individuals looking for a new way to showcase their talents. Whether you’re a professional photographer, an artist, or a collector, a DIY light box offers endless possibilities for display and creativity. By using LED lights, you can create a bright and even lighting effect that is perfect for capturing every detail of your subject. Additionally, building your own light box is an excellent way to save money and customize it to fit your specific needs. In this article, we will explore the five easy steps to make your own LED light box and start showcasing your art in the best possible light.
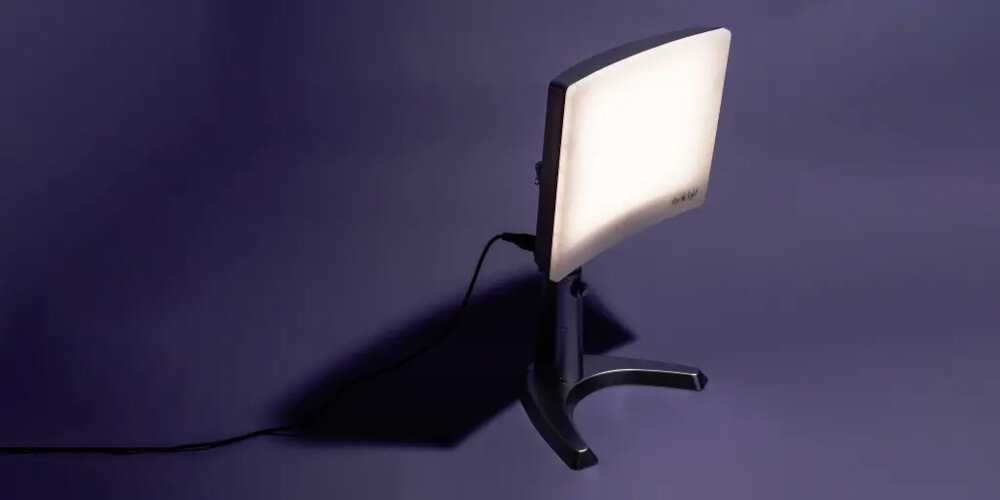
A LED light box is a flat panel that emits bright, even light, usually used for tracing or displaying artwork, photographs, and slides. It features a series of light-emitting diodes (LEDs) installed around the edges of a translucent acrylic or glass surface that diffuses the light evenly across the panel. LED light boxes are popular among artists, photographers, and graphic designers as they provide a consistent and clear illumination that allows for precise tracing or viewing of details. Moreover, they are energy-efficient, long-lasting, and produce a cool light that doesn’t emit heat, making them safe to use for extended periods.
There are numerous benefits to making your own LED light box rather than purchasing one. Firstly, it allows you to customize the size and design of the box to meet your specific needs. Secondly, making your own light box is often more cost-effective than buying one, especially if you have materials on hand or can repurpose items. Additionally, building your own light box can be a fun and creative DIY project, providing a sense of satisfaction and accomplishment. Lastly, making your own light box gives you the opportunity to learn new skills and techniques, such as wiring and soldering, which can be useful for future projects. Overall, creating your own LED light box can be a rewarding and practical endeavor.
To create your own LED light box, you will need a few essential materials. Firstly, you will need a sturdy and durable box that can hold the light and resist external pressure. Secondly, you will need LED light strips or panel lights that provide a uniform light source. You will also need an opaque white acrylic sheet or tracing paper to diffuse the light and create a smooth surface. In addition, you will require a power supply to power the LED lights and an on/off switch to control the light. Lastly, you will need a few basic tools such as a drill, screws, and a screwdriver to assemble the light box. With these materials, you will have everything you need to make your own LED light box in just five easy steps.
Step 1: Measuring and Cutting
The first step in making your own LED light box is measuring and cutting. This step is crucial in ensuring that your light box is the correct size and shape to fit your needs. You will need to measure the size of the acrylic sheet that you will be using as the base of your light box. Once you have measured the acrylic sheet, you will need to use a saw or a cutter to cut it to the correct size. It is important to be precise when cutting the acrylic sheet to avoid any jagged edges or uneven cuts. You will also need to measure and cut the LED strips to fit the size of your acrylic sheet. This will ensure that the LED strips are evenly spaced and provide an optimal amount of light for your light box. Measuring and cutting can be a daunting task, but with the right tools and careful attention to detail, it can be done easily and accurately. It is important to take your time when measuring and cutting to ensure that you get the most precise measurements possible. A ruler or measuring tape can be helpful in keeping your measurements accurate, and a saw or cutter will make cutting the acrylic sheet and LED strips a breeze. Once you have finished measuring and cutting, you will be one step closer to having your very own LED light box that is perfectly tailored to your needs.
Measuring and marking the acrylic sheet is a crucial step in making your own LED light box. To ensure precise measurements, it is recommended to use a ruler or measuring tape and a marker. The acrylic sheet should be marked on both sides to avoid confusion during the cutting process. It is also important to use a straight edge or T-square to ensure straight lines. Careful attention should be paid to the placement of the markings to avoid mistakes that could lead to the acrylic sheet being cut incorrectly. Taking the time to accurately measure and mark the acrylic sheet will result in a professional-looking finished product.
Cutting the acrylic sheet to size is a crucial step in making your own LED light box. Acrylic is a versatile material, but it can be brittle and prone to cracking if not cut properly. To ensure a clean, precise cut, use a saw blade with fine teeth and go slowly. It’s also important to use a straight edge or ruler as a guide to keep your cut straight and even. Once you’ve cut your acrylic sheet to size, be sure to remove any rough edges or burrs with a sanding block or file. This will help ensure that your final product looks polished and professional. With a little patience and attention to detail, you can cut your acrylic sheet to the perfect size for your LED light box.
After cutting the acrylic sheet to the desired size, the edges may appear rough or uneven. To achieve a smooth and professional look, it is important to sand the edges of the acrylic sheet. This can be done with sandpaper of different grits, starting with a coarse grit and gradually moving to a finer one. The sandpaper should be held at a 45-degree angle to the edge of the sheet and moved in a circular motion. This will help to remove any rough spots or burrs and create a clean, polished edge. It is important to take care not to over-sand the edges, as this can cause them to become too thin and brittle. Sanding the edges of the acrylic sheet is a crucial step in creating a high-quality LED light box that will look professional and last for years to come.
Step 2: Creating the Frame
Creating the frame is an essential step when making your LED light box, as it provides the structure that holds everything together. You can use a variety of materials to create the frame, such as wood, aluminum, or PVC pipes. However, the most popular choice is wood due to its durability and ease of use. To create the frame, measure the dimensions of your LED lights and cut the wood to the appropriate size using a saw. Then, assemble the pieces together using wood glue and nails, ensuring that the frame is sturdy and can hold the weight of the LED lights. When creating the frame, you can also add additional features such as hinges or legs to make it more versatile and easy to use. Hinges can be added to the sides of the frame to create a hinged lid that allows you to change the LED lights easily. Legs can be added to the bottom of the frame to make it freestanding, allowing you to place it on any surface without the need for additional support. Creating the frame is a crucial step in making your LED light box, as it provides the foundation for the rest of the project. By following the proper techniques and using quality materials, you can ensure that your frame is sturdy and long-lasting, providing you with a reliable LED light box for years to come.
After gathering all the necessary materials and tools, the first step to making your own LED light box is cutting the wooden pieces for the frame. It is important to choose a high-quality wood that is sturdy and durable, such as oak or maple. Using a saw, carefully measure and cut the pieces according to the dimensions of your desired frame size. Take extra care to ensure that the corners are precisely angled at 45 degrees, as this will ensure a seamless fit when the pieces are joined together. Sand down any rough edges to create a smooth surface, and wipe away any excess sawdust. With the wooden pieces for the frame now cut and prepared, you are one step closer to creating your very own LED light box.
Once you have cut and assembled the wooden pieces for your LED light box, it’s time to sand them. Sanding is a crucial step that helps to ensure the smoothness and uniformity of the final product. Using a sandpaper with a fine grit, start by sanding the rough edges and surfaces of the wooden pieces. Continue sanding until the surface feels smooth to the touch. Be sure to remove any dust or debris left behind from the sanding process before moving on to the next step. Remember, the better you sand the wooden pieces, the more professional and polished your LED light box will look. So take your time and use a steady hand to achieve the desired results.
Assembling the frame is a crucial step in building your own LED light box. Firstly, you need to gather all the necessary materials, including the aluminum frame, corner connectors, and screws. Once you have everything you need, start by attaching the corner connectors to the aluminum frame. Make sure to secure them tightly with screws, ensuring that the frame is sturdy and stable. Next, join the four corners of the aluminum frame, ensuring that everything is aligned correctly. Double-check your work to avoid any mistakes, and adjust the frame as necessary. Once you’ve completed the frame, you’ll be ready to move on to the next step in building your LED light box!
Step 3: Wiring the LED Strip
Step 3 of making your own LED light box involves wiring the LED strip. This is a crucial step, as it determines the brightness and functionality of your light box. First, you need to measure the length of the LED strip and cut it accordingly. Then, use a soldering iron to connect the wires to the LED strip. Make sure to connect the wires to the correct polarity, as LED strips only work in one direction. Once the wires are connected, you can test the LED strip to ensure that it is functioning properly. If everything is working correctly, you can proceed to the next step. It is important to note that wiring an LED strip requires some basic electrical knowledge, and if you are not comfortable working with electricity, it is best to seek professional help. Also, ensure that you have the correct tools and materials before starting this step. Wiring the LED strip properly can greatly enhance the visual appeal and functionality of your light box, and is well worth the effort.
When it comes to choosing the LED strip for your DIY light box, there are a few things to consider. First and foremost, make sure the strip is the appropriate length for your box dimensions. LED strips come in a variety of lengths, so measure your box carefully before making a purchase. Additionally, consider the color temperature and brightness of the LED lights. Some strips may emit a cooler or warmer light, and you’ll want to choose the one that best suits your needs. Finally, look for a strip that is easy to install and comes with an adhesive backing for simple attachment to your box. With these factors in mind, you’ll be able to find the perfect LED strip for your DIY project.
Measuring and cutting the LED strip to size is a crucial step in making your own LED light box. To begin with, you need to measure the length of the LED strip required to cover the entire perimeter of the box. Once you have determined the length, carefully cut the LED strip to size using a sharp pair of scissors or a wire cutter. Make sure to cut along the designated cut lines on the strip to avoid damaging the circuit. It is vital to measure and cut the LED strip accurately to ensure that it fits perfectly around the edges of the box, providing even illumination. A well-measured and cut LED strip ensures that your lightbox functions optimally and produces the desired level of brightness.
After attaching the LED strip to the acrylic sheet, the next step is to solder the strip to the power source. Before starting, it’s important to ensure that the power source is compatible with the LED strip. Once that’s confirmed, carefully strip the wires of the power source and the LED strip, and then twist them together. Next, apply heat to the joint using a soldering iron until the solder melts and the wires are securely connected. Be sure to avoid overheating the joint, as this can damage the LED strip. Once the joint has cooled, cover it with heat shrink tubing to insulate and protect it. With the LED strip now connected to the power source, the light box is almost complete!
Step 4: Attaching the Acrylic Sheet and LED Strip to the Frame
In step 4 of making your own LED light box, you will need to attach the acrylic sheet and LED strip to the frame. First, place the acrylic sheet on top of the frame and ensure it is centered. Then, use a drill to make small holes through the acrylic sheet and into the frame. Be careful not to apply too much pressure as the acrylic sheet is fragile and can crack easily. Next, use screws to attach the acrylic sheet to the frame. Make sure the screws are not too long as they can damage the acrylic sheet. Once the acrylic sheet is securely attached to the frame, it’s time to attach the LED strip. Peel off the adhesive backing of the LED strip and carefully place it along the inside of the frame. Make sure the LED strip is evenly spaced and follows the perimeter of the frame. Then, connect the LED strip to the power source and test it to make sure it’s working properly. If everything looks good, you can now enjoy your very own LED light box! This is a fun and creative way to add some unique lighting to any room or space.
After assembling the frame of the LED light box, the next step is to apply adhesive to the joints for added stability. The adhesive should be evenly spread over the joints using a brush or applicator, taking care not to apply too much to avoid dripping or excess glue. A good quality adhesive such as epoxy or wood glue is recommended, as these provide a strong hold and withstand the weight of the LED lights. Once applied, the adhesive should be left to dry completely before moving on to the next step. This ensures a secure and durable frame, which is critical for the overall functionality and longevity of the LED light box.
Once all the LED strips are securely attached to the frame, it’s time to place the acrylic sheet on top. Carefully place the sheet onto the frame, making sure it’s aligned and centered. If the sheet is larger than the frame, use a ruler or a straight edge to trim it down to size. Be sure to remove any protective film covering the sheet before placing it, as this can affect the brightness and clarity of the light box. Once the sheet is in place, apply gentle pressure to ensure it’s securely attached to the frame. A well-placed and well-fitted acrylic sheet will provide a smooth and even surface for the light to illuminate, resulting in a stunning and professional-looking LED light box.
Attaching the LED strip to the back of the acrylic sheet requires careful handling and precision to ensure that the light box glows evenly. Before attaching the strip, make sure that the acrylic sheet is free from any dust or debris that may affect the adhesion of the LED strip. To attach the strip, start at one end of the acrylic sheet and carefully peel off the backing of the adhesive tape on the back of the LED strip. Then, press the strip firmly onto the acrylic sheet, making sure that it is aligned correctly. Continue attaching the strip until you reach the other end of the acrylic sheet. For best results, use a ruler or a straight edge to ensure that the LED strip is attached in a straight line. With the LED strip securely attached, the light box is now ready for the final step of wiring the circuit.
Step 5: Finishing Touches
Step 5 of making your own LED light box is where you can add your own unique touch to the project. This is where you can get creative with the finishing touches to make your light box stand out. One option is to add some decorative tape around the edges of the box to give it a professional and polished look. Another option is to paint the box to match the decor of the room it will be displayed in. You could even add stencils or decals to the outside of the box to make it more personalized. Once you’ve added the finishing touches to your LED light box, it’s time to turn it on and enjoy the beautiful glow it emits. This DIY project is perfect for anyone who wants to add a unique and stylish accessory to their home or office. With just a few easy steps, you can create a custom-made light box that will impress everyone who sees it. Plus, it’s a great way to save money while still enjoying the benefits of having a high-quality LED light source. So why not give it a try and see what kind of creative masterpiece you can come up with!
One of the crucial steps in making your own LED light box is covering the back of the box with a white sheet or paper. This simple yet effective step helps to diffuse the light evenly throughout the box, preventing any harsh shadows or hotspots. By using a white background, the light will also reflect back into the box, maximizing the brightness and clarity of your images. This step is particularly important for those using the light box for photography or artwork, as it ensures that the colors are accurately represented and the details are clearly visible. Overall, taking the time to cover the back of your light box with a white sheet or paper is a small but significant step towards creating a high-quality and professional-looking light box.
Once you have successfully assembled the LED light box, you may want to add a switch to control the light source. This will allow you to turn the light on and off as needed, conserving energy and prolonging the lifespan of the LEDs. Adding a switch is a simple process that requires only a few basic tools and components, such as a switch, wires, and a soldering iron. First, determine where you want to install the switch on the box and drill a small hole to accommodate it. Then, connect the switch to the wires leading to the LEDs, ensuring that the polarity is correct. Finally, test the switch to make sure it is functioning properly, and enjoy the convenience and control it provides.
Decorating the frame of your DIY LED light box is an optional but fun step that can add a personal touch to your creation. You can use decorative tape, stickers, or paint to embellish the frame’s surface. Consider using metallic or glittery tape to give your light box a glamorous look, or use patterned tape or stickers to create a more playful, whimsical vibe. If you prefer a more understated look, you can paint the frame a solid color or use a wood stain to bring out the natural grain. Whatever decorating method you choose, be sure to let the frame dry completely before inserting the LED lights and acrylic sheet.
Making your own LED light box is a fun and creative project that can be completed in just five easy steps. First, gather your materials, including a wooden frame, LED light strips, and a diffuser panel. Next, assemble the frame and attach the LED strips, ensuring that they are evenly spaced and facing the right direction. Then, connect the LED strips to a power source and test that they are working properly. After that, attach the diffuser panel to the front of the frame, which will help to evenly distribute the light. Finally, turn on your LED light box and enjoy the beautiful and vibrant glow that it emits, perfect for photography or artwork. With a little bit of patience and creativity, you can easily create your own LED light box and add a touch of brightness to any space.
Making your own LED light box is not only an easy and fun DIY project, but it can also be a great way to enhance your creativity skills. With just a few simple materials and a little bit of patience, you can create a personalized light box that can be used for various purposes, such as drawing, tracing, or even displaying artwork. Not only will it provide you with a unique and customized tool, but it can also save you money compared to purchasing an expensive pre-made light box. So, don’t hesitate to give it a try and see how your creativity can shine with your very own LED light box.
Before you begin your DIY LED light box project, it’s important to gather all the necessary materials, including acrylic sheets, LED strips, and a power supply. It’s also crucial to carefully measure and cut the acrylic sheets to ensure a perfect fit. As you assemble the light box, pay close attention to the wiring and make sure everything is connected properly before testing it out. Additionally, consider adding a dimmer switch or color-changing LEDs for added versatility. Once your light box is complete, experiment with different lighting techniques to achieve the desired effect. With a little patience and creativity, you’ll have a beautiful and functional LED light box that you can proudly display in your home or office.
Conclusion
In conclusion, creating your own LED light box is not only a fun DIY project, but it can also be an excellent way to elevate your photography or artwork. By following these five easy steps, you can produce a professional-looking light box that will showcase your work in the best possible light. With just a few materials and some basic tools, you can bring your creative vision to life and enjoy the benefits of a customized LED light box. So why not give it a try and see what amazing results you can achieve?


