Flickering LED Light DIY: A StepbyStep Guide to Create Your Own
Flickering LED lights have become increasingly popular in recent times. These lights have a unique charm and can add a cozy and warm ambiance to any space. However, buying flickering LED lights can be quite expensive, and it can be challenging to find the perfect style that matches your preferences. The good news is that you can create your flickering LED lights with a few simple steps, and this guide will show you how. This DIY guide will take you through the necessary steps, from gathering the materials to assembling the parts and testing your flickering LED light. You don’t need to be an expert in electronics or have prior experience with DIY projects to complete this task. With some patience and attention to detail, you can create a stunning flickering LED light that will add a touch of warmth and coziness to your living space. So, roll up your sleeves, and let’s get started with this fun and exciting project!
A flickering LED light can be a frustrating and distracting problem. It occurs when the light rapidly turns on and off, creating a strobe-like effect. This can be caused by a variety of factors, including a faulty LED driver, voltage fluctuations, or issues with the electrical wiring. In some cases, the flickering may be barely noticeable, while in others it can be so pronounced that it causes headaches and eye strain. Fortunately, with a few simple steps, you can easily troubleshoot and fix a flickering LED light, allowing you to enjoy a steady and reliable source of illumination.
Creating a DIY flickering LED light is a fun and rewarding activity that can be enjoyed by anyone, regardless of their level of expertise in electronics. This type of light is particularly useful for creating a cozy and relaxing atmosphere in a room or setting the mood for a party or gathering. It can also be used in creative projects such as film-making or photography to add unique visual effects. With the increasing popularity of DIY projects, creating a flickering LED light is a great way to express creativity and learn new skills. Additionally, building your own light can be cost-effective and environmentally friendly, as it allows you to repurpose materials and avoid purchasing new products. Overall, creating a DIY flickering LED light is a fun and useful activity that can be enjoyed by anyone, while also having practical uses in various settings.
This step-by-step guide aims to provide a comprehensive breakdown of the process involved in creating your very own flickering LED light. The guide is designed to be accessible to both beginners and seasoned DIY enthusiasts alike, with easy-to-follow instructions and a list of necessary materials. The guide starts with an introduction to the project and a list of required tools and materials, before moving on to the construction process itself. Each step of the process is clearly outlined and accompanied by photographs and diagrams to help you visualize the process. By the end of this guide, you’ll have created your very own flickering LED light that can be used as a night light, decoration, or as part of a larger DIY project.
Materials Required

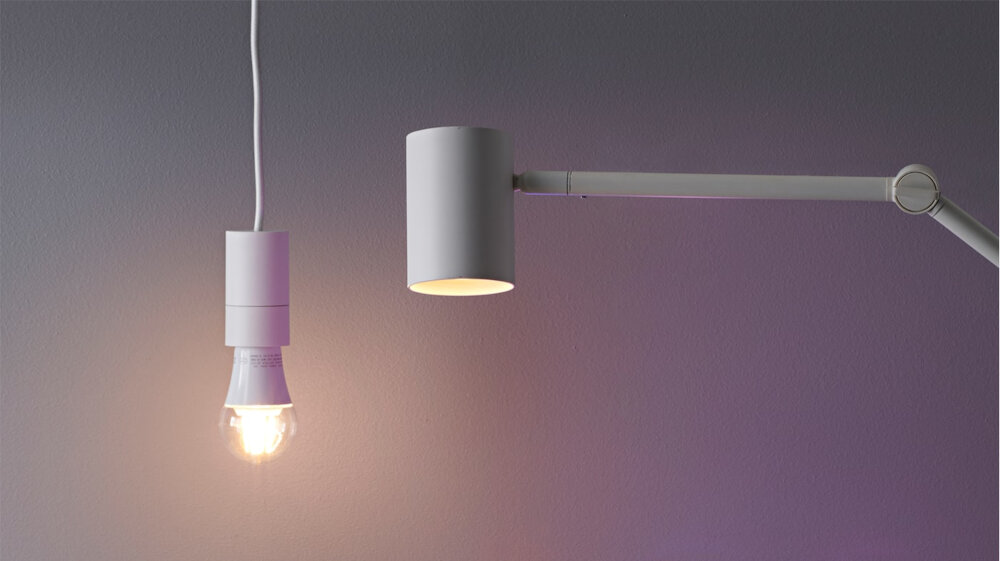
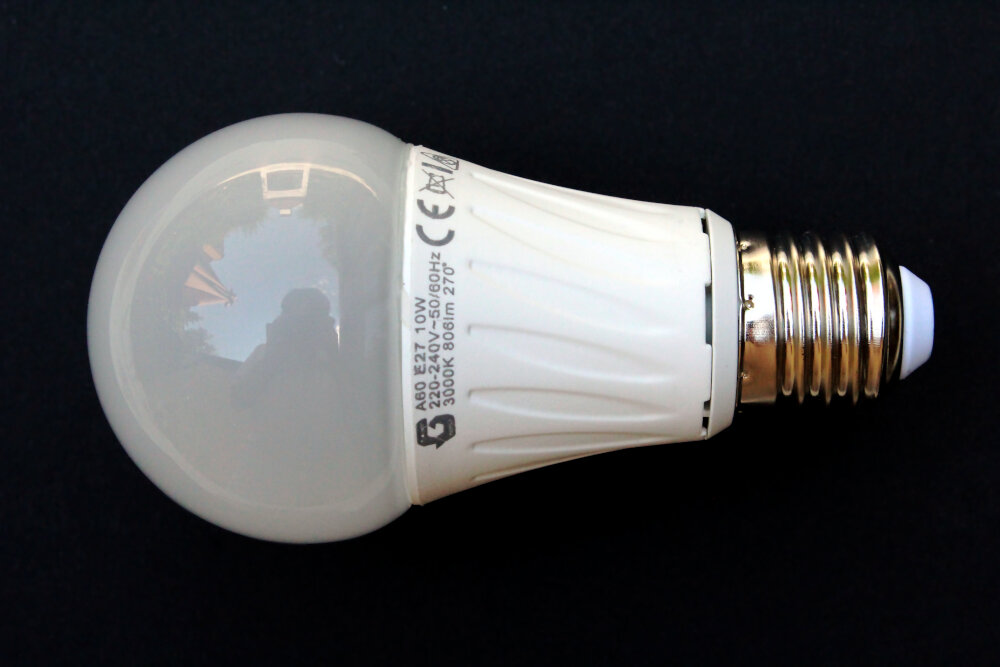
Flickering LED Light DIY is an exciting project that requires some materials to complete. To begin with, you will need a breadboard, a microcontroller, and some jumper wires. The breadboard serves as a platform for connecting electronic components and is an essential item for this DIY project. The microcontroller is the brain of the project and plays a critical role in controlling the flickering LED light. Jumper wires, on the other hand, are used to connect the different components together, and they come in various sizes and colors. In addition to the above materials, you will also need an LED, a resistor, and a USB cable. LEDs are the centerpiece of this project, and the flickering lights they produce are eye-catching and mesmerizing. A resistor is required to regulate the amount of electricity flowing through the LED and prevent it from burning out. Lastly, a USB cable is needed to connect the microcontroller to a computer for programming. You can also use a battery instead of a USB cable, but a cable is more convenient and easier to use. With all these materials in place, you are ready to start your DIY Flickering LED Light project.
To create a flickering LED light, there are several materials one needs to gather. A breadboard, a 555 timer IC, a potentiometer, a capacitor, resistors, an LED, and wires are essential components. Additionally, a battery or power supply, a soldering iron, and soldering wire are required. These materials can be found at electronics stores or online retailers. It is crucial to ensure that the materials are of high quality to ensure the light’s stability and longevity. With these materials, one can create a flickering LED light that can be used for various purposes, such as decoration or mood lighting.
When creating a flickering LED light, it is important to understand the function of each material used. The LED light itself is the star of the show, producing the flickering effect that makes the project so unique. Resistors are also necessary to regulate the voltage and prevent the LED from burning out too quickly. Capacitors store and release electrical energy, which helps to create the flickering effect. The transistor is used to amplify the current and control the flow of electricity, while the diode allows current to flow in one direction. Finally, the breadboard is used to connect all of the components together in a safe and organized manner. By understanding the role of each material, you can create a flickering LED light that is both functional and visually appealing.
StepbyStep Guide

Flickering LED Light DIY A Step-by-Step Guide to Create Your Own is an informative article for those who love to experiment with electronics. The article provides a detailed and easy-to-follow guide for creating your own flickering LED light. The article starts with a brief introduction about the flickering LED light and its uses. It then moves on to the step-by-step guide, which includes a list of required materials and tools, along with instructions on how to assemble the circuit. The guide is well-written and easy to understand, making it an ideal read for beginners and experts alike. The article does an excellent job of breaking down the process into simple steps, making it easy to follow along. The guide is also accompanied by clear and concise diagrams that help readers understand the circuitry and wiring. The author also provides useful tips and tricks throughout the guide, which can be helpful for those who are new to electronics. Overall, the Flickering LED Light DIY A Step-by-Step Guide to Create Your Own is an informative and well-written article that provides readers with everything they need to know to create their own flickering LED light. Whether you’re a beginner or an expert, this guide is sure to be a valuable resource for anyone interested in electronics.
Creating your own flickering LED light is an exciting and rewarding DIY project that can be completed in a few simple steps. First, gather the necessary materials which include an LED, a resistor, a capacitor, and a breadboard. Next, connect the resistor and capacitor to the breadboard and attach the LED to the same breadboard. The flickering effect can be achieved by adding a potentiometer to control the timing of the capacitor’s discharge. By adjusting the potentiometer, the flickering effect can be customized to your desired frequency. With these easy-to-follow steps, you can create a unique and personalized flickering LED light that is sure to impress.
Step 1: Gather the MaterialsTo create a flickering LED light, you will need a few materials, including an LED light, a resistor, a breadboard, and wires. Make sure you have all the necessary equipment before starting the project. You can purchase these materials from an electronics store or online. Step 2: Connect the LED Light to the BreadboardThe next step is to connect the LED light to the breadboard. Place the LED light on the breadboard and connect it using the wires. Ensure that the positive and negative terminals of the LED light are connected correctly. You can check the polarity of the LED light by checking the long leg and short leg of the LED light. Step 3: Connect the Resistor to the BreadboardAfter connecting the LED light to the breadboard, it’s time to connect the resistor to the breadboard. The resistor will limit the current flowing to the LED light, preventing it from burning out. Connect one end of the resistor to the positive rail of the breadboard and the other end to the same row as the positive leg of the LED light. Step 4: Add a PotentiometerTo control the flickering effect of the LED light, you will need to add a potentiometer. Connect the potentiometer to the breadboard and adjust the resistance to control the brightness of the LED light. The potentiometer will also control the speed of the flickering effect. Step 5: Test the CircuitAfter completing the circuit, it’s time to test it. Turn on the power supply and ensure that the LED light is flickering. If the LED light is not flickering, check the wiring and connections. You can also adjust the potentiometer to control the flickering effect. Step 6: Customize the CircuitOnce you have tested the circuit, you can customize it to your liking. You can change the color of the LED light or add more LED lights to the circuit. You can also experiment with different resistors and potentiometers to create different flickering effects. Be creative and have fun!
Adding images or videos to accompany each step of the flickering LED light DIY is highly recommended to make the process more understandable and engaging for the readers. With a visual guide, readers can easily follow along and have a better understanding of the steps involved. Furthermore, images or videos can provide a clearer depiction of the materials, tools, and techniques used, making it easier for readers to replicate the process. These visuals can also serve as a source of inspiration for readers, as they can see how the flickering LED light is taking shape and what the end result will look like. Overall, incorporating images or videos into the DIY guide can enhance the reader’s experience and make the process more enjoyable.
Tips and Tricks

When it comes to creating your own DIY LED light, there are several tips and tricks that can help you achieve the best results. Firstly, it is important to choose the right type of LED. There are various types of LEDs available, each with different specifications and requirements. It is important to choose an LED that is compatible with the power source and voltage you are using, as well as one that produces the desired brightness and color temperature. Additionally, it is important to properly solder the LED to ensure a secure connection and prevent any flickering or malfunctioning. Another tip for creating a successful DIY LED light is to use the right materials and tools. This includes using high-quality resistors, capacitors, and other electrical components, as well as the right type of solder and soldering iron. It is also important to use a suitable heat sink to prevent overheating and prolong the lifespan of the LED. Additionally, it is important to follow a step-by-step guide or tutorial, as creating a DIY LED light can be a complex process that requires attention to detail and precision. By following these tips and tricks, you can create a high-quality, flicker-free LED light that meets your specific needs and preferences.
In addition to the step-by-step guide provided earlier, there are some additional tips and tricks that can make the process of creating a flickering LED light easier. Firstly, it is essential to have a clear idea of the kind of flickering effect that you want to create. This will help you select the right components and ensure that your project turns out as expected. Secondly, it is a good idea to invest in high-quality components, such as resistors and capacitors, to ensure that your LED light functions optimally. Finally, take your time when assembling your circuit, and be sure to double-check your connections before powering on your LED light. By following these additional tips and tricks, you can create a flickering LED light that is both functional and visually appealing.
Modifications or customizations can be made to the flickering LED light to enhance its appearance and functionality. One suggestion is to add a dimmer switch to control the brightness of the LED light. This modification will allow you to create different moods and ambiance in your room. Additionally, you can use different colored LEDs to create a unique and personalized effect. You can also experiment with different shapes and sizes of the LED lights. For example, you can use smaller or larger LED bulbs to create a different effect. Finally, you can use different materials for the base or casing of the LED light, such as wood or metal, to create a more rustic or industrial look. With these modifications, you can create a flickering LED light that is truly one-of-a-kind.
Creating a DIY flickering LED light is an excellent way to add ambiance and character to any space. Not only is it a fun and creative project, but it also provides a unique and personalized lighting solution. The flickering effect of the LED light creates a warm and inviting atmosphere that can be adjusted to suit your specific needs. Additionally, building your own flickering LED light is a cost-effective alternative to purchasing pre-made lighting fixtures. With just a few simple steps and some basic materials, you can create a beautiful and functional light that will enhance the aesthetic of any room in your home. So, whether you’re looking to add some mood lighting to your bedroom or want to create a cozy atmosphere in your living room, a DIY flickering LED light is the perfect solution.
This step-by-step guide provides a comprehensive overview of how to create a flickering LED light. Starting with the necessary materials, the guide walks the reader through the process of setting up the circuitry and programming the microcontroller to control the LED’s behavior. The guide includes detailed explanations and diagrams to make the process easy to follow. Additionally, it offers troubleshooting tips and suggestions for customizing the LED light’s flicker pattern. Whether you’re a seasoned DIYer or a beginner, this guide will help you create a unique and captivating LED light that is sure to impress.
In conclusion, creating your own flickering LED light is a fun and rewarding DIY project that anyone can do. Not only does it allow you to customize the light to your preference, but it also provides a sense of accomplishment when you see the finished product. Don’t be intimidated by the technical aspects, as the step-by-step guide breaks it down in a simple and understandable way. So, why not give it a try and see what you can create? Whether you’re an experienced DIYer or a beginner, this project is sure to spark your creativity and brighten up your space. Happy crafting!
Conclusion
In conclusion, creating your own flickering LED light is an exciting and rewarding DIY project that anyone can undertake with a little bit of patience and effort. The step-by-step guide provided in this article will help you to create a beautiful and unique lighting fixture that adds a touch of ambiance to any room in your home. With the right tools, materials, and a little bit of creativity, you can bring your vision to life and enjoy the warm and inviting glow of your very own flickering LED light. So why wait? Get started on your DIY project today and experience the satisfaction of creating something truly special with your own two hands.