Effortlessly Remove Recessed LED Lights with These Simple Steps
Recessed LED lights have become a popular lighting option in modern homes due to their energy efficiency and sleek design. However, when it comes to replacing or removing them, it can be a challenging task. Whether you are replacing your old recessed LED lights or simply removing them to make some changes in your home’s lighting system, you need to know the right steps to take. With the right tools and techniques, removing recessed LED lights can be a straightforward process that you can do yourself without hiring a professional. In this article, we will guide you through the process of removing recessed LED lights using simple steps that anyone can follow. We will cover the tools you will need, the safety precautions you should take, and the step-by-step process involved in removing recessed LED lights. By the end of this article, you should be able to remove your recessed LED lights effortlessly and safely without damaging your ceiling or electrical connections. So, let’s dive in and learn how to remove recessed LED lights with ease.
Recessed LED lights are a type of lighting fixture that is installed into a ceiling or wall, creating a seamless and sleek appearance. They are energy-efficient, long-lasting, and come in a variety of styles and colors to fit any decor. However, there are times when these lights may need to be removed, such as when they are damaged, outdated, or need to be replaced with a different type of light fixture. Removing recessed LED lights can be a daunting task, but with the right tools and techniques, it can be done effortlessly and without causing damage to your ceiling or walls.
Turn off the Power
Turning off the power is a crucial step before removing recessed LED lights. This step ensures that the wires are not live, reducing the risk of electrocution. To turn off the power, locate the circuit breaker that controls the lights and flip the switch to the off position. Alternatively, you can use a non-contact voltage tester to confirm that the wires are not live. This tool detects the presence of electricity without making contact with the wires. Once you have confirmed that the power is off, you can proceed with removing the lights safely. It is essential to turn off the power before removing recessed LED lights to avoid any accidents. Failure to turn off the power can result in electrocution or damage to the fixture. Additionally, turning off the power prevents damage to the wiring, which can cause power surges or short circuits. Taking this step ensures that the process is safe and straightforward, allowing you to remove the lights without any concerns. Remember to double-check that the power is off before touching any wires or fixtures.
It is crucial to turn off the power before attempting to remove recessed LED lights to avoid the risk of electric shock or electrocution. Removing these lights without turning off the power can lead to serious accidents, causing severe injuries or even death. Additionally, turning off the power ensures that you don’t damage the electrical components of the fixture or the wiring. Taking the necessary safety measures not only prevents accidents but also ensures that the removal process goes smoothly and without any complications. Therefore, it is essential to take the necessary precautions before attempting to remove recessed LED lights to avoid any potential hazards.
Before attempting to remove recessed LED lights, it’s essential to turn off the power as a safety measure. Firstly, locate the circuit breaker or fuse box and identify the switch or fuse controlling the power to the room where the light is located. Switch off the circuit breaker or remove the fuse to ensure the power is off. If you’re unsure which switch or fuse controls the power, turn off the main power switch. It’s also important to wait a few minutes to allow the electricity to dissipate before proceeding with the light removal process. Remember to use caution and wear protective gear when working with electricity to prevent any accidents.
Remove the Trim

Removing the trim of recessed LED lights is an essential step in the process of replacing or installing new LED lights. To begin, turn off the power supply to the lighting fixture. This is crucial to avoid any electrical shock. Once the power is off, you can proceed with removing the trim. The trim is usually held in place by springs or clips. Gently pull or twist the trim until it detaches from the housing. You can use a flathead screwdriver to help release the clips. If you encounter any difficulty, don’t force it. Instead, check the manufacturer’s instructions for specific directions on removing the trim. After removing the trim, inspect the housing for any damage or debris. Clean the housing thoroughly before installing the new LED light. Additionally, check if the housing is compatible with the new LED light you are installing. It is recommended to replace the entire fixture if the housing is damaged or incompatible. Finally, carefully install the new LED light, following the manufacturer’s instructions. Remember to turn the power back on only after the installation is complete. By following these simple steps, you can effortlessly remove recessed LED lights and install new ones with ease.
The trim is an essential component of recessed LED lights that helps to secure and hold the fixture in place. It is a decorative element that covers the gap between the light fixture and the ceiling, giving it a clean and polished look. To remove the recessed LED light, the trim must be taken out first. This is because the trim is attached to the fixture with clips or screws, which hold it firmly in place. Removing the trim will give you access to the fixture and allow you to disconnect it from the wiring. It is important to remove the trim carefully to avoid damaging it and to ensure that it can be easily reattached once the fixture is replaced.
If you want to remove the trim safely, first turn off the power supply to the lights. Then, use a screwdriver or a pry bar to gently loosen the trim from the ceiling. Be careful not to damage the surrounding drywall or plaster. Once the trim is loose, pull it down gently and disconnect any wiring that may still be attached. If there are any clips or screws holding the trim in place, remove them carefully. It is important to take your time and be gentle when removing the trim to prevent any damage to the ceiling or the fixtures themselves.
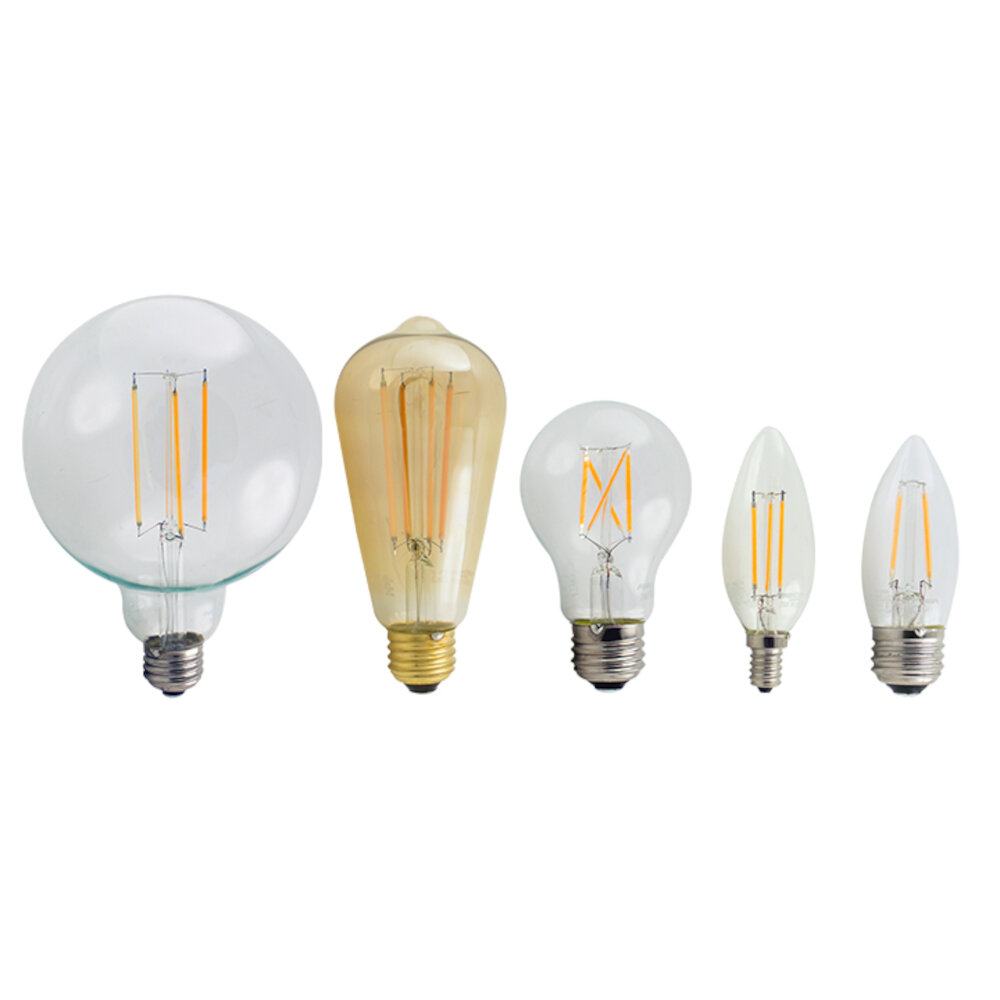
Remove the Light Bulb
Removing recessed LED lights can be a daunting task, especially when it comes to removing the light bulb. However, with the right tools and steps, this can be done effortlessly. The first step when removing the light bulb is to ensure that the power supply is turned off. This can be done by switching off the switch or turning off the circuit breaker. This is important to avoid electrocution or any accidents that may occur during the process. Once the power supply is turned off, the next step is to locate the light bulb. This can be done by removing the trim or the cover. Carefully twist the cover or trim anticlockwise to release it from the housing. Once the cover is removed, the light bulb should be visible. Gently grip the light bulb and turn it anticlockwise to release it from the socket. If the light bulb does not come out easily, try wiggling it back and forth while pulling it out. With these simple steps, removing the light bulb from recessed LED lights can be done effortlessly.
Before attempting to remove a recessed LED light fixture, it is important to first remove the light bulb. This is because the light bulb is typically screwed into the fixture and serves as an obstruction that prevents the fixture from being easily removed. Attempting to remove the fixture without first removing the light bulb can cause damage to both the fixture and the bulb, and may even result in injury. Once the light bulb has been removed, the fixture can be safely and easily removed by following a few simple steps.
Removing a recessed LED light bulb can seem like a daunting task, but with the right steps, it can be done easily and safely. Start by turning off the power to the light fixture to avoid any electrical accidents. Next, use a ladder to reach the light bulb and wear gloves to protect your hands. Locate the two small springs on either side of the bulb and gently push them towards the center. This will release the bulb, allowing you to pull it down and out of the fixture. If the bulb is difficult to remove, try twisting it slightly while pulling it down. Once the bulb is out, dispose of it properly and install a new one using the same steps in reverse. By following these simple steps, you can effortlessly remove recessed LED lights and keep your home well-lit and safe.
Remove the Fixture
Removing fixtures, especially those that are mounted on the ceiling, can be a daunting task. It requires careful planning and execution to avoid damaging the surrounding area. One of the most common fixtures that homeowners encounter is recessed LED lights. These lights are typically installed in the ceiling and require special tools to remove. However, with the right knowledge and tools, removing recessed LED lights can be a simple and effortless task. To remove recessed LED lights, start by turning off the power to the fixture. This can be done by flipping the circuit breaker that controls the light or by turning off the switch that controls the light. Once the power is off, remove the bulb from the fixture. Next, locate the clips or springs that hold the fixture in place. Use a screwdriver or pliers to release the clips or springs and gently lower the fixture out of the ceiling. Be sure to support the fixture with your other hand to prevent it from falling and causing damage. Once the fixture is removed, you can disconnect the wiring and remove the mounting bracket from the ceiling. With these simple steps, you can effortlessly remove recessed LED lights and replace them with new fixtures or bulbs.
Once you’ve removed the trim and light bulb from your recessed LED light fixture, it’s time to take out the fixture itself. Start by carefully pulling down on the metal housing of the fixture, taking care not to damage any wires or insulation. You may need to use a screwdriver to help loosen any screws or clips holding the fixture in place. Once the fixture is loose, gently pull it down and out of the ceiling. Be sure to disconnect any electrical connections before completely removing the fixture. With these simple steps, you can effortlessly remove your recessed LED lights and move on to your next lighting project.
Removing a recessed LED light fixture can seem intimidating at first, but with the right tools and steps, it can be done safely and easily. Before starting, make sure that the power to the fixture is turned off, and wear appropriate safety gear such as gloves and eyewear. First, remove the trim of the fixture by gently pulling it down, making sure not to damage the ceiling or surrounding area. Next, locate the metal clips that hold the fixture in place and gently push them towards the center of the fixture until they release. Once the clips are released, gently pull the fixture down from the ceiling, being careful not to twist or pull the wires. Finally, disconnect the wires from the fixture and remove it completely. With these simple steps, you can effortlessly remove a recessed LED light fixture and safely move on to your next project.
If you’re looking for an easy way to remove recessed LED lights, the following steps can help. First, turn off the power supply to the light. Then, locate the springs that hold the light fixture in place and gently pull them down. Once the springs are free, carefully pull the fixture out of the ceiling. If there are any wires connected to the light, disconnect them before fully removing the fixture. To replace the light, simply reverse the steps and make sure the wires are properly connected before turning the power back on. With these simple steps, removing and replacing recessed LED lights can be a breeze.
It is essential to prioritize safety when removing recessed LED lights. Before starting, make sure to turn off the power supply to the fixture. Wear safety goggles to protect your eyes from any debris that may fall during the removal process. Use a ladder or step stool that is sturdy and placed on a flat surface to reach the light fixture. Avoid using metal tools that may damage the fixture or cause an electrical shock. Instead, use plastic tools or your hands to gently remove the trim and the light bulb. If the bulb is stuck, try using a suction cup or a rubber jar opener to loosen it. Lastly, dispose of the bulb and fixture properly according to your local regulations.
Conclusion

In conclusion, removing recessed LED lights may seem like a daunting task, but with the right tools and knowledge, it can be effortlessly done in a matter of minutes. By following the simple steps outlined in this guide, you can safely and quickly remove your recessed LED lights without causing any damage to your ceiling or fixtures. Remember to always turn off the power supply, use the proper tools, and handle the lights with care. With the right approach, you can easily replace your old or malfunctioning lights with new ones, and enjoy a brighter and more energy-efficient home.