CuttingEdge Guide: Where to Cut LED Light Strip for Perfect Fit
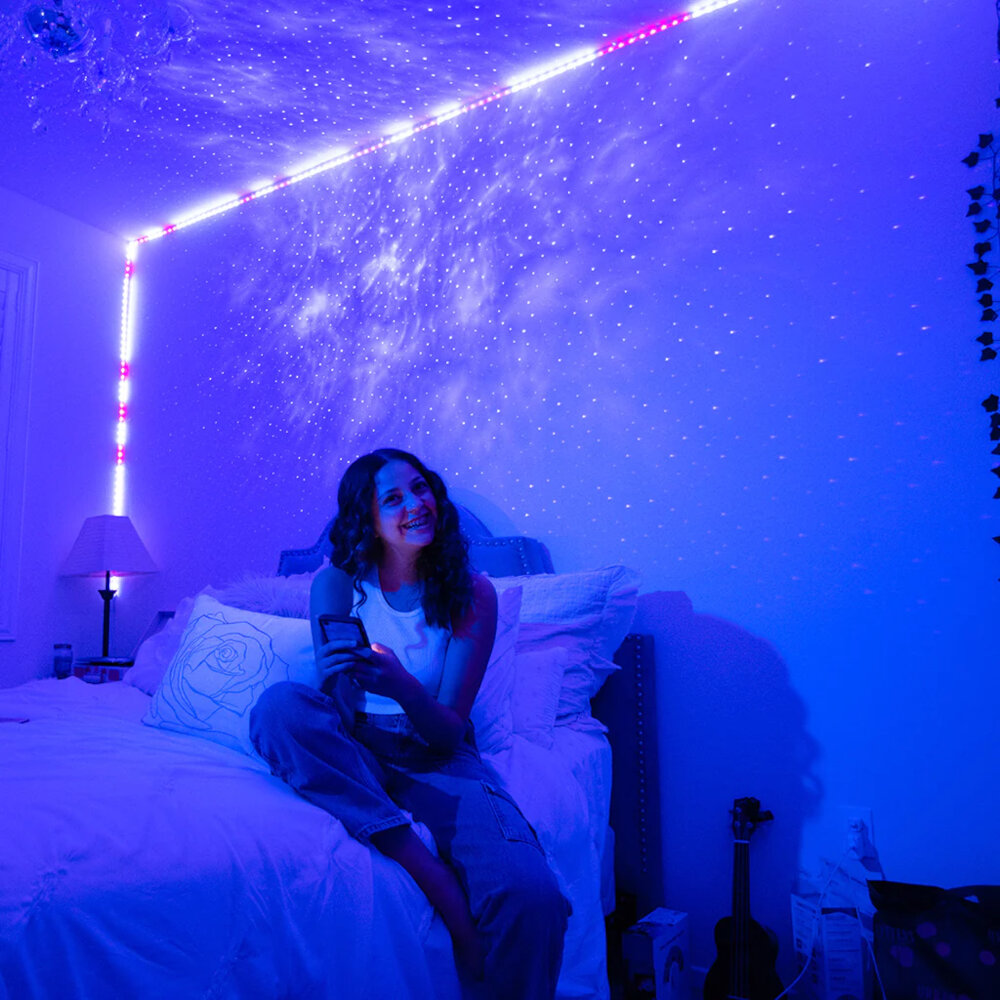
LED light strips are an excellent and cost-effective way to add ambiance and illumination to any room or space. They come in a variety of colors and lengths, making them ideal for accent lighting or task lighting. However, cutting LED light strips to fit a specific area can be a daunting task, especially if you’re not familiar with electrical wiring or DIY projects. That’s why we’ve put together this cutting-edge guide to help you cut LED light strips for a perfect fit. Whether you’re looking to install LED light strips in your kitchen, living room, or bedroom, this guide will provide you with step-by-step instructions on how to cut and connect LED light strips. We’ll cover everything from measuring the length of your LED light strip to choosing the right tools for the job. With our expert tips and tricks, you’ll be able to create a stunning lighting display that will transform any room into a cozy and inviting space. So, let’s get started on this exciting DIY project!
LED light strips are a type of lighting technology that has revolutionized the way we light up our homes, offices, and even our cars. These strips consist of a series of tiny light-emitting diodes (LEDs) mounted on a flexible circuit board. LED lights are known for their energy efficiency, long life, and versatility. They are also highly customizable, allowing users to choose from a wide range of colors, brightness levels, and patterns. LED light strips are easy to install and can be cut to fit almost any surface. This makes them an ideal choice for creating unique lighting effects in a variety of applications. Whether you want to add some ambiance to your living room, highlight a display case, or light up your car’s interior, LED light strips offer a flexible and cost-effective solution.
The purpose of this cutting-edge guide is to provide clear and concise instructions on where to cut LED light strips for a perfect fit. LED light strips are versatile and can be used in a variety of settings, but it can be difficult to know exactly where to cut them to fit a particular space. This guide aims to eliminate any confusion and provide step-by-step guidance on how to cut LED light strips to the correct length. By following the instructions in this guide, users can achieve a flawless and professional-looking installation that enhances the ambiance of any room or setting.
Understanding LED Light Strips
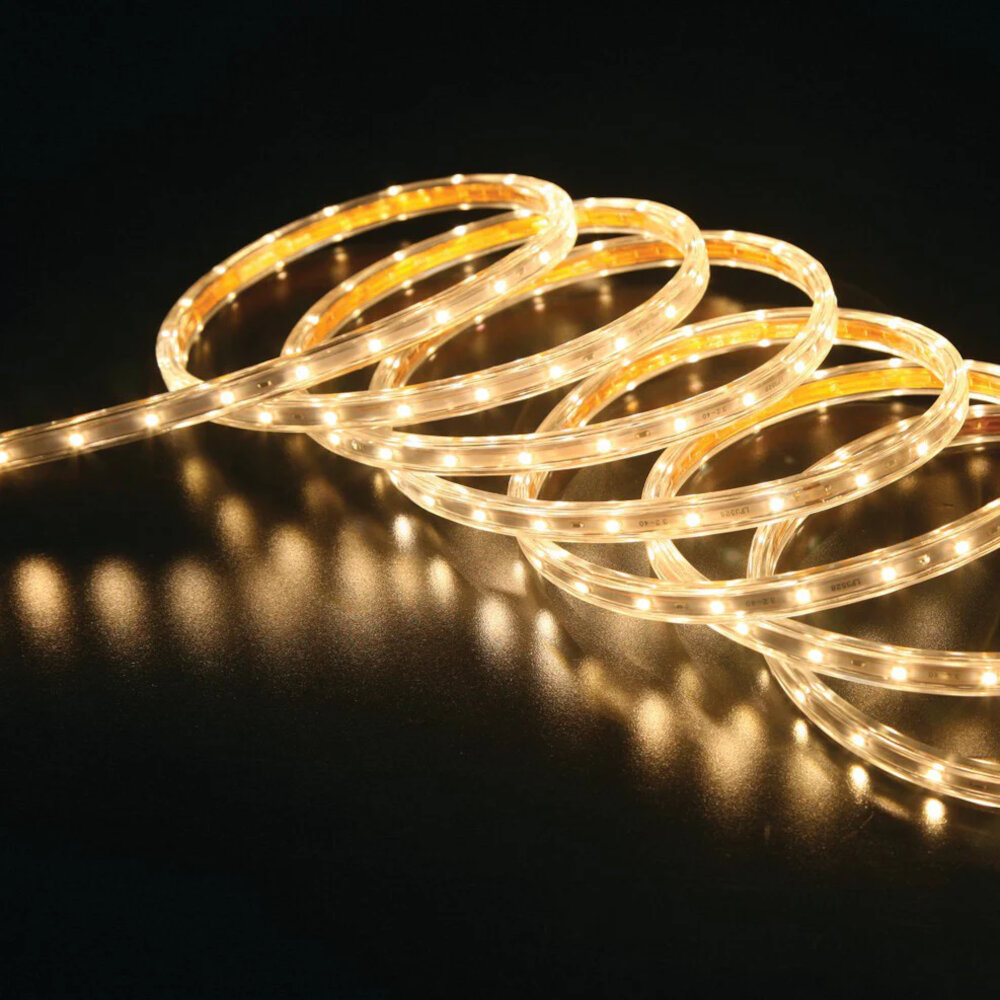
LED light strips are a popular lighting option that can be used to create a variety of lighting effects in any space. These strips are made up of small LED bulbs that are mounted onto a flexible circuit board. LED light strips are available in a range of colors and brightness levels, making them a versatile lighting solution that can be used in a variety of applications. They are easy to install and can be cut to fit any space, making them an ideal option for DIY projects. When it comes to cutting LED light strips, it’s important to understand how they work. Each LED light strip is made up of several segments, and each segment contains a certain number of LEDs. The segments are marked with cutting lines, which indicate where the strip can be cut without damaging the circuit. It’s important to cut the strip along these lines to ensure that it continues to function properly. Once the strip has been cut, it can be reconnected using solder or connectors. It’s important to follow the manufacturer’s instructions when cutting and reconnecting LED light strips to ensure that they work properly and safely.
When it comes to LED light strips, there are several types available in the market, each with its unique features and applications. The most common types include single-color, multicolor, and RGB LED light strips. Single-color LED light strips produce a fixed color, usually white or yellow, and are ideal for ambient lighting. Multicolor LED light strips, on the other hand, can produce a wide range of colors, allowing for more creative applications such as accent lighting or mood lighting. RGB LED light strips are the most versatile, capable of producing any color in the visible spectrum using red, green, and blue diodes. They are perfect for adding vibrant colors to any space or creating dynamic lighting effects. It’s important to choose the right type of LED light strip based on your specific needs and preferences to achieve the desired lighting effect.
LED light strips are a popular lighting option for home and commercial spaces due to their flexibility, energy efficiency, and long lifespan. These strips consist of several components that work together to produce light. The LED chips are the most important component and are responsible for emitting the light. The circuit board controls the flow of electricity to the chips, while the adhesive backing allows the strip to be attached to various surfaces. The protective coating, such as silicone or epoxy, shields the strip from damage and weather conditions. Finally, the connectors enable the strips to be linked together or to a power source. Understanding the components of LED light strips is essential to ensure a perfect fit when cutting the strips to the desired length.
LED light strips use light-emitting diodes (LEDs) to produce light. LEDs are semiconductor devices that convert electrical energy into light. The LED light strip consists of a flexible circuit board with a series of LEDs placed at regular intervals. The circuit board is coated with a layer of phosphor, which helps to convert the blue light emitted by the LEDs into a broader spectrum of light. The LED light strip is powered by a driver that converts the AC current from the mains supply into a DC current that can be used by the LEDs. The driver also regulates the current and voltage to ensure that the LEDs operate within their optimal range. The LED light strip can be cut to size and connected using special connectors, making it a versatile and easy-to-install lighting solution for a variety of applications.
Choosing the Right LED Light Strip
When it comes to choosing the right LED light strip, there are a few key factors to consider. The first is the brightness of the strip. Brightness is measured in lumens, and you’ll want to choose a strip that is bright enough for your needs. If you’re using the strip for accent lighting, you may not need a very bright strip. However, if you’re using it for task lighting, you’ll want something brighter. Additionally, consider the color temperature of the strip. Color temperature is measured in Kelvin, and it determines the warmth or coolness of the light. If you want a warm, cozy feel, look for a strip with a lower Kelvin rating. If you want a more modern, cool feel, look for a strip with a higher Kelvin rating. Another important factor to consider is the length of the strip. Measure the space where you plan to install the strip and choose a length that will fit. Keep in mind that you can cut LED light strips to fit, but you’ll need to know where to cut and how to do it properly. You’ll also want to consider the type of adhesive used on the strip. Some strips come with a 3M adhesive backing that makes installation a breeze, while others require additional adhesive or mounting hardware. Lastly, consider the quality of the LED chips used in the strip. Higher quality chips will last longer and provide more consistent lighting.
When choosing LED light strips, there are several factors to consider to ensure maximum functionality and efficiency. One important consideration is the length of the strip, as it determines the amount of light emitted and the area it can cover. The brightness of the LED lights is also a crucial factor, as it affects the overall ambiance and mood of the space. Additionally, the color temperature of the LED light strips should be considered, as it can affect the appearance of the space and the color of the objects within it. Another factor to take into account is the adhesive backing of the strip, as it must be strong enough to hold the strip in place without damaging the surface it is attached to. Finally, the power source and control options should be evaluated to ensure that they meet the needs of the specific application.
When it comes to choosing the perfect LED light strip for your project, it’s important to pay attention to the specifications. First of all, consider the length of the strip and whether it can be cut to size without damaging the circuitry. Look for information on the number of LEDs per meter, as this will give you an idea of the brightness of the strip. Additionally, consider the color temperature and whether it will suit your needs. Some LED strips may also be waterproof or have adhesive backing, so make sure to check for these features if they are important to your project. Finally, pay attention to the voltage and wattage requirements of the strip to ensure that it will be compatible with your power source. By considering these factors, you can choose an LED light strip that will provide the perfect fit and functionality for your project.
When it comes to LED light strips, brightness levels are an essential factor to consider. The brightness of an LED light strip is measured in lumens per foot, and it can vary from strip to strip. The higher the lumen output, the brighter the strip will be. It’s important to note that the brightness of an LED light strip can also be affected by the color temperature, with cooler temperatures appearing brighter than warmer ones. When choosing the right brightness level for your LED light strip, consider the environment in which it will be used and the intended purpose. For example, a bright LED light strip may be appropriate for a workspace, while a softer, warmer light may be better suited for a living room or bedroom. Ultimately, understanding the different brightness levels of LED light strips can help you select the perfect fit for your lighting needs.
Cutting LED Light Strips
LED light strips are a popular lighting solution for both residential and commercial applications. They are versatile, energy-efficient, and easy to install. However, sometimes the length of the LED light strip doesn’t perfectly match the area it needs to be installed on, and cutting it becomes necessary. Cutting LED light strips can be a little intimidating, but it’s actually a straightforward process. The first step is to measure the length of the area where the LED light strip needs to be installed, and then mark the cutting point on the strip. It’s essential to cut the LED light strip at the designated cutting points, which are usually marked on the strip itself. Cutting the strip at any other point can damage the circuit board and render the entire strip useless. Once the cutting point is marked, cut the strip carefully with a sharp pair of scissors or a craft knife. It’s important to note that cutting an LED light strip doesn’t affect the quality of the light emitted from the remaining strip. However, once the strip is cut, it cannot be reconnected. Therefore, it’s essential to measure the area accurately and cut the strip carefully to avoid wasting any length. Additionally, it’s crucial to seal the cut end of the LED light strip with a silicone sealant to protect the circuit board from moisture and dust. This will ensure the longevity and performance of the LED light strip. By following these tips, cutting LED light strips can be a breeze, and you can have a perfect fit for your lighting needs.
To cut LED light strips, there are a few essential tools that you will need. First and foremost, a sharp pair of scissors or a utility knife is crucial to ensure a clean and precise cut. Additionally, a measuring tape or ruler is recommended to measure the length that needs to be cut accurately. A soldering iron can also be useful if you need to reconnect the cut ends of the LED strip. However, if you don’t have a soldering iron, you can use an LED strip connector instead. Lastly, safety goggles are recommended to protect your eyes from any debris that may fly off during the cutting process. By having these tools on hand, you can confidently cut your LED light strips to the perfect fit for your lighting needs.
When it comes to LED light strips, cutting them to the right length can be crucial for achieving the perfect fit. The ideal place to cut LED light strips depends on the specific design and structure of the strip. Some LED light strips have designated cut points, indicated by a line or a symbol on the strip, which makes it easy to cut them to the correct length. If there are no cut points, the safest option is to cut the strip between the copper pads, which are the areas with exposed metal. It is important to use the right tools, such as sharp scissors or a precision knife, to ensure a clean cut and avoid damaging the LED lights. Regardless of where you cut the LED light strip, always make sure to double-check the length before cutting to avoid any mistakes.
If you’re looking to customize your LED light strips to fit a specific space, cutting them is an excellent option. However, it can be a bit intimidating if you’re not sure how to do it properly. The first step is to measure out the length you need and mark it with a pencil. Next, use a sharp pair of scissors or a utility knife to make the cut. It’s essential to cut along the designated cut line because cutting in the wrong spot may damage the circuitry. Once you’ve made the cut, you’ll need to add a connector to the end of the strip to reconnect it to the power source. With these simple steps, you can easily cut and customize your LED light strips to fit any space perfectly.
When it comes to cutting LED light strips, there are a few tips and tricks to keep in mind for a perfect fit. First, make sure to measure the desired length of the strip before cutting to avoid any mistakes. Use sharp scissors or a sharp blade to make a clean cut through the strip, being careful not to damage any of the LED bulbs. When cutting, make sure to cut along the designated cut lines on the strip to ensure that the strip still functions properly. Finally, if you need to connect the strip to another power source, make sure to use a soldering iron or a connector clip for a secure and reliable connection. With these tips and tricks, cutting LED light strips can be a breeze and give you the perfect fit for your lighting needs.
Installing Cut LED Light Strips

Installing cut LED light strips can be a great way to add some pizzazz to any room in your home. These versatile lights can be cut to fit just about any space, making them ideal for a wide range of applications. However, before you get started, it’s important to know where to cut your LED light strip to ensure the perfect fit. The first step is to measure the length of the area where you want to install the light strip. This will help you determine how many strips you need and where to make your cuts. Once you have a clear idea of where you need to cut, use a pair of sharp scissors to make a clean, straight cut through the strip. Be sure to cut along the designated cut lines, which are usually marked every few inches on the strip. This will ensure that your LED light strip remains functional and looks great. After you’ve made your cuts, it’s time to install your LED light strip. Start by cleaning the surface where you plan to install the strip. This will help ensure that the adhesive on the back of the strip sticks properly. Once the surface is clean and dry, carefully peel off the backing tape from the adhesive strip on the back of your LED light strip. Then, carefully place the strip onto the surface where you want it to go. Use a firm, even pressure to press the strip into place, making sure that it adheres to the surface evenly. Once your LED light strip is in place, plug it in to make sure it works properly. With a little bit of patience and attention to detail, you can install cut LED light strips like a pro and enjoy a beautifully lit space in no time.
Installing cut LED light strips is a simple process that can add a touch of elegance to any space. The first step is to measure the area where you want to install the light strips and cut them to the appropriate length using a sharp pair of scissors or a cutting tool. Next, remove the adhesive backing and firmly press the strips into place. It’s important to make sure the surface is clean and dry before applying the strips to ensure a secure hold. Once the strips are in place, connect the power source and enjoy the beautiful, energy-efficient lighting they provide. Whether you’re creating a cozy ambiance in your home or adding a touch of sophistication to your business, cut LED light strips are a versatile and stylish option that are sure to impress.
When it comes to installing cut LED light strips, there are a few tips and tricks that can make the process smoother and ensure a perfect fit. First, measure the area where you want to install the light strip and mark where you will need to cut it. Then, use sharp scissors or a utility knife to make a clean cut along the marked line, being careful not to damage the circuit or strip. To secure the strip, use adhesive tape or clips designed specifically for LED lights. It’s also important to make sure the power source is compatible with the cut strip and to follow any instructions provided by the manufacturer. With these simple steps, you can create a stunning and customized lighting display in your home or office.
When installing cut LED light strips, there are several common mistakes to avoid. One of the most significant mistakes is cutting the strip in the wrong place. It is essential to measure the area where the strip will be installed and cut it accordingly. Additionally, ensuring that the strip is properly connected to the power source is crucial. Another common mistake is not using the correct connectors or not securing the connections properly. This can result in the strip not working correctly or even a fire hazard. Lastly, not properly sealing the strip can lead to it being damaged or not lasting as long as it should. By avoiding these common mistakes, you can ensure that your cut LED light strip installation is successful and long-lasting.
This cutting-edge guide provides comprehensive instructions on how to cut LED light strips to achieve a perfect fit for any lighting project. It emphasizes the importance of measuring and planning before making any cuts, as well as choosing the right tools for the job. The guide also covers the different types of LED light strips available and their unique features. It explains the anatomy of the strips and how to identify the cutting points. Additionally, the guide offers tips on how to solder and connect cut LED light strips to ensure a seamless and functional installation. With this guide, anyone can confidently cut LED light strips to fit any space or application with ease.
To ensure a successful installation and a perfect fit for your LED light strips, there are a few final tips to keep in mind. Firstly, always measure twice before cutting once, as mistakes can be costly and difficult to fix. Secondly, use a sharp pair of scissors or a cutting tool to prevent frayed edges or uneven cuts. Thirdly, be sure to clean the surface before installing the strips to ensure a strong adhesive bond. Finally, test the strips before permanently attaching them to ensure they are working properly and to make any necessary adjustments. By following these tips, you can achieve a seamless and professional-looking installation for your LED light strips.
If you’re looking to add some ambiance to your living space, experimenting with LED light strips might be the perfect solution. These versatile strips can be cut to fit any space and provide a variety of lighting options, from bright and bold to soft and subtle. Whether you’re looking to highlight a specific area or create a cozy atmosphere, LED light strips are a great choice. Don’t be afraid to experiment with different lengths, colors, and placement to find the perfect fit for your home. With a little creativity and some cutting-edge know-how, you can transform any room into a stunning and inviting space.
Conclusion
In conclusion, cutting LED light strips can be a tricky task to achieve the perfect fit for your project. However, with the right tools and knowledge, it can be done easily and efficiently. Remember to measure twice and cut once, use sharp and precise cutting tools, and always follow the manufacturer’s guidelines. Whether it’s for a DIY project or a professional installation, cutting LED light strips to fit your desired space can elevate the ambiance and add a touch of elegance to any room. So, take the plunge and start cutting your LED light strips today, and see the difference it makes in your space.

