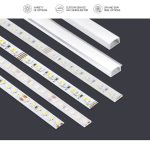
Cutting LED Light Strips: A StepbyStep Guide to Achieving Perfect Results
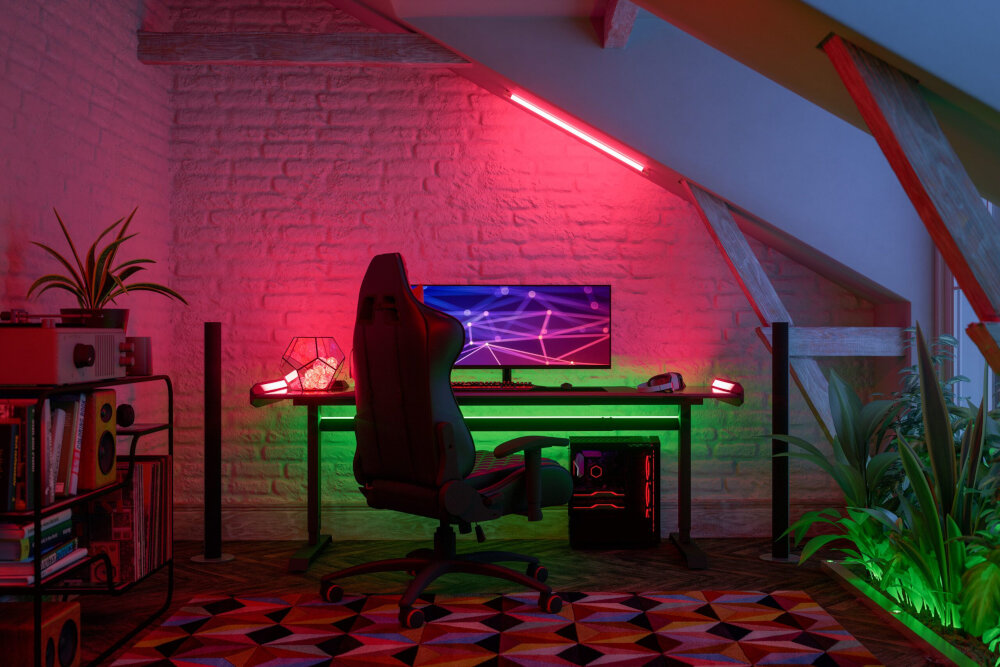
LED light strips have become increasingly popular in recent years due to their energy efficiency, versatility, and affordability. They are commonly used for home decor, accent lighting, and even in commercial settings. However, when it comes to installation, cutting and sizing the LED light strips can be a daunting task. Cutting LED light strips requires precision and attention to detail in order to achieve perfect results. In this step-by-step guide, we will explore the best practices for cutting LED light strips, including the necessary tools, techniques, and tips to help you achieve a flawless outcome. Whether you’re a seasoned DIY enthusiast or a beginner, cutting LED light strips can be intimidating. However, with the right tools and techniques, it can be a simple and easy process. In this guide, we will cover everything you need to know to get started. From choosing the right type of LED light strip to measuring and cutting it, we will walk you through the process step-by-step. By the end of this guide, you will have the knowledge and confidence to tackle any LED light strip cutting project with ease and achieve perfect results every time.
LED light strips are flexible circuit boards that contain tiny light-emitting diodes (LEDs) that produce light when an electric current passes through them. These strips come in various lengths and colors and are commonly used for decorative or functional lighting purposes. They are typically easy to install and can be cut to fit specific lengths, making them a versatile lighting option for a variety of applications. LED light strips are also energy-efficient and long-lasting, making them an eco-friendly lighting solution. Whether you want to add ambiance to a room or highlight a specific area, LED light strips offer a customizable and cost-effective way to achieve your desired lighting effects.
Accurate cutting is crucial when it comes to LED light strips, as it ensures that the strips fit perfectly in their intended location and provide the desired illumination. Cutting the strips haphazardly can lead to uneven lighting, gaps or overlaps between the strips, and an overall unprofessional finish. Additionally, LED light strips can be quite expensive, so cutting them accurately can help minimize waste and save money in the long run. By following the step-by-step guide and taking the time to measure and cut the strips precisely, you can achieve perfect results and elevate the look and feel of your space.
Materials Needed

Materials Needed for Cutting LED Light StripsBefore you get started with cutting LED light strips, it is important to have all the necessary materials at hand. The first and foremost item on your list will be LED light strips. Ensure that you have the correct length of LED light strips that you need, and that the strips come with adhesive backing. Additionally, you will need a pair of scissors, a ruler, a pencil, and a soldering iron. A soldering iron is particularly useful if you need to connect multiple strips of LED lights. Other materials you may need include wire cutters, a power supply, and connectors. Wire cutters can be used to cut LED strips that are not needed, while connectors are useful in connecting two strips together. A power supply is essential to provide power to the LED light strips. Ensure that you have the correct power supply for the number of LED light strips you are using. Having all the necessary materials at hand will ensure a smooth and efficient cutting process. In conclusion, cutting LED light strips is an easy and fun DIY project that can transform any space. However, it is important to have all the necessary materials at hand before commencing the project. Having the right materials will make the cutting process smooth and efficient, and ensure that you achieve perfect results.
Before diving into the process of cutting LED light strips, it is essential to have all the required materials on hand. Firstly, a measuring tape or ruler is necessary to determine the exact length of the LED strip needed. Next, a sharp pair of scissors or a utility knife is required to make precise cuts without damaging the strip. Additionally, a soldering iron and solder wire are necessary to connect the strip to the power source. A heat shrink tubing helps to insulate the connections, and a wire stripper is needed to remove the insulation from the wires. Lastly, a power source, such as a battery or adapter, is necessary to power the LED strip. Having all these materials ready before starting the process will ensure a smooth and successful cutting of LED light strips.
When cutting LED light strips, there are several items that are necessary to achieve perfect results. Firstly, a measuring tape or ruler is essential in order to accurately measure and mark the desired cutting points on the strip. Additionally, a pair of sharp scissors or a craft knife is necessary to make clean and precise cuts without damaging the LED lights or circuitry. A soldering iron and solder may also be required to reconnect the cut pieces or add connectors. A heat shrink tubing or electrical tape is useful for insulating and protecting the exposed wires. Finally, a power source or LED controller is necessary to test the newly cut strip and ensure that it is functioning properly. Having all of these items on hand can make the process of cutting LED light strips much smoother and more successful.
Measuring and Marking
Measuring and marking are essential steps in cutting LED light strips for achieving perfect results. Before you start cutting, you need to measure the length of the LED light strip. To do this, use a measuring tape and measure the distance between the two closest cut points on the strip. Make sure to measure accurately as cutting an LED strip too short can ruin the entire project. After measuring, mark the cutting points on the strip using a pencil or a marker. Avoid using a pen or a sharp object as it can damage the strip. Once you have marked the cutting points, it’s time to make the cut. Use a pair of sharp scissors or a pair of wire cutters to cut the LED strip. Cut along the marked line to ensure that the cut is straight and accurate. It’s essential to use sharp tools to avoid damaging the strip or causing it to bend or deform. If you’re cutting multiple strips, make sure to label them to avoid confusion later on. Measuring and marking may seem like simple steps, but they’re crucial for achieving perfect results when cutting LED light strips. By taking the time to measure accurately and mark the cutting points, you can ensure that your LED light strips will fit perfectly and function as intended.
Measuring and marking the LED light strips is a crucial step in achieving perfect results while cutting them. To begin with, one must decide the length of the strip required and use a measuring tape to accurately measure it. After measuring, mark the length with a pencil or marker on the strip. Next, use a straight edge to connect the marks and make a clear line to ensure that the cut is straight. It is important to cut the LED strip at the marked point, which can be done using a sharp pair of scissors, wire cutters, or a craft knife. Proper measurement and marking of the LED light strips ensure that they are cut to the desired length and fit perfectly into the designated space.
When cutting LED light strips, it’s essential to aim for both accuracy and precision to achieve perfect results. First and foremost, measure twice and cut once to avoid any errors. Also, use a sharp cutting tool, such as a sharp pair of scissors or a utility knife, to make clean and accurate cuts. Additionally, mark the cutting line with a pencil or a marker to ensure precise cuts. Finally, take your time and cut slowly to prevent any mistakes or slips. By following these tips, you can cut LED light strips with accuracy and precision, ensuring that you get the perfect results you’re after.
Cutting the LED Light Strips

LED light strips are a popular lighting solution for homes, offices, and commercial spaces. However, sometimes the length of the light strip is too long for the intended space. In such cases, cutting the LED light strip becomes necessary. Cutting LED light strips may seem like a daunting task, but with the right tools and techniques, it is a simple process. The first step is to measure the length of the strip needed and mark it with a pencil. A straight edge can be used to ensure a precise cut. Next, use a sharp pair of scissors or a craft knife to cut the strip along the marked line. It is essential to be careful not to damage any of the LED bulbs while cutting. Once the strip is cut, the exposed wires can be soldered to a new connector or attached to a power source. When cutting LED light strips, it is important to consider the type of strip being used. Some LED strips are designed to be cut at specific intervals, while others can be cut at any point. It is important to read the manufacturer’s instructions before cutting the strip. It is also important to note that cutting the strip may void the warranty, so it is best to check with the manufacturer before making any changes. Additionally, it is important to use the correct tools when cutting the strip. A sharp pair of scissors or a craft knife should be used to ensure a clean cut. Using dull tools may damage the LED bulbs and cause the strip to malfunction. Following these simple steps can help achieve perfect results when cutting LED light strips.
Cutting LED light strips can be a daunting task, but with the right tools and a little know-how, anyone can achieve perfect results. First, determine where you want to make the cut and mark it with a pencil. Next, use a sharp pair of scissors or a utility knife to cut through the strip along the marked line. It’s important to make sure the cut is straight and even, as any jagged edges can affect the performance of the strip. Once you’ve made the cut, be sure to seal the end of the strip with a waterproof sealant to prevent any damage to the LED lights. With these easy steps, you’ll be able to cut LED light strips with confidence and achieve the perfect results you’re looking for.
When it comes to cutting LED light strips, there are various cutting methods and tools available that can ensure precise results. One of the most common cutting methods is using scissors or a knife, which is suitable for thinner LED strips. However, for thicker LED strips, a rotary cutter or a saw is recommended. Another popular cutting tool is a pair of wire cutters or pliers, which can easily cut through the copper contacts of the LED strip. For more intricate cuts or shapes, a laser cutter or a CNC machine can be used. It’s important to choose the right cutting tool and method for your specific LED strip to achieve the best results.
When cutting LED light strips, it’s crucial to prioritize safety measures to avoid any accidents or injuries. First and foremost, ensure that the power supply is switched off before cutting. Wear gloves to protect your hands from any sharp edges, and use a sharp blade to ensure a clean cut. Make sure the surface you’re cutting on is stable and secure to avoid any slips or mishaps. Additionally, use a ruler or straight edge to guide your cuts and prevent any jagged edges. Lastly, dispose of any scraps or cut-off pieces properly to avoid any potential hazards. By taking these precautions, you can ensure a safe and successful cutting experience when working with LED light strips.
Testing and Installing the Cut LED Light Strips
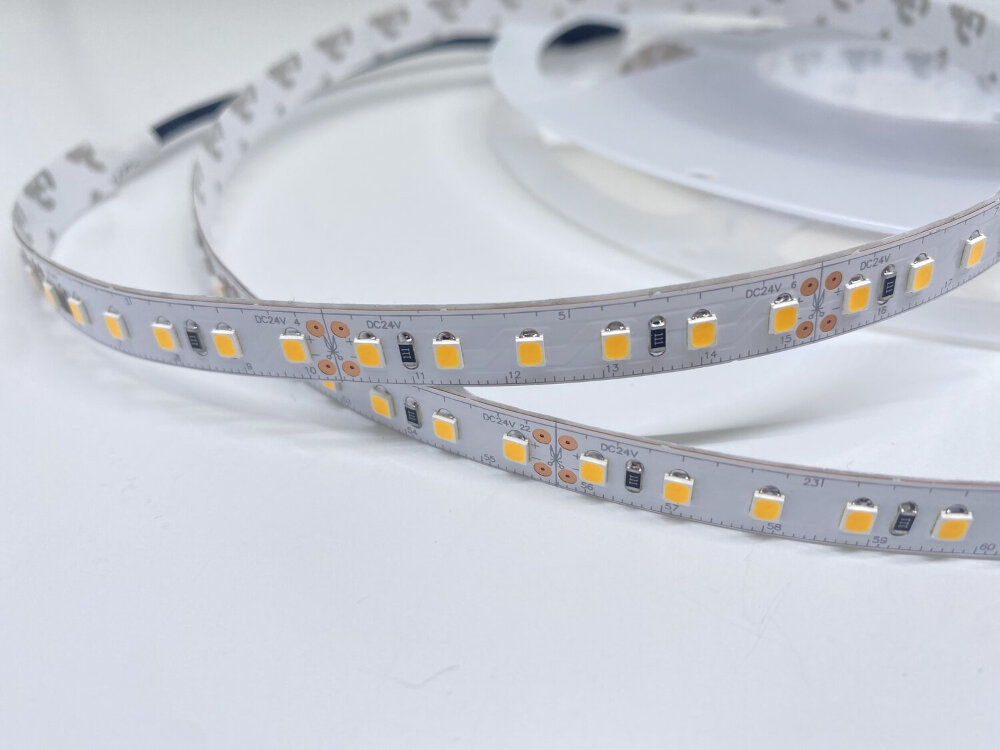
When it comes to testing and installing cut LED light strips, there are a few crucial steps that you need to follow to ensure that everything is working correctly. First and foremost, you need to test the LED light strips before you start the installation process. This is important because it will help you identify any issues or defects in the LED lights before you start installing them. To test the LED lights, you can use a multimeter or a battery to check that the lights are working correctly. You should also check the color and brightness of the LEDs to ensure that they match your expectations. Once you have tested the LED lights, you are ready to move on to the installation process. Installing cut LED light strips is relatively straightforward, but there are a few important things to keep in mind. First, you need to ensure that the surface where you are installing the LED lights is clean and dry. This will help the adhesive on the back of the LED strip to stick properly. Next, you need to measure the length of the surface where you want to install the LED lights and cut the LED light strips accordingly. Once you have cut the LED light strips, you can remove the adhesive backing and stick the LED lights to the surface. It is important to ensure that the LED lights are straight and evenly spaced, as this will help to create a consistent and professional-looking finish. Finally, you can connect the LED light strips to a power source and test that everything is working correctly. With these simple steps, you can achieve perfect results when cutting and installing LED light strips.
After cutting your LED light strips to the desired length, it is crucial to test them before installation. To do this, connect the cut strips to a power source (such as a battery or LED driver) and turn them on. Check for any visible issues, such as dim or flickering lights, uneven brightness, or color inconsistencies. If any problems arise, double-check the connections and try again. It’s also a good idea to test the strips in the intended location to ensure they provide the desired level of illumination. By testing your newly cut LED light strips, you can prevent any issues before installation and achieve the perfect results you’re looking for.
When it comes to installing LED light strips, there are a few tips and tricks that can help you achieve perfect results. First, make sure to measure the area where you want to install the lights and cut the strip to the appropriate length. Use a sharp pair of scissors or a utility knife to make clean, straight cuts. Next, clean the surface where you’ll be applying the strip using rubbing alcohol or another cleaning solution to ensure that the adhesive will stick properly. When applying the strip, start at one end and work your way along the surface, using a ruler or level to keep the strip straight. If you need to bend the strip around corners, make small cuts in the strip at the appropriate points to allow it to flex without breaking. With these tips and tricks, you’ll be able to achieve a professional-looking installation that will enhance any space.
Accurate and precise cutting of LED light strips is of utmost importance to achieve perfect results. Accuracy ensures that the strips are cut at the desired length, while precision guarantees that the cut is made straight and clean. A small error in cutting can result in a waste of material and time, and can also affect the performance of the LED lights. Moreover, improper cutting can lead to unappealing aesthetics and poor lighting quality. Therefore, it is crucial to use the right tools and techniques to cut LED light strips accurately and precisely, ensuring that they fit perfectly in the desired space and enhance the overall ambiance.
The article, \Cutting LED Light Strips: A Step-by-Step Guide to Achieving Perfect Results,\ provides a comprehensive guide for cutting LED light strips. The guide covers the necessary tools and equipment needed, such as a sharp pair of scissors, a ruler, and a soldering iron. It also provides step-by-step instructions, which include measuring the length of the strip, marking the cutting point, and cutting the strip with precision. The guide also includes tips on how to avoid damaging the LED lights and how to connect the cut strip to a power source. By following this guide, anyone can achieve the perfect results when cutting LED light strips.
In conclusion, cutting LED light strips can be a simple and rewarding task if done correctly. By following the step-by-step guide mentioned above, you can achieve perfect results with minimal effort. However, it’s essential to remember that safety must come first, so always use the appropriate tools and protective gear. Additionally, be sure to measure and plan out your cuts beforehand to avoid any mistakes. Lastly, take your time and be patient, as rushing can lead to uneven cuts and damaged LED lights. With these tips in mind, you’re sure to achieve perfect results every time you cut your LED light strips.
Conclusion

In conclusion, cutting LED light strips can be a daunting task for many, but with the right tools and techniques, it can be accomplished with perfect results. It is important to follow the step-by-step guide carefully, ensuring that the strip is cut at the right point to avoid damaging the circuitry. Attention to detail and precision is key in achieving an even and consistent cut. With the proper equipment and knowledge, anyone can easily customize their LED light strips for their desired length and achieve a flawless finish. Whether it’s for a DIY project or a professional installation, this guide provides the necessary information to achieve a perfect result every time.

