10 Easy Steps to Successfully Diffuse LED Light Strips for a Softer Glow
LED light strips are the perfect way to add ambiance to any room or outdoor space. However, the bright and harsh light can sometimes be too intense for a cozy and inviting atmosphere. Fortunately, there are ways to soften the glow of your LED light strips, making your space warm and inviting. In this article, we will discuss 10 easy steps to successfully diffuse LED light strips for a softer and more welcoming ambiance. Diffusing LED light strips not only creates a more comfortable atmosphere, but it also enhances the overall aesthetic of the space. Whether you’re looking to create a subtle glow in your bedroom or a relaxing mood in your living room, these 10 steps will help you achieve the perfect ambiance. So, let’s dive into the world of LED light strip diffusion and explore the various techniques that can be used to create a softer glow.
LED light strips are a versatile and energy-efficient lighting solution used for a variety of purposes. These strips consist of numerous small LED lights that are attached to a flexible circuit board, making them easy to install and manipulate into any shape or space. They can be used for both practical and decorative purposes, such as providing task lighting under cabinets or shelves, highlighting architectural features or artwork, creating mood lighting in a room, or adding a colorful accent to a space. LED light strips are also known for their long lifespan and low heat output, making them a safe and cost-effective lighting solution.
Diffuse lighting is a crucial aspect of creating a softer and more inviting atmosphere in any space. While harsh, direct lighting can create unflattering shadows and an unpleasant glare, diffused lighting softens the light and spreads it more evenly across the room. This can make everything from reading to entertaining more comfortable, while also creating a more relaxed and welcoming ambiance overall. Diffused lighting is especially important when it comes to LED light strips, which can often be quite bright and overwhelming without proper diffusion. By following the 10 easy steps outlined in this guide, you can ensure that your LED light strips are perfectly diffused for a warm and inviting glow that will enhance any room.
Step 1: Choose the Right Diffuser
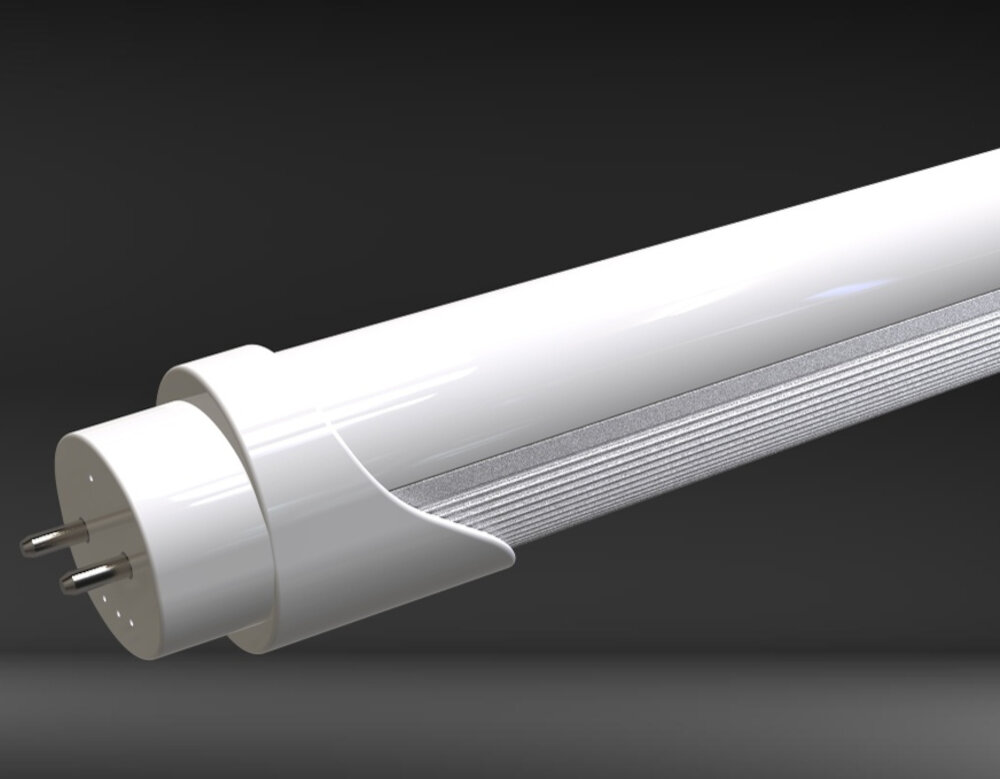
The first step to successfully diffuse LED light strips is choosing the right diffuser. A diffuser is an essential accessory that helps to scatter the harsh light from the LED strips and create a softer glow. There are various types of diffusers available in the market, including acrylic, polycarbonate, and glass diffusers. It is important to choose the right diffuser that suits your needs and budget. Acrylic diffusers are lightweight and cheaper, but they are not as durable as polycarbonate or glass diffusers. Polycarbonate diffusers are more durable and have better heat resistance than acrylic ones. Glass diffusers are the most expensive option, but they offer the best optical properties and durability. Another important factor to consider when choosing a diffuser is the level of light diffusion. Some diffusers offer high levels of diffusion, while others provide low to medium levels of diffusion. High diffusion diffusers are ideal for creating a soft, even glow throughout the room, while low to medium diffusion diffusers are better for creating directional lighting. Additionally, some diffusers come in frosted or clear finishes. Frosted diffusers offer better light diffusion and create a softer glow, while clear diffusers provide a more direct and intense light. Ultimately, the choice of diffuser depends on the specific requirements of your project, such as the size of the room, the desired light output, and the overall aesthetic you are trying to achieve.
There are various types of diffusers available, each with its unique characteristics and benefits. The most common types include frosted covers, acrylic sheets, and polycarbonate sheets. Frosted covers are popular because they provide a soft and even distribution of light, making it an excellent choice for ambient lighting. Acrylic sheets are highly durable and offer a smooth surface that provides a diffused light distribution. Polycarbonate sheets, on the other hand, are shatter-resistant and provide a more efficient light distribution than acrylic sheets. Other diffusers include fabric, paper, and glass, each having their unique properties and benefits. Choosing the right type of diffuser depends on the desired level of diffusion, the amount of light required, and the design aesthetics of the project.
When choosing a diffuser for LED light strips, there are a few factors to consider. Firstly, the material of the diffuser can affect the quality of light dispersion. Polycarbonate diffusers are durable and provide even distribution of light, while acrylic diffusers are more fragile but offer a clearer, more transparent appearance. Secondly, the thickness of the diffuser can affect the level of diffusion. Thicker diffusers provide a softer glow, while thinner diffusers create a sharper light. Additionally, the shape and size of the diffuser should be chosen based on the intended use and the size of the LED light strip. Finally, it is important to consider the installation method, as some diffusers require clips or brackets while others can be easily snapped onto the light strip.
Step 2: Measure Your Light Strip
After deciding on the type of LED light strip you want to use and where to place it, the next step is to measure the length of the strip. Measuring your light strip is crucial to ensure that you have enough length to cover the desired area. Start by measuring the length of where you want to install the strip, and then add a few extra inches to the measurement to accommodate any curves or bends in the surface. It’s always better to have some extra length than to come up short and have to restart the entire process. Once you have the measurement, you can then choose the appropriate length of LED light strip to purchase. Measuring your LED light strip is also important for calculating the amount of diffuser material needed for the project. The diffuser material helps to create a softer and more even glow by spreading the light across a larger surface area. By measuring the length of the light strip, you can determine how much diffuser material is needed to cover the entire length. This will help you to purchase the correct amount of diffuser material and avoid any unnecessary wastage or added expenses. Overall, taking the time to measure your light strip is a critical step that will ensure a successful and professional-looking installation.
Measuring your light strip accurately is crucial to ensure a successful diffusion process. To do this, start by determining the length of the area where you want to install the light strip. Use a measuring tape to get an accurate measurement and add a few extra inches to ensure you have enough length to work with. Next, carefully unroll the light strip and measure the length of the strip itself. Make sure to account for any connectors or wiring that may add to the length. With this information, you can now cut your light strip to the desired length using sharp scissors or a cutting tool. Being precise with your measurements will ensure that your light strip fits perfectly and diffuses the light evenly.
Accurate measurements are crucial when it comes to effectively diffusing LED light strips for a softer glow. Without precise measurements, the diffusion material may not cover the entire surface area of the LED strip, resulting in uneven lighting. Additionally, inaccurate measurements can lead to wasted materials and increased costs. Furthermore, ensuring accurate measurements can also help to prevent potential safety hazards, such as overheating or electrical malfunctions. Overall, taking the time to measure accurately can significantly improve the final result of the diffusion process, creating a more even, aesthetically pleasing glow.
Step 3: Cut Your Diffuser to Size
After measuring the length of your LED light strips, the next step is to cut your diffuser to size. The diffuser is a material that softens the light emitted by the LED strips, making it more pleasing to the eyes. There are different types of diffusers available, such as frosted acrylic, polycarbonate, and PVC, but they all serve the same purpose. To cut your diffuser, you can use a sharp utility knife or a pair of scissors, depending on the thickness and material of your diffuser. Make sure to measure and mark the cutting lines accurately to avoid any mistakes. A properly cut diffuser will not only enhance the aesthetic appeal of your LED light strips but also provide a softer and more diffused glow. When cutting your diffuser, it is essential to consider the placement of your LED light strips. If you plan to install them under a cabinet or on a shelf, you may need to cut your diffuser to fit the exact size of the space. On the other hand, if you want to create a diffused lighting effect for a larger area, you may need to join multiple diffusers together. In this case, you can use a diffuser connector or simply glue the edges of the diffusers together. It is important to note that the size and shape of your diffuser will affect the amount and quality of light emitted by your LED light strips. Therefore, it is crucial to take your time and cut your diffuser to the right size to achieve the desired lighting effect.
Cutting a diffuser may seem like a daunting task, but with the right tools, it can be a breeze. Here are some essential tools you will need to get the job done: Firstly, a sharp utility knife or a pair of scissors with long blades will allow you to make precise cuts in the diffuser material. Secondly, a ruler or measuring tape will help you measure the exact length of the diffuser needed for your LED light strips. Thirdly, a cutting mat or a flat surface will provide a stable and safe workspace for cutting the diffuser material. Lastly, a sandpaper or file will help smooth out any rough edges or burrs left behind after cutting the diffuser. By having these tools at your disposal, you can achieve a clean and polished look for your diffused LED light strips.
Cutting a diffuser to size for LED light strips can be a tricky task, but with a few tips, you can do it successfully. First, measure the size of the light strip that you want to cover with the diffuser. Then, mark the measurements on the diffuser panel and use a sharp blade or a pair of scissors to cut along the marked lines. Make sure to cut straight lines and avoid jagged edges, as they can affect the diffusion of the light. Additionally, use sandpaper or a file to smooth out any rough edges. Finally, test the diffuser by placing it over the LED light strip and adjusting it until you achieve the desired level of diffusion.
Step 4: Clean Your Diffuser
Step 4 in the process of diffusing LED light strips is to clean your diffuser. This step is crucial, as it ensures that the diffuser is free from any dust or debris that could affect the quality of the light emitted. To clean your diffuser, simply wipe it down with a damp cloth, being careful not to scratch the surface. If the diffuser is particularly dirty, you can use a mild soap solution to clean it. Once the diffuser is clean, dry it thoroughly before reattaching it to your LED light strip. Cleaning your diffuser on a regular basis will help ensure that your LED light strips continue to emit a soft, diffused light. Dust and debris can accumulate on the surface of the diffuser over time, causing the light to become harsh and uneven. By taking the time to clean your diffuser, you can maintain the quality of your LED light strips and enjoy a softer, more diffused glow. Additionally, a clean diffuser will help prolong the life of your LED light strips, as dirt and debris can cause the LED lights to overheat and fail prematurely. So, take the time to clean your diffuser regularly and enjoy the benefits of a soft, diffused light.
Cleaning the diffuser before installation is an essential step that should not be overlooked. A diffuser is designed to scatter and soften the light emitted by LED light strips, creating a more pleasant and ambient atmosphere in a room. However, if the diffuser is not cleaned, it can accumulate dirt, dust, and other unwanted particles that can obstruct the light and reduce its effectiveness. Furthermore, if the diffuser is not properly cleaned, it can also become discolored and cloudy over time, further reducing the quality of the light output. Therefore, taking the time to properly clean the diffuser before installation can go a long way in ensuring that your LED light strips provide the desired soft and ambient glow that you are looking for.
When it comes to cleaning LED light strips, it’s essential to use gentle methods that won’t damage the delicate components. A soft, lint-free cloth is perfect for wiping down the surface of the light strips, but be careful not to apply too much pressure. For tougher grime and dirt buildup, a small amount of mild soap and water can be used, but make sure to dry the strips thoroughly afterwards. Avoid using harsh chemicals or abrasive materials like steel wool, as these can scratch the surface of the LED light strips and cause permanent damage. Regular cleaning will not only keep your LED light strips looking their best, but also help them to perform optimally for years to come.
Step 5: Install Your Diffuser
Installing your diffuser is a critical step in successfully diffusing LED light strips and achieving a softer glow. A diffuser helps to scatter light evenly and reduce harsh shadows or glare produced by the LED lights. It also adds an aesthetic appeal to your lighting system. There are various types of diffusers available in the market, including frosted covers, opal covers, and clear covers. Frosted covers are best suited for diffusing light in a large area, opal covers offer a soft glow with minimal glare, and clear covers provide a sharp and bright light output. Choose the one that best suits your requirements and install it carefully over the LED light strip. Ensure that the diffuser is secured firmly in place to prevent it from falling off or shifting. When installing the diffuser, it is essential to consider its placement and the type of LED light strip you are using. If you are using a flexible LED light strip, ensure that the diffuser is flexible enough to curve along with the strip to prevent it from cracking or breaking. For rigid LED light strips, you may need to use clips or screws to secure the diffuser in place. Additionally, if you plan to install your LED light strips in a humid environment, it is recommended to choose a diffuser that is water-resistant. Overall, installing a diffuser is a crucial step towards achieving a softer glow with your LED light strips. Ensure that you choose the right diffuser and install it correctly to achieve the desired results.
There are several methods for installing a diffuser to achieve a softer and more evenly-distributed glow from LED light strips. One of the easiest ways is to use diffuser covers that can be snapped onto the LED strips. These covers come in various styles, such as frosted, milky, or clear, and can be made of materials like PVC, polycarbonate, or acrylic. Another method is to apply a diffusion film directly onto the LED strip, which can be cut to size and attached using adhesive. For a more DIY approach, one can create a diffuser using materials like parchment paper, tracing paper, or even a shower curtain. Ultimately, the method chosen will depend on personal preference, budget, and the desired outcome.
Installing LED light strips can be a tricky task, but with the right approach, it can be a breeze. The key to a successful installation is preparation. Before you start, make sure you have all the tools and materials you need. Measure the area where you want to install the strips to ensure you have the correct length. Clean the surface where you will be mounting the strips to ensure it is free of dust and debris. Make sure you have a steady hand and take your time when attaching the strips to avoid any mistakes. Finally, test the strips before securing them in place to ensure they are working correctly. By following these tips, you can achieve a successful installation and enjoy a softer glow from your LED light strips.
Step 6: Test Your Light Strip
After completing the installation of your LED light strips, it’s important to test them to ensure they’re properly functioning. To test your light strips, turn on the power source and look for any signs of damage or malfunction. Check for any flickering, dimming, or discoloration of the light. If you notice any issues, double-check the wiring and connections to make sure they’re secure and correctly installed. It’s also a good idea to test the light strips with a dimmer switch or remote control, if applicable, to make sure they respond correctly to adjustments. Once you’ve confirmed that your LED light strips are working correctly, take some time to adjust their position or brightness to achieve the desired effect. Experiment with different placement options and angles to create the perfect ambiance and glow for your space. Don’t be afraid to play around with the settings until you find the perfect balance of functionality and aesthetics. With proper testing and adjustments, you can enjoy the soft, diffused glow of your LED light strips for years to come.
After installing your LED light strip, it’s crucial to test it thoroughly to ensure that everything is working correctly. A quick test will help you identify any issues with the installation, such as loose connections or damaged wires. This step will save you time and money in the long run as it will prevent you from having to take the entire strip down to fix any problems. Additionally, it’s important to test the light strip’s brightness, color accuracy, and dimming capabilities to ensure that it meets your expectations. Overall, testing your LED light strip after installation will give you peace of mind knowing that your investment is working correctly and will provide the desired soft glow for your space.
Before diffusing your LED light strip, it’s important to ensure that it’s working properly. To test your light strip, plug it into a power source and turn it on. Check that all the LEDs are lighting up evenly and there are no dead spots or flickering. You can also use a multimeter to test the voltage and current of the light strip to make sure it’s within the manufacturer’s specifications. If there are any issues with the light strip, it’s important to address them before diffusing it to ensure the best possible results.
Step 7: Adjust Your Diffuser
Step 7 of diffusing LED light strips is all about adjusting the diffuser to achieve the desired effect. Depending on the type of diffuser you have chosen, you may be able to adjust it in a few different ways. If you have a flexible diffuser, you can experiment with different shapes and angles to see which provides the best coverage and diffused light. If you have a rigid diffuser, you may need to adjust the placement of the light strip within the diffuser to achieve the desired effect. It’s important to take your time with this step and play around with different configurations until you find the perfect fit for your space. When adjusting your diffuser, it’s important to keep in mind the overall purpose of diffusing LED light strips: to create a softer, more diffused light that is easier on the eyes and creates a more relaxing atmosphere. With this in mind, you may want to adjust the diffuser to provide more coverage or a more diffused effect, depending on your needs. It’s also important to consider the amount of light that you need in your space. If you need more light, you may need to adjust the diffuser to allow more light to pass through. On the other hand, if you need less light, you may need to adjust the diffuser to block some of the light and create a more ambient effect. Ultimately, the key to success with diffusing LED light strips is to experiment and find the perfect balance between functionality and aesthetics.
To achieve optimal diffusion with your LED light strip diffuser, it’s important to make adjustments that suit your specific needs. First, consider the density of the diffuser material and adjust accordingly. A denser material will require less diffusion, while a less dense material will require more. Next, consider the distance between the LED light strip and the diffuser. If the distance is too great, the light may not diffuse evenly. Conversely, if the distance is too close, the light may appear too bright and harsh. Finally, experiment with different diffuser shapes and sizes to find the perfect fit for your space. With a bit of trial and error, you can achieve a beautifully soft and diffused glow from your LED light strip diffuser.
When adjusting a diffuser for LED light strips, there are a few common mistakes to avoid. Firstly, avoid using too much force when installing the diffuser as this can damage the light strip or the diffuser itself. Secondly, be careful not to over-tighten the diffuser as this can cause the light to become distorted or uneven. Another mistake to avoid is using the wrong type of diffuser for your LED light strip. Make sure to choose a diffuser that is compatible with your specific LED light strip to ensure the best results. Finally, remember to clean and maintain your diffuser regularly to prevent any dirt or dust from affecting the quality of the light output. By avoiding these common mistakes, you can successfully diffuse your LED light strips for a softer and more pleasing glow.
Step 8: Add Additional Diffusers

Step 8: Add Additional Diffusers is crucial to achieving the perfect soft glow for your LED light strips. Although your light strip may come with a diffuser already attached, adding additional diffusers can further enhance the quality of your lighting. Additional diffusers can help to reduce glare and hotspots, creating a more even and soft lighting effect. Diffusers can come in a variety of materials, including frosted acrylic, polycarbonate, or even paper. Experimenting with different diffuser materials can help you achieve the desired level of diffusion for your LED light strips. Adding additional diffusers can also increase the longevity of your LED light strips. By reducing the amount of direct exposure to the LED diodes, diffusers can help to prevent premature aging and damage. Additionally, diffusers can help to protect your LED light strips from dust and other debris, ensuring that your lights stay clean and bright for longer. Overall, adding additional diffusers is a simple and effective way to improve the quality and lifespan of your LED light strips.
Adding additional diffusers can be a great way to enhance the ambiance of a space and create a softer, more diffused glow from LED light strips. It’s especially useful in situations where the light strips might be too bright or harsh, or if you want to create a more subtle lighting effect. Additional diffusers can also help to reduce glare and provide a more even distribution of light, which can be especially important in areas where people will be spending a lot of time, such as in a living room or bedroom. When selecting additional diffusers, it’s important to consider the size and shape of the space, as well as the type of LED light strips you’re using. Different diffusers will have different effects on the light output, so it’s important to experiment with different options to find the one that works best for your needs.
In order to enhance the lighting in your space, adding additional diffusers can be a great option. When it comes to choosing the right diffuser, consider the type and size of the LED light strip you are using, as well as the overall aesthetic you are trying to achieve. Some popular diffuser options include frosted acrylic, polycarbonate, and even fabric. Another important factor to consider is the placement of the diffuser – make sure it is evenly spaced and secured to the surface so that it doesn’t move around or create uneven lighting. With the right diffusers in place, you can achieve a softer, more diffused glow that is perfect for any space.
Step 9: Consider Using a Dimmer
Step 9 of successfully diffusing LED light strips involves considering the use of a dimmer. A dimmer allows you to adjust the brightness of your LED light strip, providing you with greater control over the intensity of the light. This is especially useful for those who want to create a cozy and relaxed ambiance in their space. By dimming your LED light strip, you can create a warm and inviting atmosphere that is perfect for unwinding after a long day or entertaining guests. Furthermore, a dimmer can also help you to save energy and reduce your electricity bill. By lowering the brightness of your LED light strip, you are using less energy and therefore, reducing your electricity consumption. This is not only good for the environment but also for your wallet. So, if you want to create a comfortable and energy-efficient environment in your home, considering the use of a dimmer for your LED light strip is a great option.
Using a dimmer with your diffuse LED light strip has several advantages. Firstly, a dimmer allows you to control the brightness of your light strip, making it more versatile for different occasions and moods. Secondly, a dimmer can extend the lifespan of your LED light strip by reducing the voltage and current, which helps to prevent overheating and prolongs its usage. Additionally, a dimmer can help to save energy and reduce electricity bills, as it allows you to adjust the brightness according to your needs. Lastly, a dimmer can contribute to creating a cozy and relaxing atmosphere, as lower light levels have been shown to promote relaxation and better sleep. Overall, a dimmer is a great addition to any diffuse LED light strip setup, offering flexibility, longevity, energy efficiency, and ambiance.
Dimmers are devices that allow you to adjust the brightness of LED light strips, making them a popular addition to any home or office space. There are several types of dimmers available, including rotary, slide, touch, and smart dimmers. Rotary dimmers feature a dial that you turn to adjust the brightness, while slide dimmers have a sliding switch. Touch dimmers respond to a light touch, and smart dimmers can be controlled via a smartphone app or voice commands. Some dimmers also have additional features, such as the ability to set timers or create preset lighting scenes. It’s important to choose the right type of dimmer for your LED light strips to ensure optimal performance and longevity.
Step 10: Enjoy Your Softly Glowing LED Light Strip
Congratulations, you have successfully diffused your LED light strip and now it’s time to sit back, relax and enjoy the soft and warm ambiance it creates. Your efforts in following the 10 easy steps have paid off and you have achieved the desired effect for your space. Whether you are using the LED light strip as a night light, mood lighting or as a decorative element, the diffused glow will add a cozy and inviting feel to any room. You can now spend countless hours reading, working, or simply enjoying the company of loved ones with the gentle glow of your LED light strip in the background. As you bask in the warm and inviting atmosphere created by your diffused LED light strip, take a moment to appreciate the impact it has on your mood and well-being. Soft lighting has been known to reduce stress, promote relaxation, and improve sleep quality. With your newly diffused LED light strip, you can now create the perfect ambiance for any occasion, whether it be a romantic dinner, a relaxing bath, or a cozy movie night with friends. So go ahead, enjoy your softly glowing LED light strip and revel in the magic of a well-lit, inviting space.
In conclusion, successfully diffusing LED light strips is a simple yet effective way to create a softer and more ambient glow in any space. By following the ten easy steps outlined in this article, you can achieve a professional-looking result without breaking the bank. Remember to choose the right diffusion material for your specific needs, experiment with different placement and spacing, and take your time to ensure a neat and tidy finish. Whether you’re decorating your home, office, or business, diffused LED light strips are a versatile and cost-effective lighting solution that can enhance any environment.
If you’re looking to add some ambiance to your living space, a softly glowing LED light strip can be an excellent choice. To make the most of this lighting option, there are a few key tips to keep in mind. First, consider the placement of your LED light strip. Whether you’re looking to highlight certain areas of a room or create a cozy atmosphere, placement can make a big difference in the overall effect. Additionally, think about the color and brightness of your LED strip. Choosing a warmer color temperature and adjusting the brightness can help create a softer, more relaxing glow. Finally, be mindful of any other lighting sources in the room, as they can affect how your LED strip looks and feels. With these tips in mind, you can enjoy your softly glowing LED light strip to the fullest.
To successfully diffuse LED light strips, there are ten easy steps to follow. First, measure your LED light strip and cut your diffuser material accordingly. Next, attach the diffuser to the LED strip with adhesive tape. Third, remove the protective coating from the diffuser material. Fourth, clean the surface where you will install the LED light strip. Fifth, attach the LED light strip to the surface. Sixth, ensure the LED light strip is aligned and straight. Seventh, secure the LED light strip with clips or mounting brackets. Eighth, connect the LED light strip to a power source. Ninth, test the LED light strip to make sure it works. Finally, enjoy the softer, diffused glow of your newly installed LED light strip. By following these simple steps, you can easily diffuse LED light strips for a more aesthetically pleasing lighting experience.
Proper diffusion is essential for achieving a softer and more even glow from LED light strips. Without diffusion, the light emitted from LED strips can be harsh and concentrated in certain areas, leading to an unappealing and uncomfortable lighting effect. Diffusion materials, such as frosted acrylic or polycarbonate, help to scatter the light and create a more uniform glow. It is important to choose the right diffusion material for your LED strip setup, as different materials can have varying levels of light transmission and diffusion effects. By investing in proper diffusion, you can transform your LED light strips into a beautiful and relaxing lighting solution for any space.
Conclusion
In conclusion, achieving a softer glow from LED light strips is not a difficult task, but it requires a little bit of effort and creativity. By following the 10 easy steps we have discussed, anyone can successfully diffuse LED light strips and create a cozy and inviting atmosphere in their living space. From using diffuser panels to adding frosting spray, there are various methods to soften the harsh glare of LED light strips. Experimenting with different techniques and combinations can yield unique and pleasing results. So, let your imagination run wild and transform your home into a warm and welcoming oasis with the help of these simple yet effective tips.