Resurfacing concrete as a DIY project for your property and your garage
Should we even explain how strong and durable concrete is? This material consists of aggregate and cement that has a lime base. When mixed with water, you can easily shape it precisely as you like and create something remarkable. When gets dry concrete will become hard as stone and you will end up with construction or surface that is extremely durable.
Thanks to the aforementioned characteristics of concrete, you can find it these days literally anywhere. It is used for driveways, sidewalks and also as flattening surface in garages. An interesting fact is that concrete is used for Hoover Dam and Panama Canal. However, it was used by ancient Romans and Pantheon was made solely from concrete.
Why resurfacing concrete is so desirable fix?
Over time, concrete will crack and deteriorate. This refers to all concrete surfaces indoor and outdoor, although surfaces outdoors will fail sooner. The cracks then lead to spalling which is the presence of the holes in the concrete. Once this start happening, the entire surface will deteriorate constantly. You will have to repair or to replace the concrete.
Replacing the concrete means that you have to pull out the old concrete and pour a new one. You need special equipment, a lot of time and money to get this type of job done. A simple alternative is known as resurfacing concrete and it is a far better option. When you repair the surface using this method you will enjoy the brand new look that will last. There are a lot of benefits to this fix, but the main ones are:
- It is a simple task that can be complete as a DIY process.
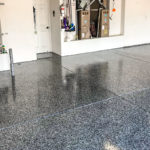
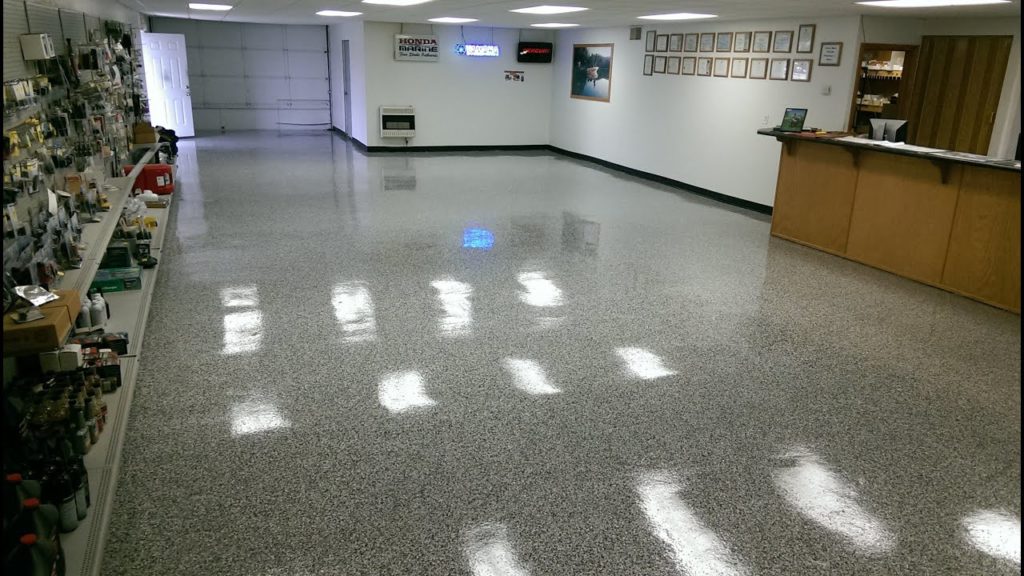
- The finish is stunning and you will get the same result as with replacing the concrete.
- It is a durable and effective fix commonly used all over the globe.
- This process is affordable and generally, cost way less than replacing the concrete.
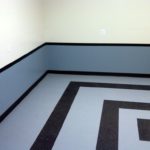
- Resurface concrete is available in gray color, but you can change it if needed.
It is important to remember that resurfacing concrete can’t be used straight from a bag. It won’t stick to the old concrete meaning the surface will start deteriorating and cracking within days. This type of repair needs to be done using a special type of concrete with proper bonding agents. Yes, it is slightly more expensive than using ordinary concrete, but you will need very little of concrete which is an affordable option in the end.
We also must add that some agents that can be added to this type of concrete are beneficial due to the fact they can make flattening much easier and simpler. If you are a beginner with this fix, you will need this benefit.
The last thing you need to remember is that old concrete will have holes. Water will reach those holes even after you resurface it. When the temperatures are low, the water will freeze and it will put a lot of pressure on the new concrete layer. As a result, it will crack. The solution is obvious. Simply fill the holes with concrete before applying the new layer and you are all set.
Resurfacing garage floor or driveway
Most of you are interested in this technique in order to resurface their garage floor or driveway. The process is the same and it uses the same steps and the same tools and ingredients. Below we will reveal all the steps you need to take and all the things you will need. Follow the steps to the point and you will get the job done perfectly.
Steps you will need to take:
- Preparing
- Mixing the ingredients
- Applying the concrete
- Finishes touches
The time needed to complete all 4 steps is around one day, but you should leave extra time just in case. This process can take up to 2 days if you have a massive surface top cover. The tools and items you are going to need are:
- Pressure washer
- Resurface concrete
- Trowel for finishing
- Squeegee
- A bucket (5 gallons)
- Measuring container
- Hose
- Weatherstripping
- Chisel
- Hammer
- Broom
- Safety goggles
- Safety gloves
The amount of concrete and other elements you will need depends on the size of the surface you want to cover. Measure the surface and calculate the square footage of the surface so you know how much concrete you will actually need.
-
Preparing
The first thing you will have to do is to clean the surface. Use pressure washer that can generate 3500 PSI and a fan tip under 25 degrees to complete this task. The goal is to remove all the stains, paint and dust. You will have to hold the pressure washer 6 inches above the surface in order to complete the cleaning process and effectively remove all the dirt and aforementioned issues.
Now you should remove all the pieces of old concrete that are loose. Use a chisel if needed to get the job done within minutes. This is an essential part due to the fact if you don’t remove it, they will cause cracks in the new layer so you definitely want to remove all loose parts.
Start mixing the resurface concrete with water in 7:1 ratio. Mix them and apply a thin layer to all the areas where the cracks and holes are present. Once done you can use a trowel to flatten the surface. Leave it between 2 and 5 hours to get dry completely and then move to the next step.
In addition, you can use weather stripping to make the sections and to repair them with the mixture you have in your bucket. Use a chisel to press the weather strip before you apply a fresh coat of concrete.
-
Mixing the ingredients
Mixing needs to be done carefully and it involves a lot of stirring. You need to add a small amount of resurface agent to the bucket and pour one glass of water. Use a mixing attachment available for your drill and mix 5 minutes. The end result should be a mixture without any lumps or similar issues. If the mixture is too dense, add a small amount of water and continue mixing the compound.
This is an important part of the guide. If you make a mistake here the surface won’t be very strong and it will crack after a short period of time. If you do everything we told you, the surface will be perfectly strong and you will end up with the superb result.
-
Applying the concrete
The most important part of the guide is applying the concrete. Apply a thin layer which should be between ½ and ¼ of an inch and work with smaller areas. Keep in mind that you have 20 minutes of time to work with the mixture. After that, it will start hardening. Once you apply the mixture, use a trowel to flatten the surface. Then you can move to the next section.
After 5 minutes use a broom and create a soft texture in concrete. They will be more than just needed afterward. The texture will make the surface rough and therefore provide a lot of traction when the concrete is wet. You can use any kind of a broom, but the ones with nylon bristles work the best. Make the pattern in 90 degrees.
After 20 minutes you are ready to start removing the weather strips. Make sure that they can be pulled easily from the concrete but they don’t affect the lines of the sections.
It is important to add that for garages you should create several sections and complete each one before you start with the next. The mixture should be made per each section and in small amounts.
-
Finishes touches
The last thing you will need to do is to cover the surface with a tarp if the rain is possible through the night. If there is no risk from rain, you don’t have to cover it and just leave it to get dry naturally. The duration will depend on the temperature, the thickness of the concrete and the mixture you made. Don’t forget that applying water to the done surfaces, after they are partially dry is the desired method to prevent any cracks and damages.
Additional things to remember
The main things here we should add are to always make a small amount of mixture of concrete and to apply it to one small section of your garage or floor in general. If you make too much, it will harden in the bucket and you will have to make a new one and throw the old one.
Measure the surface size you want to cover with new concrete and calculate the amount of mixture you will need. On all packages, you can see how much of surface they can cover.
The final word
Resurfacing old concert with a new layer is an extremely easy and rewarding process. You will get a new look and your garage or driveway will be able to compliment your property for years to come. Follow all the steps we mentioned and never skip a process. Read more about repair and maintenance here.