Protecting Your Walls: Safely Removing LED Light Strips Without Damaging Paint
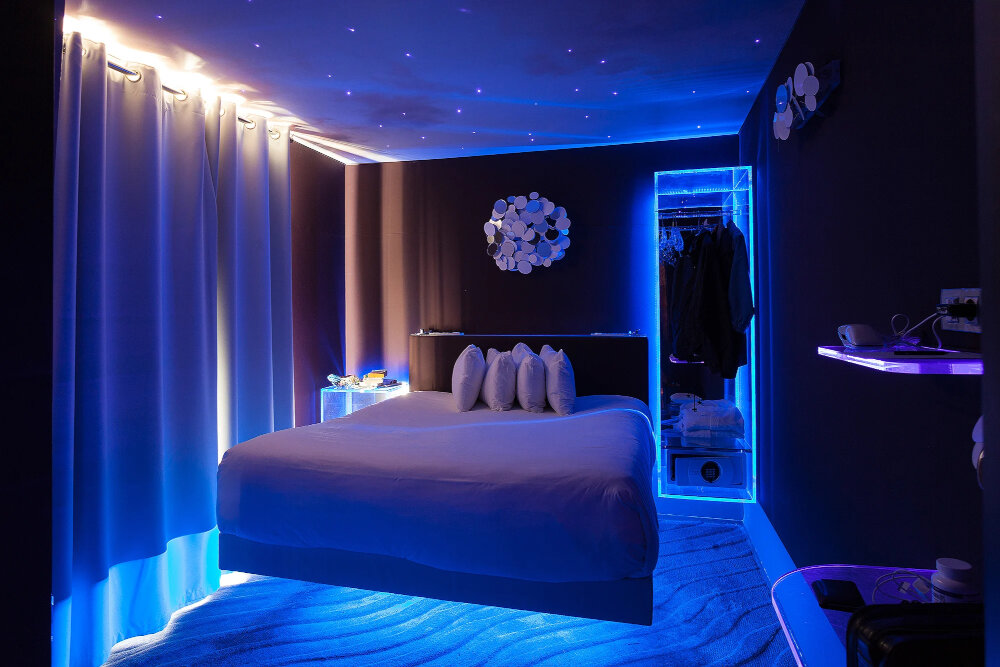
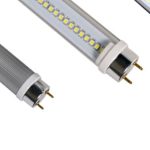
When it comes to adding a little extra ambiance to your home, LED light strips have become an increasingly popular choice. These versatile strips can be used to highlight architectural features, provide mood lighting, or even serve as a fun addition to a child’s bedroom. However, once it’s time to remove them, it can be a challenge to do so without causing damage to your walls. It’s important to approach the removal process carefully to avoid any unsightly blemishes or costly repairs. In this article, we’ll discuss some tips and tricks for safely removing LED light strips without damaging your paint. First and foremost, it’s important to understand the type of adhesive used to attach your LED light strips to your walls. Depending on the manufacturer, the adhesive may be a strong double-sided tape or a removable adhesive designed for temporary use. Understanding the type of adhesive used will help you determine the best method for removing the LED light strips. Additionally, it’s important to take note of the type of paint on your walls. While most modern paints are designed to withstand wear and tear, older or low-quality paints may be more susceptible to damage during the removal process. With these factors in mind, let’s explore some tips for safely removing LED light strips and protecting your walls.
Preparation
Preparing your walls before removing LED light strips is an essential step to ensure that you do not cause any damage to the paint. Start by turning off the LED light strips and removing any power source. It is also important to gather all the necessary tools, such as a putty knife, a heat gun, and painter’s tape. Painter’s tape can be used to create a barrier between the wall and the putty knife, preventing any direct contact between the two surfaces. This will protect the paint from getting scratched or peeled off during the removal process. Another important aspect of preparation is heating the adhesive material holding the LED light strips to the wall. The heat gun should be used to warm up the adhesive material, making it easier to remove. However, it is important not to overheat the material, as this could cause damage to the wall. Once the adhesive material is warm enough, you can use the putty knife to gently pry off the LED light strips from the wall. By following these preparation steps, you can safely remove LED light strips from your walls without causing any damage to the paint.
Before you start the process of removing LED light strips from your walls, it is crucial to gather all the necessary tools to ensure that you can do it safely without damaging the paint. Firstly, you will need a putty knife or a plastic scraper to pry the strip away from the wall gently. You will also need a hairdryer to soften the adhesive and make it easier to remove. Additionally, you will need a cleaning solution to remove any remaining adhesive residue on your walls. A microfiber cloth or a sponge can be used to apply the cleaning solution and wipe the wall clean. By having all the necessary tools at hand, you can ensure that you complete this task safely and efficiently without causing any damage to your walls.
When it comes to safely removing LED light strips without damaging paint, one of the most important steps is to turn off the power supply. This not only ensures your safety, but also prevents any electrical issues that may arise during the removal process. It’s essential to locate the power source and switch it off before proceeding with any other steps. By doing so, you can avoid any potential hazards, such as electrocution or electrical fires. Additionally, turning off the power supply can help prevent damage to the LED light strip itself, which can occur if it’s disconnected while still receiving electricity. Overall, turning off the power supply is a crucial step in ensuring the safe and effective removal of LED light strips without damaging your walls.
Cleaning the surface of the wall is an essential step to take before removing LED light strips, ensuring that the paint is protected from any damage. To start, use a soft-bristled brush or a microfiber cloth to remove any dust or debris that has accumulated on the wall’s surface. Next, mix a small amount of mild detergent with warm water and gently scrub the surface of the wall with a sponge or cloth. Rinse the wall thoroughly with clean water and allow it to dry completely before proceeding with the LED light strip removal. It’s also important to avoid using harsh chemicals or abrasive materials that could scratch or damage the paint, as this may lead to costly repairs in the future.
Removing the LED Light Strip
Removing LED light strips can be a daunting task, especially if you’re worried about damaging your walls in the process. Fortunately, with the right tools and techniques, you can safely remove LED light strips without leaving any unsightly marks or scratches on your paint. One of the most important steps in removing LED light strips is to take your time and be patient. Rushing the process can lead to mistakes and damage, so it’s important to work carefully and methodically. To begin, start by disconnecting the LED light strip from its power source. This will help prevent any electrical shocks or accidents during the removal process. Next, use a plastic putty knife or scraper to gently pry the LED light strip away from the wall. Be sure to apply even pressure and avoid using metal tools, as these can easily scratch or damage your paint. Once you’ve removed the LED light strip, use a mild cleaning solution to wipe down the area and remove any adhesive residue. With these simple steps, you can safely remove LED light strips from your walls without causing any damage.
To ensure that your walls are protected while removing LED light strips, it is essential to do it gently. First, start by unplugging the lights and gently detaching them from the wall. You can use a plastic scraper or a credit card to lift the adhesive strip and slowly peel it off the surface. Avoid using sharp tools or pulling too hard as this may damage the paint or the wall. If the adhesive strip is too stubborn, you can use a hairdryer to soften the glue and make it easier to remove. Once you have successfully removed the strip, inspect the wall for any damage or residue, and clean it up with a damp cloth. By taking these steps, you can safely remove LED light strips without causing any harm to your walls.
When it comes to removing LED light strips without damaging your walls, using a heat gun or hair dryer can be an effective solution. The heat from these tools can help to loosen the adhesive holding the light strip in place, making it easier to remove without leaving any unwanted residue or damaging the paint. However, it is important to use caution when using these tools to avoid overheating the area or causing any other damage to the wall. By taking the proper precautions and using these tools correctly, you can safely and effectively remove LED light strips from your walls without causing any harm.
When it comes to safely removing LED light strips from your walls without damaging the paint, it’s essential to take your time and approach the task with caution. One of the most critical steps is to peel the strip slowly and carefully. This will help to prevent any unnecessary strain on the adhesive, which can cause it to tear away from the wall and take some of the paint with it. By taking a patient and methodical approach, you can ensure that the removal process goes smoothly and that your walls remain in pristine condition. Additionally, you can always use a heat gun or hairdryer to gently warm the adhesive and make it easier to release from the wall.
Repairing Wall Damage
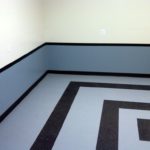
Walls can easily get damaged due to various reasons such as accidental bumps, scratches, and holes. It is essential to repair such damages to maintain the aesthetics and functionality of your walls. One of the most common wall damages is a hole in the drywall caused by a doorknob or a picture frame. To repair such holes, you can use a spackling compound that can be easily found at any hardware store. Fill the hole with the spackling compound and allow it to dry. Once it dries, sand it down lightly, and paint over it to match the rest of the wall. If the hole is too big or there are several holes, it is advisable to call a professional to repair it. Another wall damage that can occur is peeling paint. This can happen due to moisture or improper painting techniques. To repair peeling paint, first, remove the peeling paint using a scraper or sandpaper. Next, apply a coat of primer to the affected area and allow it to dry completely. Once the primer is dry, apply a coat of paint using a roller or a brush. Make sure to feather out the edges of the painted area to blend it in with the rest of the wall. By repairing wall damages promptly, you can maintain the beauty and integrity of your walls, and avoid costly repairs in the future.
Before removing LED light strips from your walls, it is important to inspect the paint for any damage or peeling. Damaged paint can be unsightly and may require costly repairs, so it is essential to handle the removal process with care. Start by examining the surface of the wall closely, checking for any cracks, chips, or scratches in the paint. If you notice any damage, take the time to address it before attempting to remove the light strips. This may involve filling in cracks or repainting the wall entirely. By being diligent in your inspection and addressing any damage beforehand, you can safely remove your LED light strips without causing any harm to your walls.
When removing LED light strips from your walls, it’s important to do it safely and without causing any damage to your paint. One helpful tip is to use a putty knife to smooth out any unevenness or bumps that may be left behind after removing the adhesive strips. This will ensure that your walls remain smooth and free of any unsightly marks. Additionally, using a putty knife can help to remove any excess adhesive that may be left on the wall, making it easier to repaint or touch up the area if needed. Overall, using a putty knife is a simple yet effective way to protect your walls during the LED light strip removal process.
After safely removing LED light strips from your wall, you may notice some visible marks or scuffs on the paint. The best way to deal with this is by applying touchup paint to cover them up. This will not only hide the marks but also ensure that the wall looks seamless and neat. Touchup paint is readily available in most hardware stores, and you can choose a shade that matches your wall color perfectly. Using a small brush, apply the paint to the affected area and allow it to dry completely. Once done, you can enjoy a smooth and flawless wall with no visible signs of damage.
Preventing Future Damage
Preventing future damage is essential when removing LED light strips from your walls. If you plan on reapplying LEDs or another type of adhesive product, you must ensure that the surface is clean and undamaged. To do so, use a gentle cleaning solution, such as water and soap, to wipe away any leftover adhesive or residue. Avoid using harsh chemicals or abrasive tools that could scratch or damage the paint. Another way to prevent future damage is to avoid removing the LED light strips too quickly or forcefully. Take your time and use a heat gun or hairdryer to soften the adhesive, making it easier to remove. This method will also minimize the risk of peeling off the paint or damaging the drywall. Additionally, consider using removable adhesive strips instead of permanent ones when reapplying LED light strips or other decorative items to your walls. These strips are designed to be easily removed without causing any damage to the surface, making them a great alternative to traditional adhesives.
When it comes to decorating your home with LED light strips, it’s important to protect your walls from damage. One way to do this is by using adhesive strips or hooks instead of permanent adhesives. These temporary solutions will hold your light strips in place without leaving behind any residue or causing any damage to the paint on your walls. Plus, they’re easy to remove when you’re ready to switch up your decor. By taking this simple precaution, you can enjoy the benefits of LED lighting without the worry of damaging your walls.
Before installing LED light strips on the walls, it is essential to apply a protective layer that safeguards the surface from any potential damage. This layer can be in the form of a transparent adhesive film or masking tape that adheres to the wall without leaving any residue. This additional step ensures that the paint on the wall remains intact, and there are no scratches or marks left behind after the removal of the LED light strips. It is crucial to apply the protective layer with care and precision to achieve the desired outcome of a wall unscathed by the installation process. Taking this precautionary measure will not only preserve the beauty of the walls but also save time and money in repainting or repairing any damage caused.
If you’re thinking about removing any decorations or fixtures from your walls, it’s crucial to exercise caution and care to avoid damaging your paint. Whether you’re removing LED light strips, picture frames or other wall-mounted items, it’s important to take your time and use the right tools to minimize any potential damage. Rushing the process or using the wrong tools can easily result in unsightly chips, scratches, or peeling paint, which can be difficult and expensive to repair. By taking a few extra precautions and following some basic guidelines, you can safely remove any decorations or fixtures from your walls without causing any damage to your paint or plaster.
When it comes to removing LED light strips from walls, doing it safely and without causing damage requires careful preparation and proper technique. It is important to start by turning off the power source to the LED lights and organizing all the necessary tools and materials, including a flathead screwdriver, putty knife, and adhesive remover. Working slowly and carefully, use the flathead screwdriver or putty knife to gently loosen the adhesive holding the LED light strips in place, taking care not to damage the paint or drywall. If necessary, use adhesive remover to help dissolve any stubborn adhesive. With a bit of patience and attention to detail, you can safely remove LED light strips from your walls without causing any unsightly damage.
The process of removing LED light strips from your walls can be tricky and risky, especially if you don’t pay attention to the details. Careful removal and repair can prevent damage to walls, ensuring that they remain in good condition. Whether you are renting or own your home, it is crucial to protect your walls from any potential harm. By taking the necessary precautions, such as turning off the power source and using the appropriate tools, you can avoid damaging the paint or other wall materials. Additionally, if any damage does occur during the removal process, it is vital to address it immediately to avoid further complications. Overall, taking the necessary care to remove LED light strips will save you time, money, and frustration in the long run.
It’s always better to be proactive rather than reactive, and this rings especially true when it comes to protecting your walls. Taking preventative measures can not only extend the life of your walls but also make future removal easier. By using proper techniques and materials, such as painter’s tape, silicone sealant, and mounting strips, you can ensure that your LED light strips won’t damage your paint or leave behind unsightly residue. Not only will these measures save you time and money in the long run, but they’ll also give you peace of mind knowing that your walls are being cared for properly. So, before you install your next set of LED light strips, take the time to protect your walls and make removal a breeze.
Conclusion
In conclusion, protecting your walls while removing LED light strips is crucial to avoid damaging your paint. By following the proper steps and techniques, you can safely remove the strips without leaving marks or residue on your walls. It is essential to use the right tools, such as a putty knife or a hairdryer, to loosen the adhesive and remove the strips gently. Additionally, taking precautions such as wearing gloves and using a cleaning solution can help ensure a smooth and damage-free removal process. Overall, taking the time to protect your walls during the removal of LED light strips can save you time and money in the long run by preventing the need for costly repairs or repainting.