Quick Guide: Changing Recessed LED Light Bulbs Made Easy
Are you tired of struggling to change recessed LED light bulbs in your home? Are you tired of calling for help or having to hire a professional to do it for you? Well, fear not! Changing recessed LED light bulbs can be done easily, quickly, and without any hassle. With the right tools and a few simple steps, you can become a master at changing your own recessed LED light bulbs. LED light bulbs are becoming increasingly popular due to their energy efficiency and long lifespan. However, changing LED light bulbs can be a bit tricky, especially when they are recessed. Recessed light fixtures are designed to be flush with the ceiling, making it difficult to access the bulb. But with a little bit of knowledge and the right approach, changing recessed LED light bulbs can be a breeze. In this quick guide, we will provide you with all the information you need to successfully change your own recessed LED light bulbs.
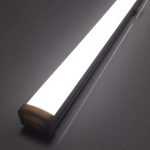
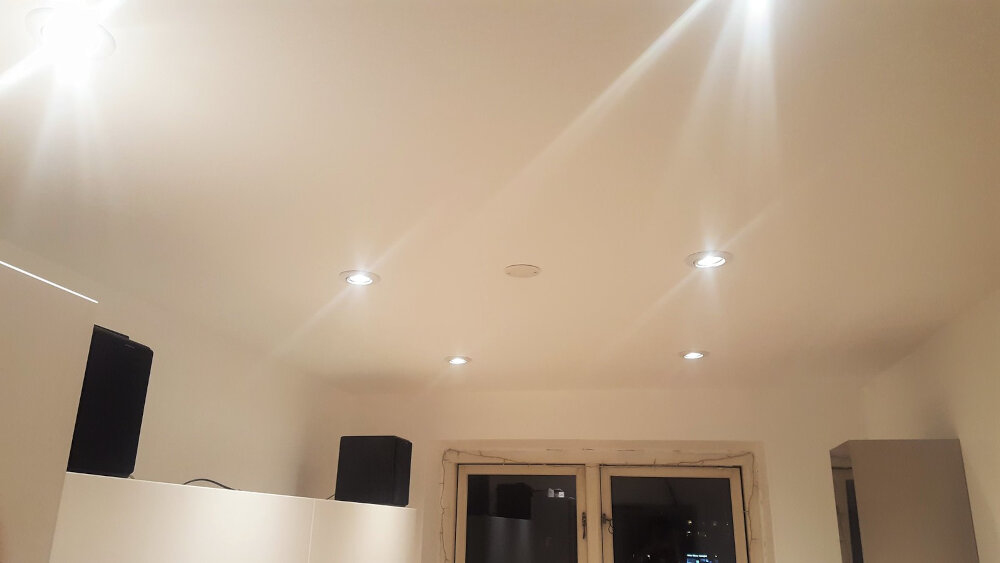
Recessed LED light bulbs are an essential part of modern lighting systems, offering a range of benefits that make them popular in both households and commercial settings. One of the key advantages of these bulbs is their energy efficiency, which can lead to significant cost savings over time. Additionally, recessed LED bulbs are known for their longevity and durability, making them a wise investment for anyone looking to upgrade their lighting. These bulbs are commonly used in a variety of settings, including homes, offices, retail spaces, and more, and can be found in a range of sizes and styles to suit any need. Whether you’re looking to reduce your energy consumption or simply want to enhance the aesthetic appeal of your space, recessed LED bulbs are an excellent choice.
StepbyStep Guide for Changing Recessed LED Light Bulbs
Changing recessed LED light bulbs may seem intimidating at first, but with a step-by-step guide, it can be done easily and safely. First, turn off the power source to the light fixture. This can be done by flipping the switch to the off position or turning off the breaker in the electrical panel. Next, locate the trim ring around the recessed light fixture. Most trim rings simply snap into place, so gently pull on the edge of the ring until it pops out. Then, carefully remove the bulb by gently pulling it out of the socket. Be sure to dispose of the old bulb properly, as LED bulbs contain hazardous materials. Finally, insert the new LED bulb into the socket, making sure it is securely in place, and replace the trim ring by snapping it back into position. It is important to note that not all recessed LED light bulbs are the same, so it is important to check the manufacturer’s instructions before attempting to change the bulb. Additionally, it is recommended to wear gloves when handling the bulb to avoid any skin irritation or transfer of oils to the bulb, which can cause it to burn out prematurely. With these simple steps, changing recessed LED light bulbs can be done quickly and easily, without the need for a professional electrician.
When it comes to changing recessed LED light bulbs, the first and most crucial step is to turn off the power supply. This is a crucial safety measure that must be taken to avoid electrocution or electrical shocks. It is essential to locate the switch or circuit breaker that controls the power supply to the light fixture before proceeding. Once located, turn off the switch or circuit breaker to ensure that no electricity is flowing to the fixture. This step will also prevent any damage to the new LED bulb being installed. It is important to remember that when it comes to electrical work, safety should always come first.
Step 2 of changing recessed LED light bulbs involves removing the old bulb. This may seem like a simple task, but it requires some care to avoid damaging the fixture or injuring yourself. First, turn off the power to the fixture by flipping the switch on the circuit breaker or unplugging it. Next, gently twist the bulb counterclockwise until it releases from the socket. If the bulb is stuck, try wiggling it back and forth while gently pulling it out. Avoid using excessive force, as this can break the bulb or damage the fixture. Once the bulb is removed, dispose of it safely and proceed to the next step.
Step 3 in the process of changing recessed LED light bulbs is to choose the right replacement bulb. This is a crucial step, as selecting the wrong bulb can result in a number of issues, including poor lighting quality, reduced energy efficiency, and even damage to the fixture itself. When choosing a replacement bulb, it’s important to consider factors such as the bulb’s wattage, color temperature, and beam angle. Additionally, you’ll want to ensure that the bulb is compatible with your fixture and that it meets any specific requirements set forth by the manufacturer. Taking the time to carefully choose the right replacement bulb will help ensure that your lighting remains bright, efficient, and effective.
After removing the old bulb, it’s time to insert the new one. The first thing to consider is to check the wattage and dimensions of the new bulb before inserting it. Make sure it is compatible with your fixture to avoid any potential damage. Hold the bulb gently, align the pins with the slots in the socket, and push it in until it clicks into place. Don’t force it in or touch the glass with your bare hands, as it can leave oils that can reduce its lifespan. Once the bulb is securely in place, turn on the power and test the light to ensure it’s working correctly. Congratulations, you have successfully changed your recessed LED light bulb!
After successfully replacing the old light bulb with a new LED bulb, it’s time to turn on the power supply. This is an important step that should not be skipped. Make sure that the switch is in the off position before turning on the power supply. Once you are sure that the switch is off, turn on the power supply. You should see the new LED bulb light up immediately. If the bulb doesn’t light up, it may be due to a loose connection or faulty wiring. In this case, you should turn off the power supply and check the connections again. Remember to always follow safety guidelines when working with electricity.
Tips for Changing Recessed LED Light Bulbs

Replacing recessed LED light bulbs can be a daunting task, especially if you’re not familiar with the process. However, with a few tips and tricks, you can easily change your recessed LED light bulbs without any hassle. Firstly, make sure that the light switch is turned off before starting the process. You don’t want to accidentally touch any live wires and risk electrocution. Next, remove the trim and bulb from the recessed fixture. To do this, gently pull down the trim and unscrew the bulb. If the bulb is stuck, use a suction cup or bulb changer tool to remove it. Once you’ve removed the old bulb, insert the new LED bulb by screwing it in place. Finally, reattach the trim and turn the light switch back on to test the new bulb. It’s important to note that when changing recessed LED light bulbs, you should always use the correct bulb type and wattage. Using the wrong bulb can not only damage your fixture but also pose a safety hazard. LED bulbs also come in different color temperatures, so be sure to select the color that best fits your needs. Additionally, if you have high ceilings or hard-to-reach fixtures, consider using a ladder or hiring a professional to change the bulbs for you. With these tips in mind, changing recessed LED light bulbs can be a simple and stress-free task.
When changing recessed LED light bulbs, it is recommended to use gloves to prevent smudges and burns. Not only do gloves protect your hands from potential burns caused by hot light bulbs, but they also prevent smudging the bulbs with fingerprints. Smudges on the bulbs can cause them to heat up unevenly, leading to shorter lifespan and potential failure. Additionally, gloves provide a better grip and prevent the bulbs from slipping out of your hand and breaking. Therefore, investing in a good pair of gloves can save you time, money and inconvenience in the long run.
When changing recessed LED light bulbs, it is essential to clean the fixture before installing the new bulb. This step is often overlooked, but it can affect the overall performance of the light fixture. Dirt, dust, and debris can accumulate in the fixture, blocking the light and reducing its brightness. Cleaning the fixture ensures that the light shines brightly and that the new bulb lasts longer. To clean the fixture, turn off the power, remove the old bulb, and carefully wipe the fixture with a soft cloth. Check for any loose wires or connections and tighten them if necessary. By taking the time to clean the fixture, you can ensure that your LED light bulbs shine brightly and efficiently.
When replacing a recessed LED light bulb, one crucial tip is to check the wattage and voltage of the new bulb to ensure compatibility. It is essential to match the voltage of the new bulb with that of the fixture to avoid overloading or underpowering the circuit. Additionally, using the wrong wattage bulb can result in reduced efficiency, shorter lifespan, and even damage to the fixture. To ensure that you get the right bulb, it is advisable to refer to the manufacturer’s guidelines or seek the advice of a professional electrician. Taking the time to check the wattage and voltage of the new bulb will ensure that you get the best performance and longevity from your LED lights.
Common Problems and Solutions
When it comes to changing recessed LED light bulbs, there are a few common problems that homeowners may encounter. One of the most common issues is difficulty removing the old bulb, particularly if it has been in place for a long time. In some cases, the bulb may be stuck due to corrosion, or it may simply be difficult to grip due to its size or shape. Fortunately, there are several solutions to this problem. One option is to use a pair of rubber gloves or a rubber grip to help increase your grip and make it easier to remove the bulb. Another option is to use a lubricant, such as WD-40, to help loosen the bulb and make it easier to twist out of the socket. Another common problem when changing recessed LED light bulbs is selecting the right replacement bulb. With so many different types of LED bulbs on the market, it can be difficult to know which one is the right fit for your fixture. One solution to this problem is to check the manufacturer’s specifications for your fixture and look for bulbs that meet those requirements. Additionally, it’s important to consider factors such as the color temperature and brightness of the bulb to ensure that it provides the right amount of light for your space. By taking the time to research and select the right replacement bulb, you can ensure that your new bulb will be a perfect fit for your fixture and provide the light you need.
One of the most common issues faced while replacing recessed LED light bulbs is when the bulb gets stuck in the fixture. This can cause frustration and make the task seem impossible to complete. However, there are a few simple solutions to address this problem. First, try wearing a pair of rubber gloves to get a better grip on the bulb. If that does not work, try using a pair of pliers or a suction cup to gently twist and remove the bulb. It’s important to avoid using excessive force or twisting too hard, as this can damage the fixture or cause the bulb to break. With a little patience and the right tools, anyone can successfully replace their recessed LED light bulbs.
One effective solution for removing a recessed LED light bulb is to use a suction cup or pliers. This method allows for a secure grip on the bulb, minimizing the risk of dropping or breaking it. A suction cup can be attached to the face of the bulb, providing a stable hold and allowing for gentle twisting to loosen the bulb. Similarly, pliers can be used to grip the base of the bulb and carefully twist it out of the socket. It’s important to ensure that the bulb is cool to the touch before attempting to remove it, as heat can cause the bulb to shatter. Overall, utilizing a suction cup or pliers is a safe and effective way to change recessed LED light bulbs with ease.
If you’re experiencing a flickering light bulb in your recessed LED lighting system, this could be due to a few different reasons. Firstly, it’s possible that the bulb itself is faulty or has reached the end of its lifespan. In this case, simply replacing the bulb should solve the issue. However, if the problem persists, it could be due to a poor connection between the bulb and the housing or the wiring in the fixture. It’s important to ensure that the bulb is securely in place and that all wiring is properly connected. If the problem continues, it may be best to consult a professional electrician to diagnose and fix the issue.
Solution 2 involves checking the wiring and connections of the recessed LED light fixture. This step is crucial in ensuring that the light bulb replacement process is successful. Faulty wiring or poor connections can lead to a dysfunctional light that will not work even with a new bulb. Before attempting to replace the bulb, it is essential to switch off the power supply to the fixture to avoid electrocution. Once the power is off, the wiring and connections should be inspected for any signs of damage, such as frayed wires or loose connections. If any issues are found, they should be fixed before proceeding with the bulb replacement. By checking the wiring and connections, you can ensure that your recessed LED light fixture works correctly and that the new bulb will function as intended.
The article \Quick Guide Changing Recessed LED Light Bulbs Made Easy\ stresses the importance of properly replacing LED light bulbs for safety and efficiency. It emphasizes the need for homeowners to understand the different types of bulbs available and how to choose the right bulb for their needs. The article provides a step-by-step guide for replacing bulbs, including safety precautions such as turning off the power and ensuring the new bulb is compatible with the fixture. The article also highlights the benefits of using LED bulbs, such as energy efficiency and longer lifespan. Properly replacing LED bulbs not only ensures a well-lit and aesthetically pleasing home but also promotes safety and saves on energy costs.
Conclusion
In conclusion, changing recessed LED light bulbs is a task that may seem daunting at first, but with the right tools and knowledge, it can be done easily and quickly. By following the steps outlined in this quick guide, you can replace your old bulbs with new ones in no time. Remember to turn off the power, remove the old bulb carefully, and insert the new bulb correctly. With a little bit of patience and attention to detail, you can enjoy bright and efficient lighting in your home or office for years to come. So don’t hesitate to tackle this DIY project and see the difference new LED bulbs can make.