Simple hacks for major garage organization that will make your place special
A garage is a dumping place for most of you. All your family members will dump literally anything there and you are one of them. This refers to being unable to use the space the garage has to offer. You will find old items, clothing, soccer balls and tools you forgot your own. Now is the right moment to change all of that. You will get your garage back and you will transform it into something perfect, something special that deserves your full affection. We have prepared simple hacks that are almost free and don’t require a lot of time but have a huge effect on the garage organization and functionality.
Start with corner shelves
The first thing you will need to add to your garage is corner shelves. They are extremely easy to make yet they are extremely appealing and practical. To make them you will need plywood, even scrap plywood will get the job done.
Cut the triangle plywood elements that fit nicely between the two walls. Use studs to secure them in place and you are done. Add as many levels as you like to make a shelf bigger. These shelves can be added to each and every corner of your garage and they are essential for storing small jars or cans that can be easily mixed with others and lost.
Vertical recycle bins
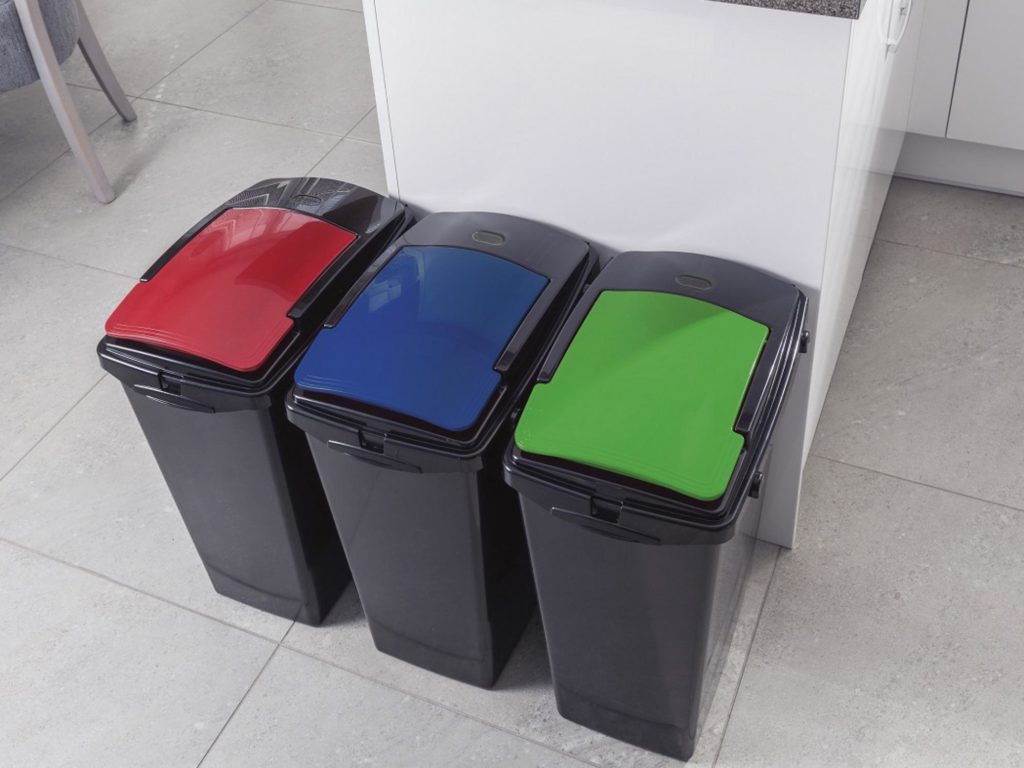
You can place your recycle bins in a vertical manner and get more space for literally smart organizing. This hack is extremely easy and almost free. You need basic tools and a few minutes of your time.
- 1×4
- 2×4
- 1 5/8 drywall screws
- 3 inches screws for drywall
(See also our Drywall Anchors Definitive Guide)
To help you, even more, we will create a scenario in which you have three recycling bins. One is for paper, another for glass and one for aluminum. All of them are 20 inches wide. To use the hack, follow these steps.
- Each bin should be paired with one 1×4 and one 2×4 cut to 18 inches length.
- Use smaller screws to screw down the three 1×4 about 2 inches from the edge.
- You should start from the bottom of the construction. Place 2×4 and use 3 inches screws to screws them down.
- One bin should be placed on one 2×4 and the cleat should be added on the top.
- The spot you need to mark now is located ¼ if an inch above the cleat.
- Now fasten the aforementioned cleat to the wall of your garage. This is used to make the using the bins easier and more practical.
- For the next bin simply place 2×4 above the first construction and repeat the process.
Additional matters to consider here are your height and the number of bins you are using. They should be easy to reach at all times. In addition, you can make more than one column.
Adding racks for your fishing rods
If you are a fisherman you will need a place to store your fishing rods. There are a few pre-made choices out there that are not very appealing and they are expensive. But, you can easily make one with basic tools and with basic items. You will need to get the mentioned items and follow the steps.
- PVC pipes with a diameter of 3 inches
- Foam swimming noodle
- Fender washers (2)
Follow these steps.
- Start by using the pipe. Drill several holes each one with a diameter of one inch and spaced 4 inches apart.
- Slice the foam in the same manner.
- Create the slits from noodle and make sure they are aligned with the pipe you have just made.
- Screw down the pipe to the wall.
Basically, this is a small accessory that looks like a pool cue holder. The bottom part of the rods is held in place with the pipe and the top is held by the noodle.
Make shelves from old tennis racquet
To get this type of a shelf you need old racquets. You can use as many of them as you like and add countless of them to the workbench. Simply drill a hole in the handle and fasten the racquet to the underside of a workbench. Allow for each one to move backward and forwards and you can use it as a small shelf for all kinds of items, usually small ones.
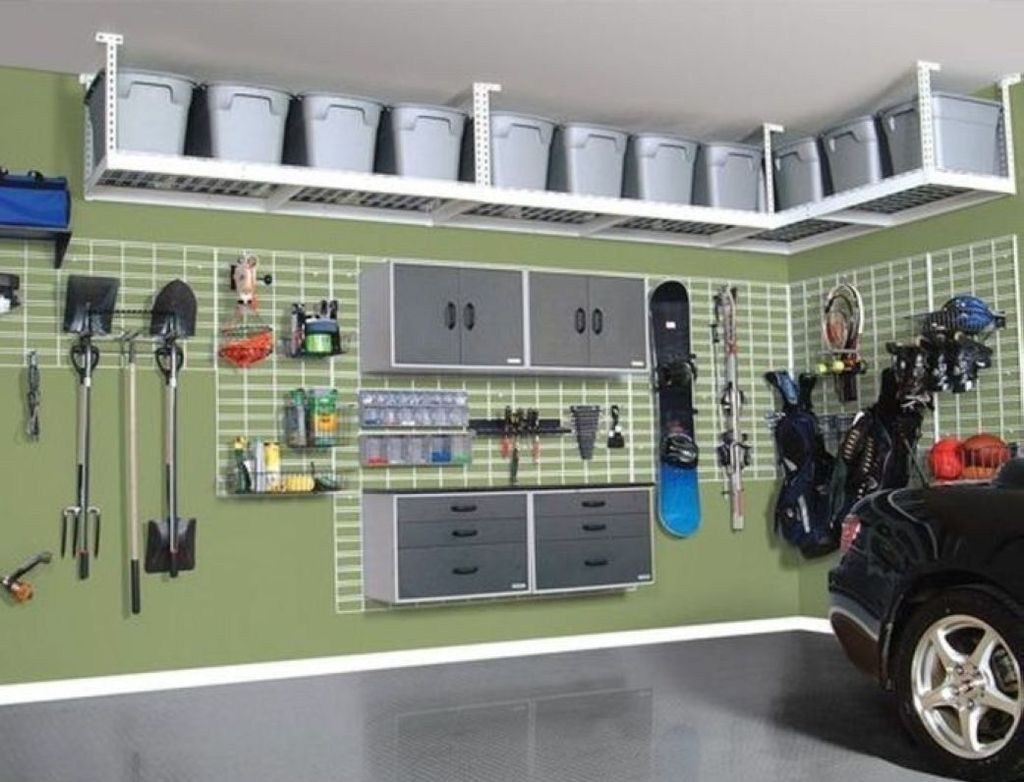
Using the ceiling for storage
The ceiling is one of those elements of any garage that is rarely used. Adding racks to it can significantly make your organization better and wiser. Below we will guide you through the simple process on how to make use of the ceiling. Don’t forget that it should be used for mid-sized bins. Anyway, you will need:
- Screws (2 inches)
- ½ inches screws (3)
- 2×2 used for holding the bins. Bins of the 24 inches will require 49 inches length.
- 1×4 with the same length as 2×2
The goal here is to make three racks which will support bins on either side and in the middle. As such you get the ability to use the bins from both sides and get the best practicality possible. The entire process is relatively simple and it won’t require from you advanced skills or advanced tools. You can do it on a weekend mind you will probably complete the entire task within hours. The steps are mentioned below.
- Place the 2×2 in such manner that the lids of the bins can touch each other when open but they don’t cause any issues. This is the best measure you should use.
- Use the 3 ½ screws to secure the 2×2 to the ceiling. The screws need to be located every 2 feet. If you think that more screws are needed, be free to include them.
- Place the 1×4 on the 2×2 and use screws to secure it all. Make sure to find the center of the 2×2 and always measure twice.
- Place the bins between the beams and you are done.
As you were able to see this hack is so simple that most of you will need literally 30 minutes or less. You can do it anywhere you like and you won’t have any complications present. To make the hack even better, we highly recommend you to use labels to the bins. Get a label maker online which is the cheapest investment and make each bin dedicated to something. Thanks to this simple addition you will get the best look of the ceiling racks and you will always find what you are looking for.
Construct a ball cage for your child
If you have small children you will want to make something special for them. The answer comes in the form of the ball cage. There are several options out there but this one we have prepared for you is probably the simplest to make. In addition, you can add or remove balls whenever you want without having to remove all of them. You will need:
- ¾ inches plywood
- 2×2
- Cord (it should be elastic)
The main advantage of this cage is simplicity. It has no top nor side panels. You get the rails and that’s it. The goal is to place the back of the panel to the wall and place an additional board to the bottom. Connect the front side of the panel using the elastic cords to the panel located on the floor and you will get a net. That net is what is holding the balls inside so you will need a strong and durable one. Here is a complete guide on how to make this cage.
- Create 12×33 inches pieces made from plywood. You will need two of them.
- Cut the second panel with 12×24 inches which will be used as bottom panel.
- Use the 2×2 and cut two pieces each 24 inches in length. They will be used as rails at the top of the construction. They will go between the two sides.
- Now drill holes, 4 inches apart to the front side of the main panel and the one 2×2.
- Thread the elastic cord between the two pieces and tie a secure not after you are done.
You can make this cage even better. Simply add hooks on the exterior and you and your family can use them for storing helmets, gloves and literally anything you like. For the added safety we will recommend plastic hooks, but you can use metal ones if you want.
A hack that helps you store all the tools with long handles
Long-handled tools are a nightmare to store. They are impractical and they will require more space than you have to offer. Luckily for you, there is a solution. As a matter of fact, there are two solutions we will reveal.
The first one is to use concrete forming tubes. They cost $10 and you can find them at any hardware store. They should be made from cardboard. Use a stud and 2×2 to secure each tube. Once you are done, place the tools and items with long handles in a tube and you are done.
A wall tool holder is the second solution. In this case scenario, you will have to cut pieces of plywood to 16×16 inches dimensions. Screw them down at an upright angle to the wall. Place the long-handled tools into the holder, close to the wall and you are ready to store all the tools of this kind.
Although these solutions are excellent and appealing they are made for lightweight tools. If you have heavyweight tools such as sledgehammers you will need a more sophisticated holder. Here is a DIY guide on how to make one all by yourself within hours. It is massive and it can hold up to 14 tools of any weight without any issue. To make the system you will need:
- Hooks (4 eye)
- 2 inch drywall nails, one pound
- 3 inch drywall nails, one pound
- ¾ inch plywood, one-piece (cut into 16×48 inches)
- 2×6 and 48 inches length
- Five 2×6 of 12 inches length
- 6 3/8×4 ½ lag screws with suitable washers
Cut all the pieces as we have provided the precise dimensions. Then cut the handle holes for the tools in the plywood piece. The just created element will be the top part of the holder. The spacing is designed to fit most, large tools, but you can change it according to your needs. When cutting the handle holder in the plywood, always make sure that it can accommodate the widest section of the handle. The smallest section should fit easily but the widest should reach the edges. Use a spray to trace the curve for the top section. Of course, you can use anything else that has the same or similar curvature. Here are the accurate steps.
- Use the 2 inches screws to connect the 2×6 plywood board to the back side of the master plywood section.
- 2×6 (all of them) should be attached to the bottom of the ledge and be parallel to the supporting 2×6 sections. Use 3 inches screws to complete this step.
- Rotate the rack and use 2-inch screws to secure the master plywood board.
- The last thing to do is to use lag screws with the washers to secure the rack to the wall of a garage. Place it 6 feet above the floor to get the best benefits and the most practical usage.
Keep in mind that some steps are mandatory and must not be skipped. The first one is to use the lag screws. This rack is designed to hold heavyweight equipment so you need to make it as stable as possible. Lag screws are just perfect for the task. If you have small children you need to secure the rack even more. Use one hook per a tool and tie the tool down. It is mandatory for larger families and homeowners who have a lot of heavy tools.
Making your own chair brackets
Now we have a simple hack that can help you store the chairs when they are not in the use. You need basic leftovers and a few hours of your time. The end result is impressive and soon you will see why.
You will need two pieces of 7 ¾ long and each one cut under 30-degree angle. Align them and connect each side to the wall stud. Use 2-inch screws for this task. You don’t need longer screws. Use them to hang the chairs and you are all done.
This is a basic hack and it can be completed within several minutes. Of course, you can make it longer, bigger or different according to your needs.
Create shelf towers for your storage bins
You can use all kinds of bins in your garage and you will have a hard time finding and using the item that is located at the bottom of the pile. To solve this annoying issue you should create tower shelves. With a few simple steps, you can create an impressive shelf that is suitable for all bins with a size of 16 or 18 gallons. Keep in mind that the lids should measure 18×24 inches. Each shelf tower will require:
- 4x8foot x3/4 inches sheets of plywood. They are used for the sides.
- ¼ inch plywood, which is used for the back side. The width should be 18 inches. The local store where you can purchase the plywood can do all the cutting.
Use A-grade plywood if you want to paint it at some point. If you don’t, then be free to get the cheapest plywood available. In addition, use the paint that is made for plywood. Assemble the tower shelf in this manner:
- ¾ inches plywood pieces should be left until the end.
- A plywood sheet should be cut to 23.75 inches, Additional two sheets should be used for the sides.
- The remaining plywood should be cut into 18 inches pieces which are used for the middle, top and bottom shelves.
- Use screws to attach the just made shelves to the sides. 18 1/2-inches increments should be used.
- Each shelf should be paired with 3, 2 inches head screws.
- Stat at the top and use 1-inch beads at a distance of 8 inches to attach the back.
- Nail the sides starting with the short side and moving to the longer side.
- Reinforce the shelves using 2 inches trim head screws.
In order to make the tower sit straight, you might have to use the shims. This isn’t a mandatory step but can be used if the floor is uneven and you have a hard time keeping all in the straight position.
Add J-shaped hooks to the garage
This hack is one of the simplest we have to provide. All you should do is purchase as many as you need J hooks and attach them to the tracks of the garage door. They don’t have to be screwed down or tightened. By using this hack you can attach ladders, tools and literally anything else you need. Just keep in mind not pot use the hooks for the super-weight items that can bend the tracks of the garage door.
There are a lot of different hooks that can be used for this purpose. However, the best ones are made of steel and rubber-coated. They are also the most durable and they will eliminate the risk of scratching the item you are placing to the hook.
Label and number the storage bins
All the bins you have in your garage should be labeled and numbered. By using this tip you will always know where your items are located and how to easily find the item you are looking for. Adding the labels made by label maker will make the things a bit more professional.
The list of all the storage bins and the containers should be kept on a workbench. By keeping it here you will always be able to get the list in a few seconds and to find what you are looking for.
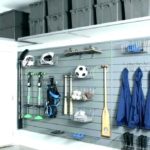
Pegboards are the best storage hack of all times
The last hack is also the most versatile. You can create anything you like within minutes and you can store all the tools you will ever need. As you already know we are referring to the pegboards. They should be attached to a wall using screws and washers. Once attached you have a massive space that can be used for storing tools, items, and even bikes.
In order to make the pegboards more versatile, you should add plastic straps to the equation. The straps allow you to attach larger items that are impossible to store and that can be hanged literally on any pegboard.
Most of the pegboards are made from hardwood and we will advise you to get them as the first choice. They are the most durable and the most versatile. Also, they look the best. But they are not the only option. There are a few more materials used in pegboard construction.
- Plastic models are popular due to a high level of practicality and low price. You can get any size, with any shape you like and install it in seconds. They are also immune to rust and they can be used in garages where humidity is high. The look is something that can’t be linked to plastic pegboards. After all, they are the most affordable option.
- Metal pegboards are the most desirable for heavy-duty purposes. They can last for years and they can withstand anything you can throw at them, or better said hag on them. Keep in mind that the installation is relatively simple and basically the same as with the previous type, but you will need to use more screws and longer ones.
The bottom line here is to prepare you to maximize the space of your garage and to be able to use each inch of room for storing your items. All of the hacks we presented to you are simple, affordable and effective. See more of the garage storage solutions.